> ## Documentation Index
> Fetch the complete documentation index at: https://docs.tryprofound.com/llms.txt
> Use this file to discover all available pages before exploring further.
# WordPress Plugin Installation
> This guide explains how to install and configure the Agent Analytics plugin for WordPress to send HTTP request logs to the Profound platform
The wordpress plugin can have limited functionality by nature of the WordPress platform. Please read the [limitations](/agent-analytics/wordpress/limitations) page to understand more.
## Overview
The Agent Analytics [WordPress plugin](https://wordpress.org/plugins/profound-agent-analytics/) enables automatic log collection from your WordPress site, forwarding visitor traffic data to the Profound Agent Analytics platform. The plugin operates transparently in the background, capturing only public traffic while excluding all administrative and system activity.
## Prerequisites
Before beginning the installation, ensure you have:
* A WordPress site running version 6.0 or higher
* Administrative access to your WordPress dashboard
* A Profound account with a Log Ingestion Token
* PHP 7.4 or higher on your hosting environment
## Installation
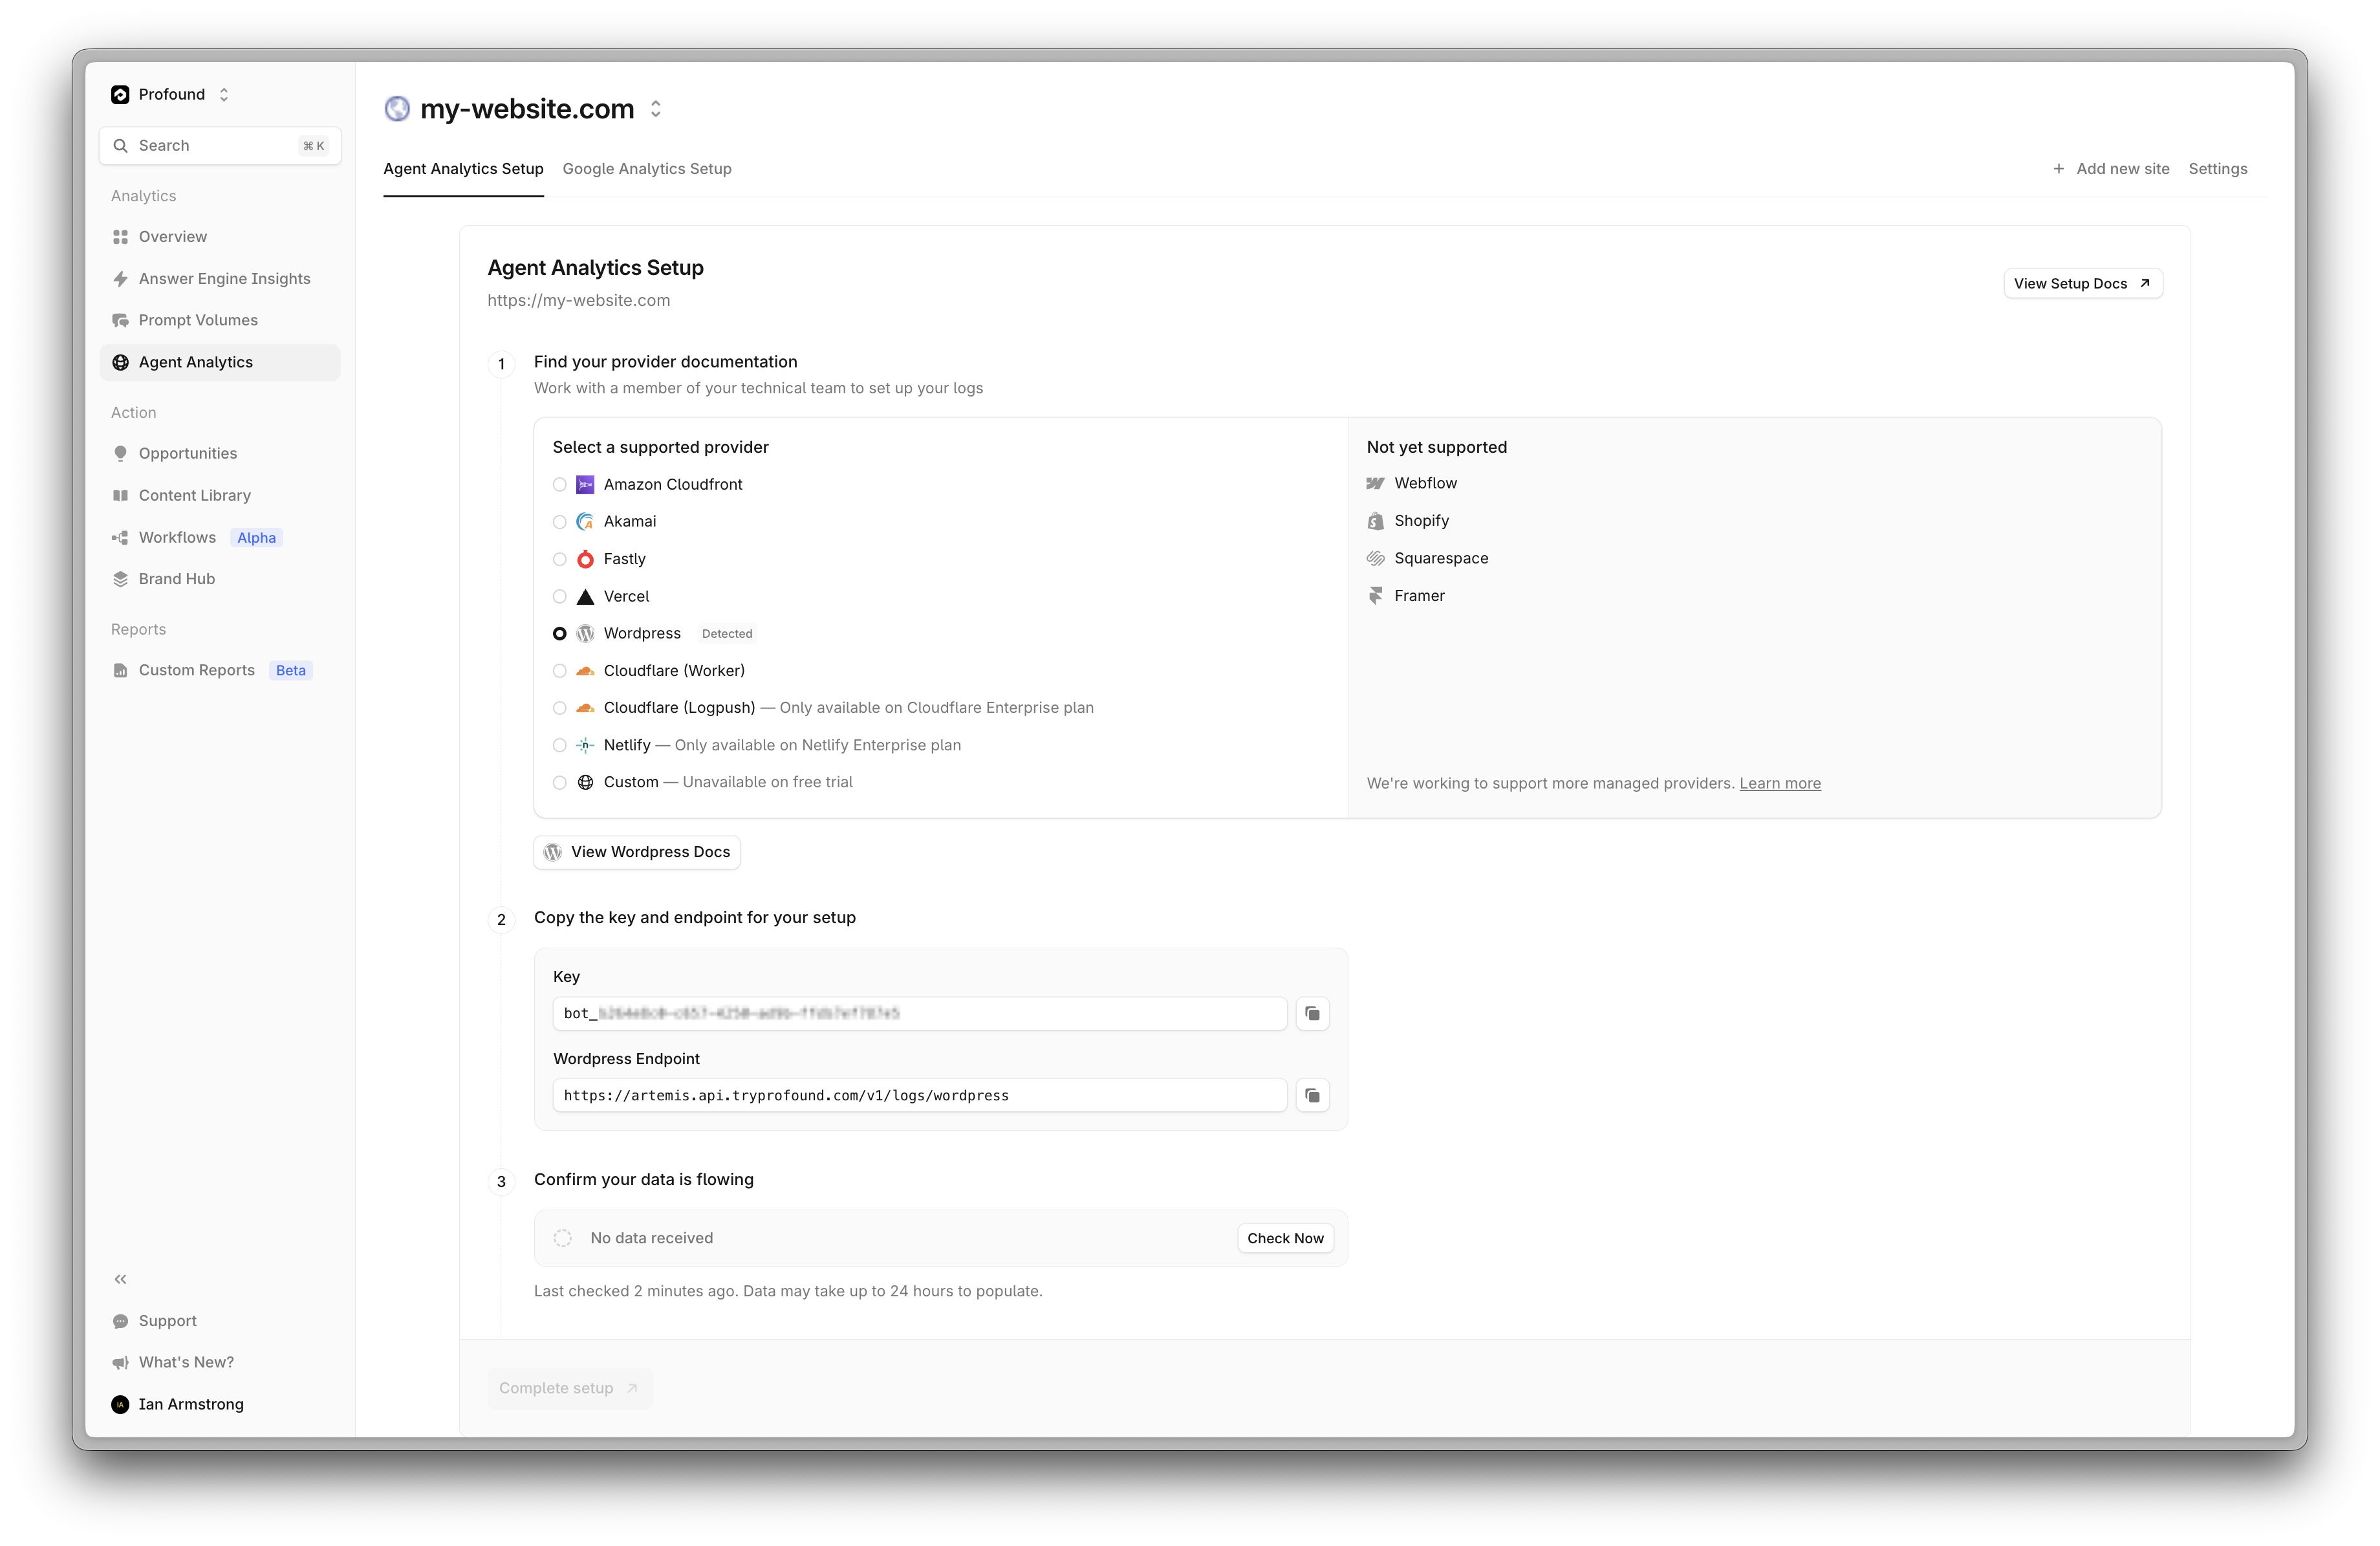 Log into your WordPress admin dashboard and navigate to **Plugins** in the left sidebar.
Click **Add New** at the top of the Plugins page. Search for "Profound Agent Analytics" or visit the [WordPress plugin page](https://wordpress.org/plugins/profound-agent-analytics/) to download the plugin.
Log into your WordPress admin dashboard and navigate to **Plugins** in the left sidebar.
Click **Add New** at the top of the Plugins page. Search for "Profound Agent Analytics" or visit the [WordPress plugin page](https://wordpress.org/plugins/profound-agent-analytics/) to download the plugin.
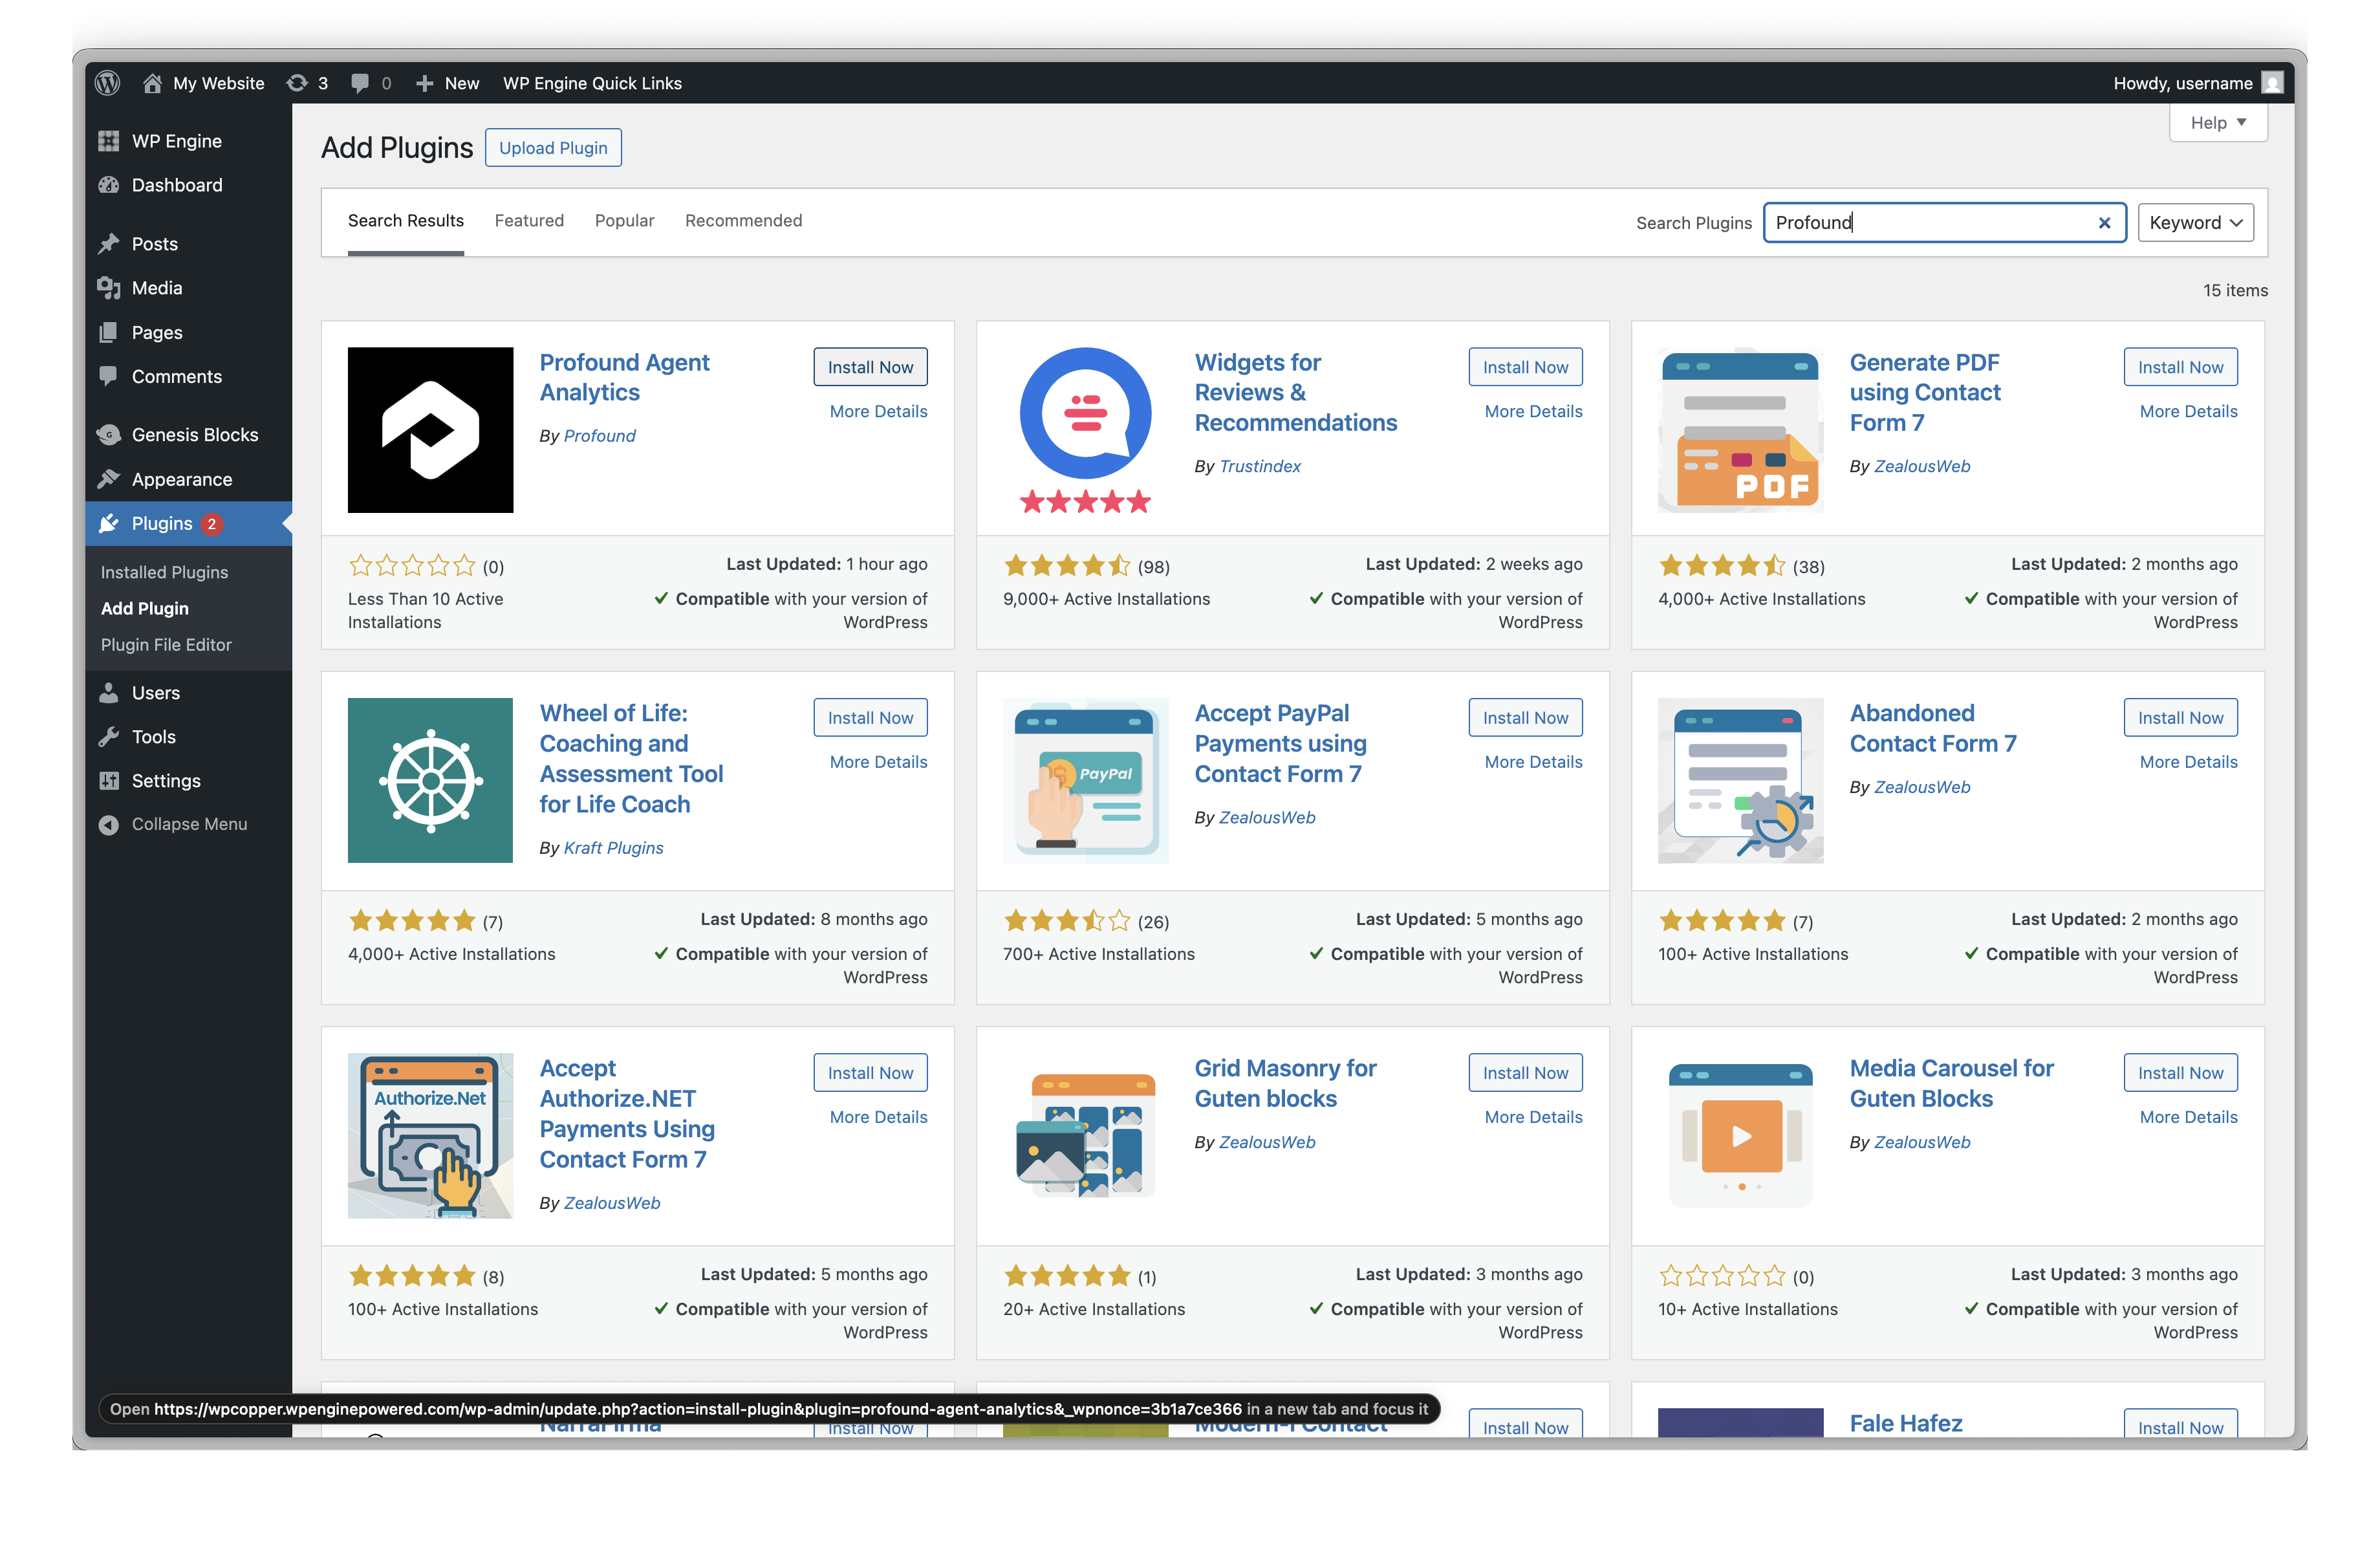 Click **Install Now** to install the plugin.
After installation completes, click **Activate** to activate the plugin.
Alternatively, navigate to **Plugins** → **Installed Plugins**, find "Agent Analytics" in the list, and click **Activate**.
Click **Install Now** to install the plugin.
After installation completes, click **Activate** to activate the plugin.
Alternatively, navigate to **Plugins** → **Installed Plugins**, find "Agent Analytics" in the list, and click **Activate**.
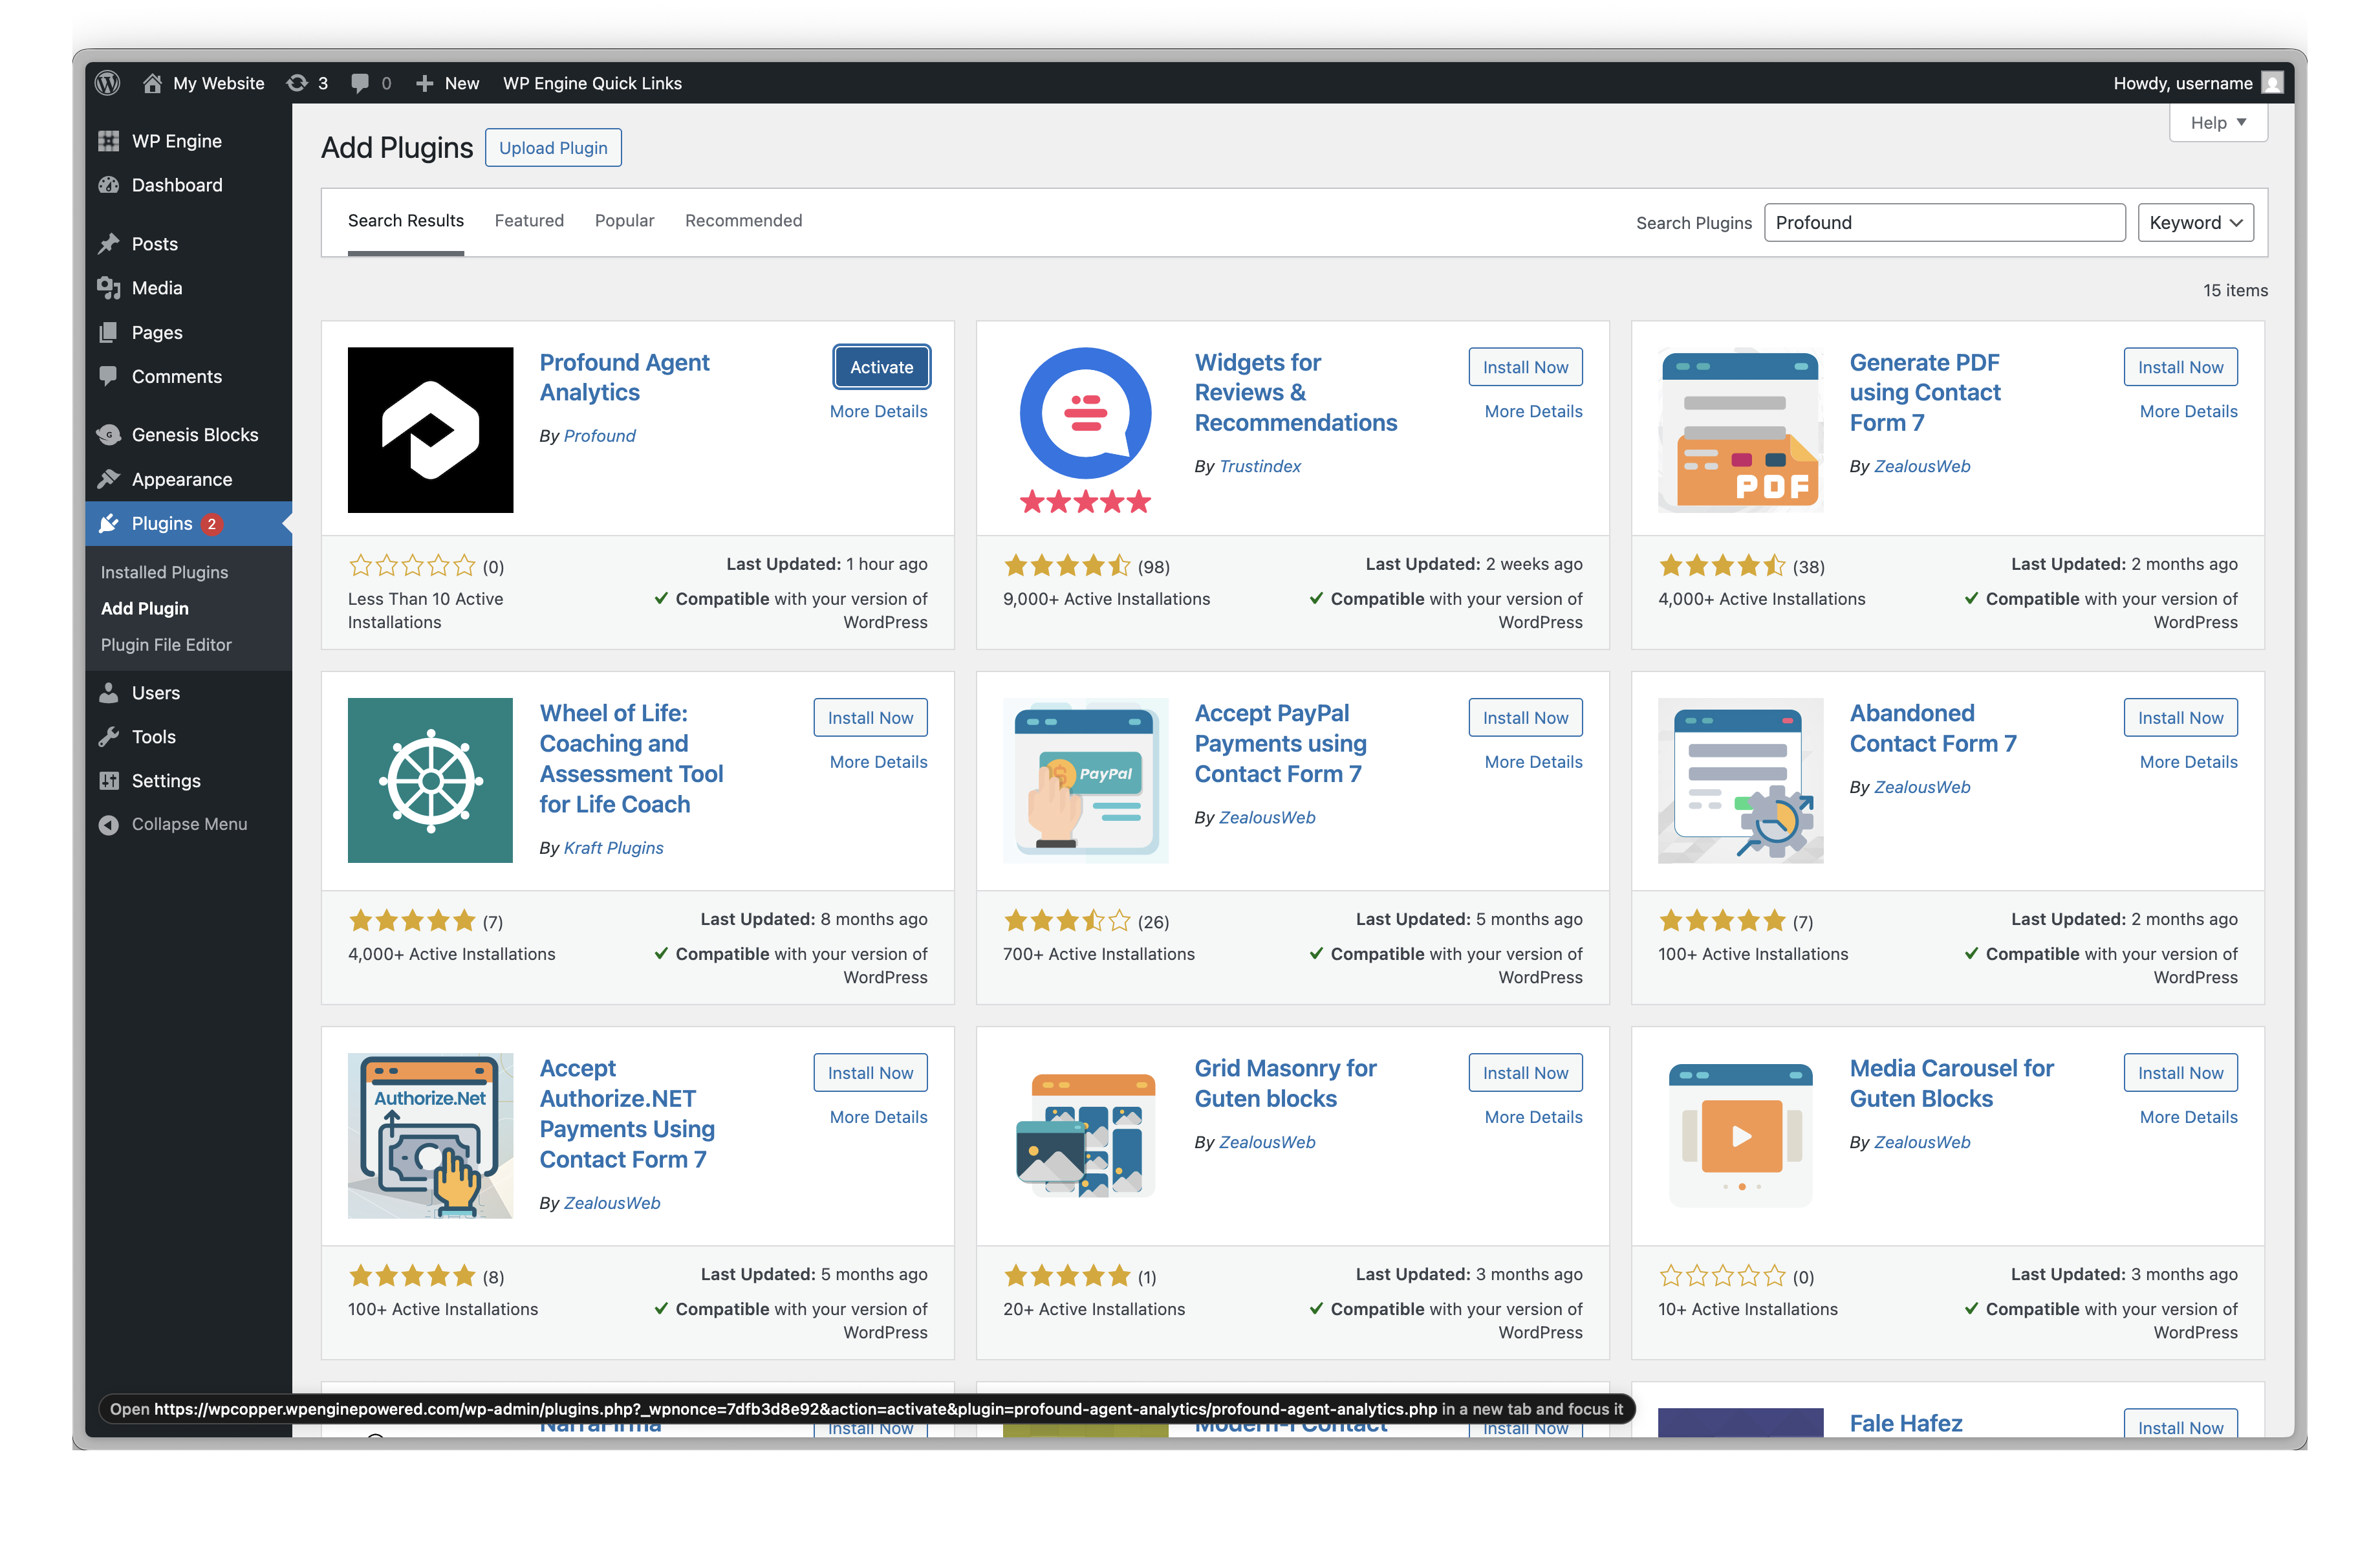 Once activated, navigate to **Settings** → **Agent Analytics** in your WordPress admin menu.
In the General settings tab:
1. Check the **Enable Logging** checkbox to activate log collection
2. Enter your Profound Log Ingestion Token (starts with `bot_`) in the **Log Ingestion Token** field
3. Leave the **API Endpoint** at its default value unless instructed otherwise
4. Optionally adjust the **Batch Size** and **Send Interval** settings.
Once activated, navigate to **Settings** → **Agent Analytics** in your WordPress admin menu.
In the General settings tab:
1. Check the **Enable Logging** checkbox to activate log collection
2. Enter your Profound Log Ingestion Token (starts with `bot_`) in the **Log Ingestion Token** field
3. Leave the **API Endpoint** at its default value unless instructed otherwise
4. Optionally adjust the **Batch Size** and **Send Interval** settings.
 Your Log Ingestion Token is sensitive information. For production sites, consider using environment variables instead of database storage. See the [security documentation](/agent-analytics/wordpress/security) for details.
Navigate to the **Privacy** tab to adjust filtering options:
* **Query Parameter Redaction**: Add any additional sensitive parameters to redact (default includes passwords, tokens, cards)
* **Path Filtering**: Add custom paths to exclude from logging
* **Skip Options**: Toggle exclusion of admin, cron, AJAX, or REST API requests
Your Log Ingestion Token is sensitive information. For production sites, consider using environment variables instead of database storage. See the [security documentation](/agent-analytics/wordpress/security) for details.
Navigate to the **Privacy** tab to adjust filtering options:
* **Query Parameter Redaction**: Add any additional sensitive parameters to redact (default includes passwords, tokens, cards)
* **Path Filtering**: Add custom paths to exclude from logging
* **Skip Options**: Toggle exclusion of admin, cron, AJAX, or REST API requests
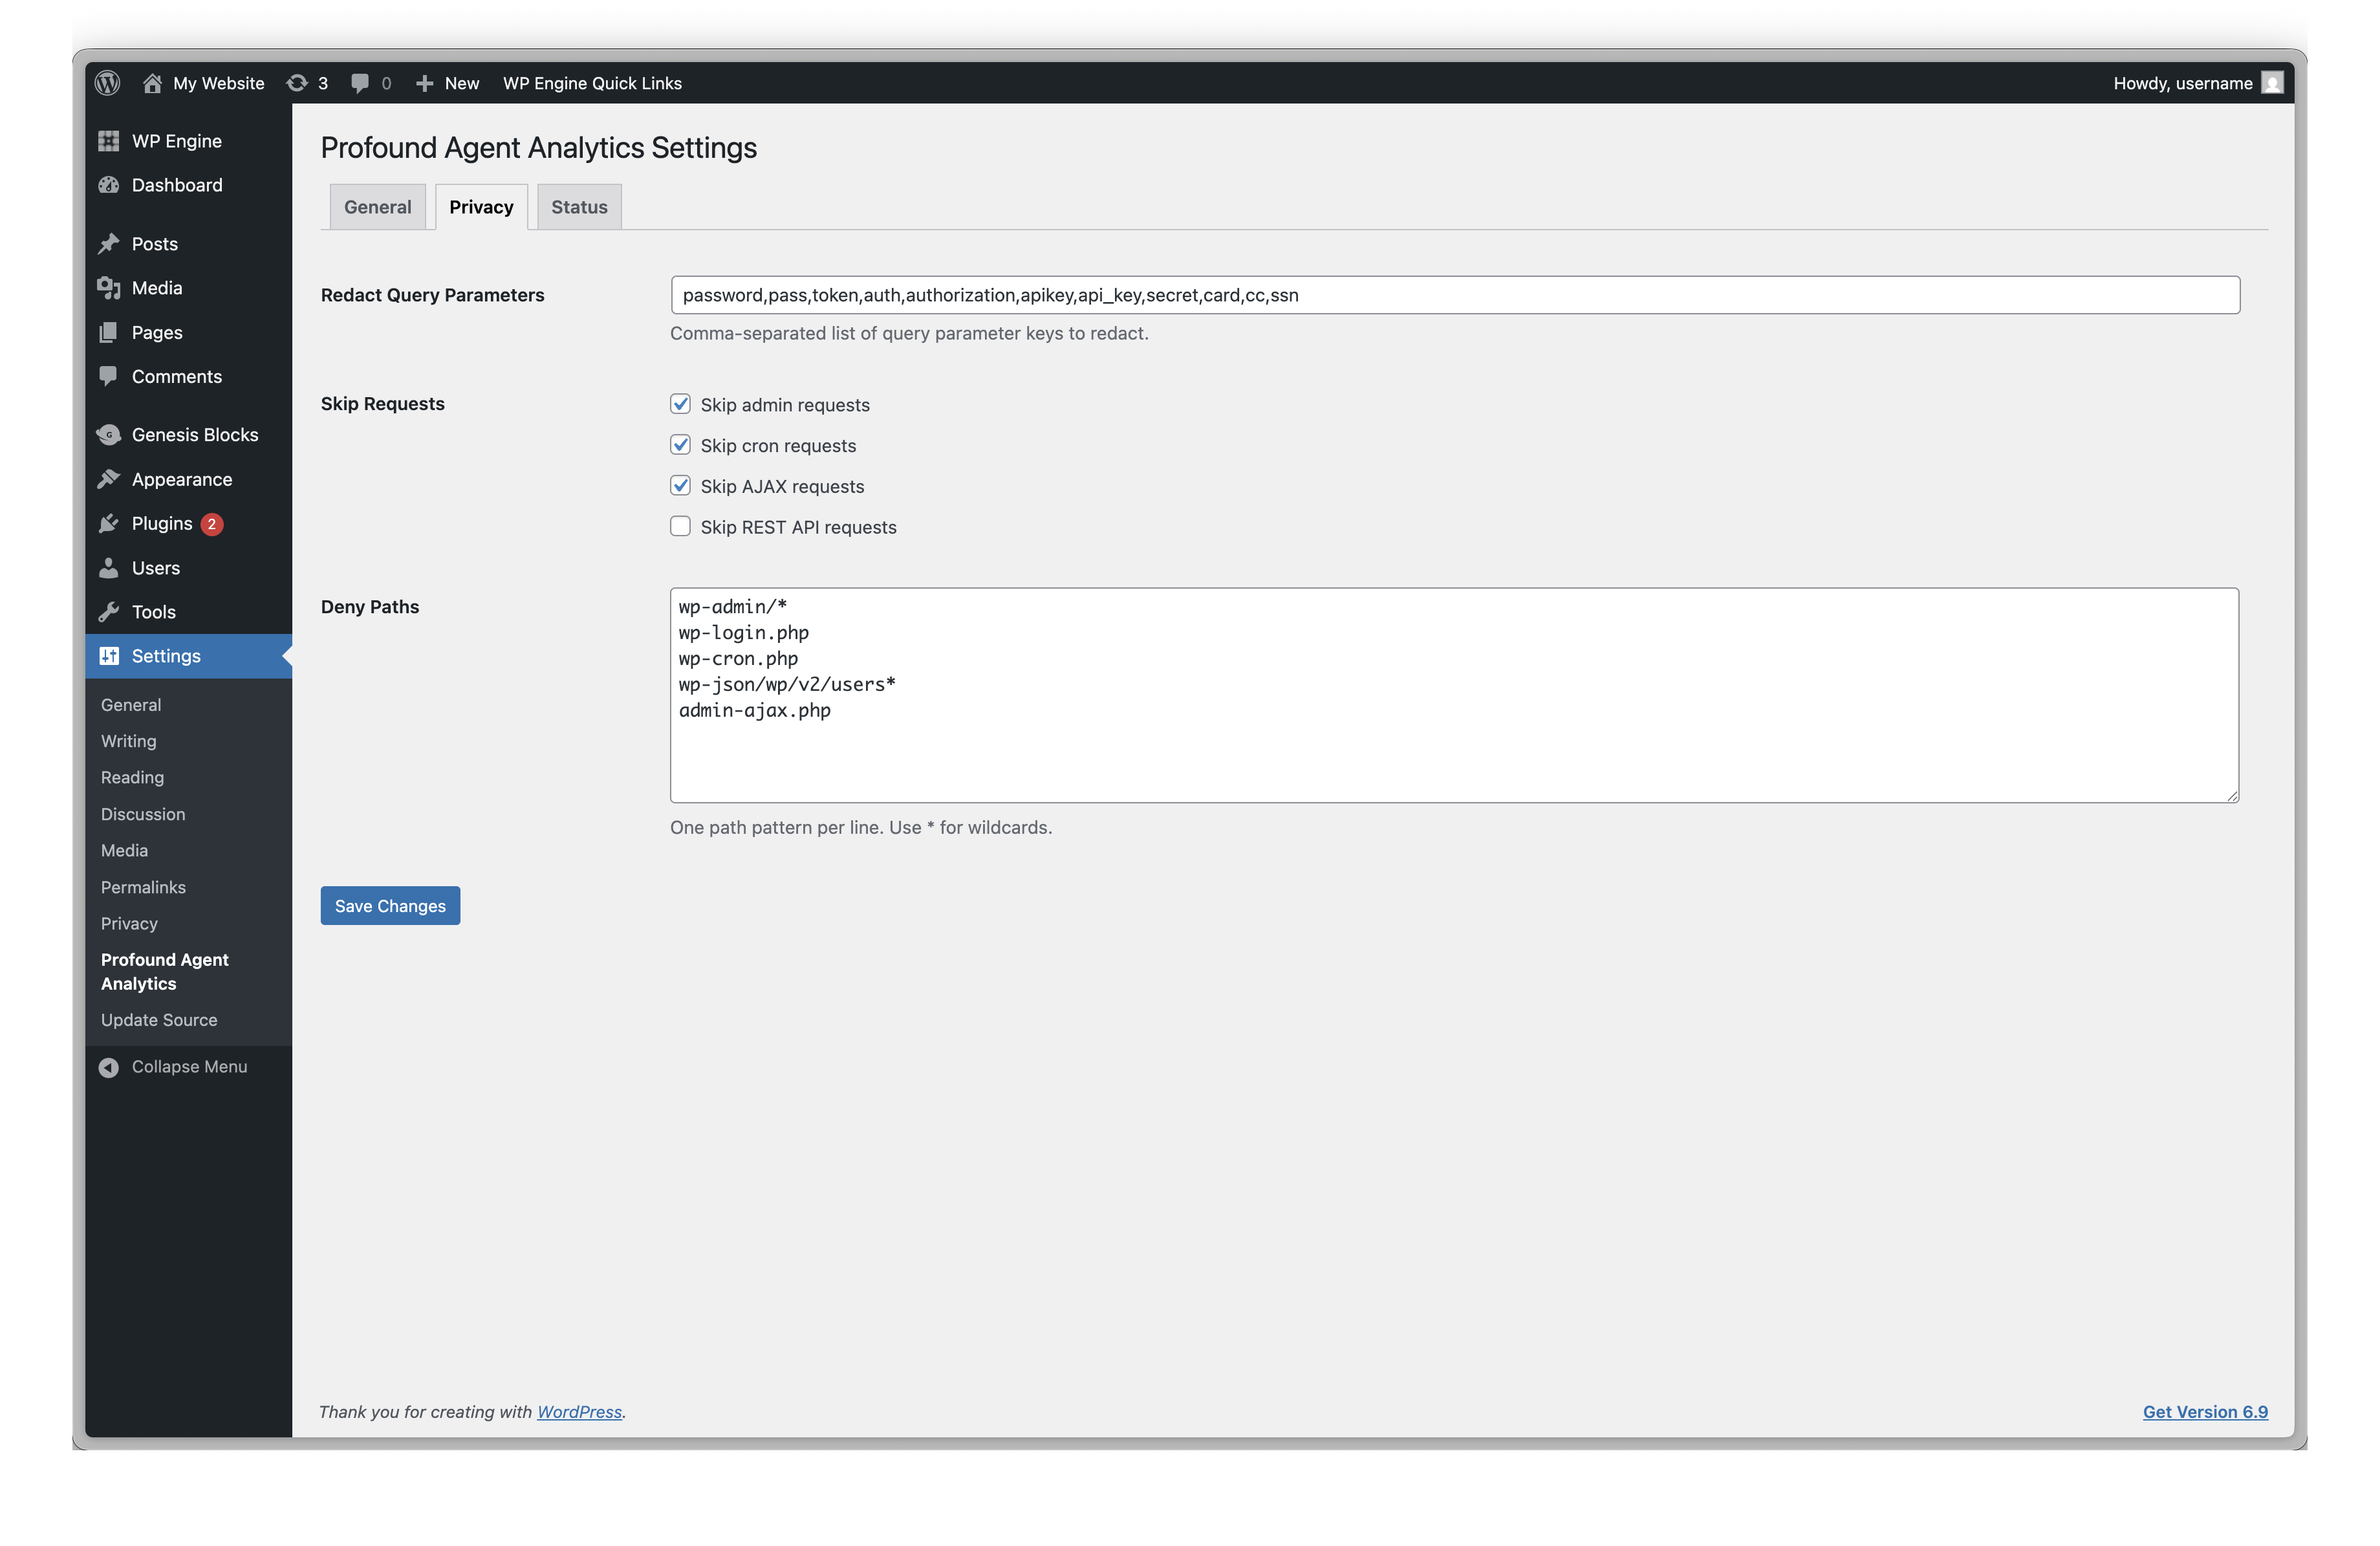 The plugin automatically excludes all WordPress admin activity and system paths. These settings allow additional customization beyond the defaults.
Click **Save Changes** at the bottom of the settings page.
Navigate to the **Status** tab to verify your configuration:
1. Check that the **Queue Status** shows as "Active"
2. Click **Send Test Event** to verify connectivity
3. Confirm you see "Test event sent successfully"
The plugin automatically excludes all WordPress admin activity and system paths. These settings allow additional customization beyond the defaults.
Click **Save Changes** at the bottom of the settings page.
Navigate to the **Status** tab to verify your configuration:
1. Check that the **Queue Status** shows as "Active"
2. Click **Send Test Event** to verify connectivity
3. Confirm you see "Test event sent successfully"
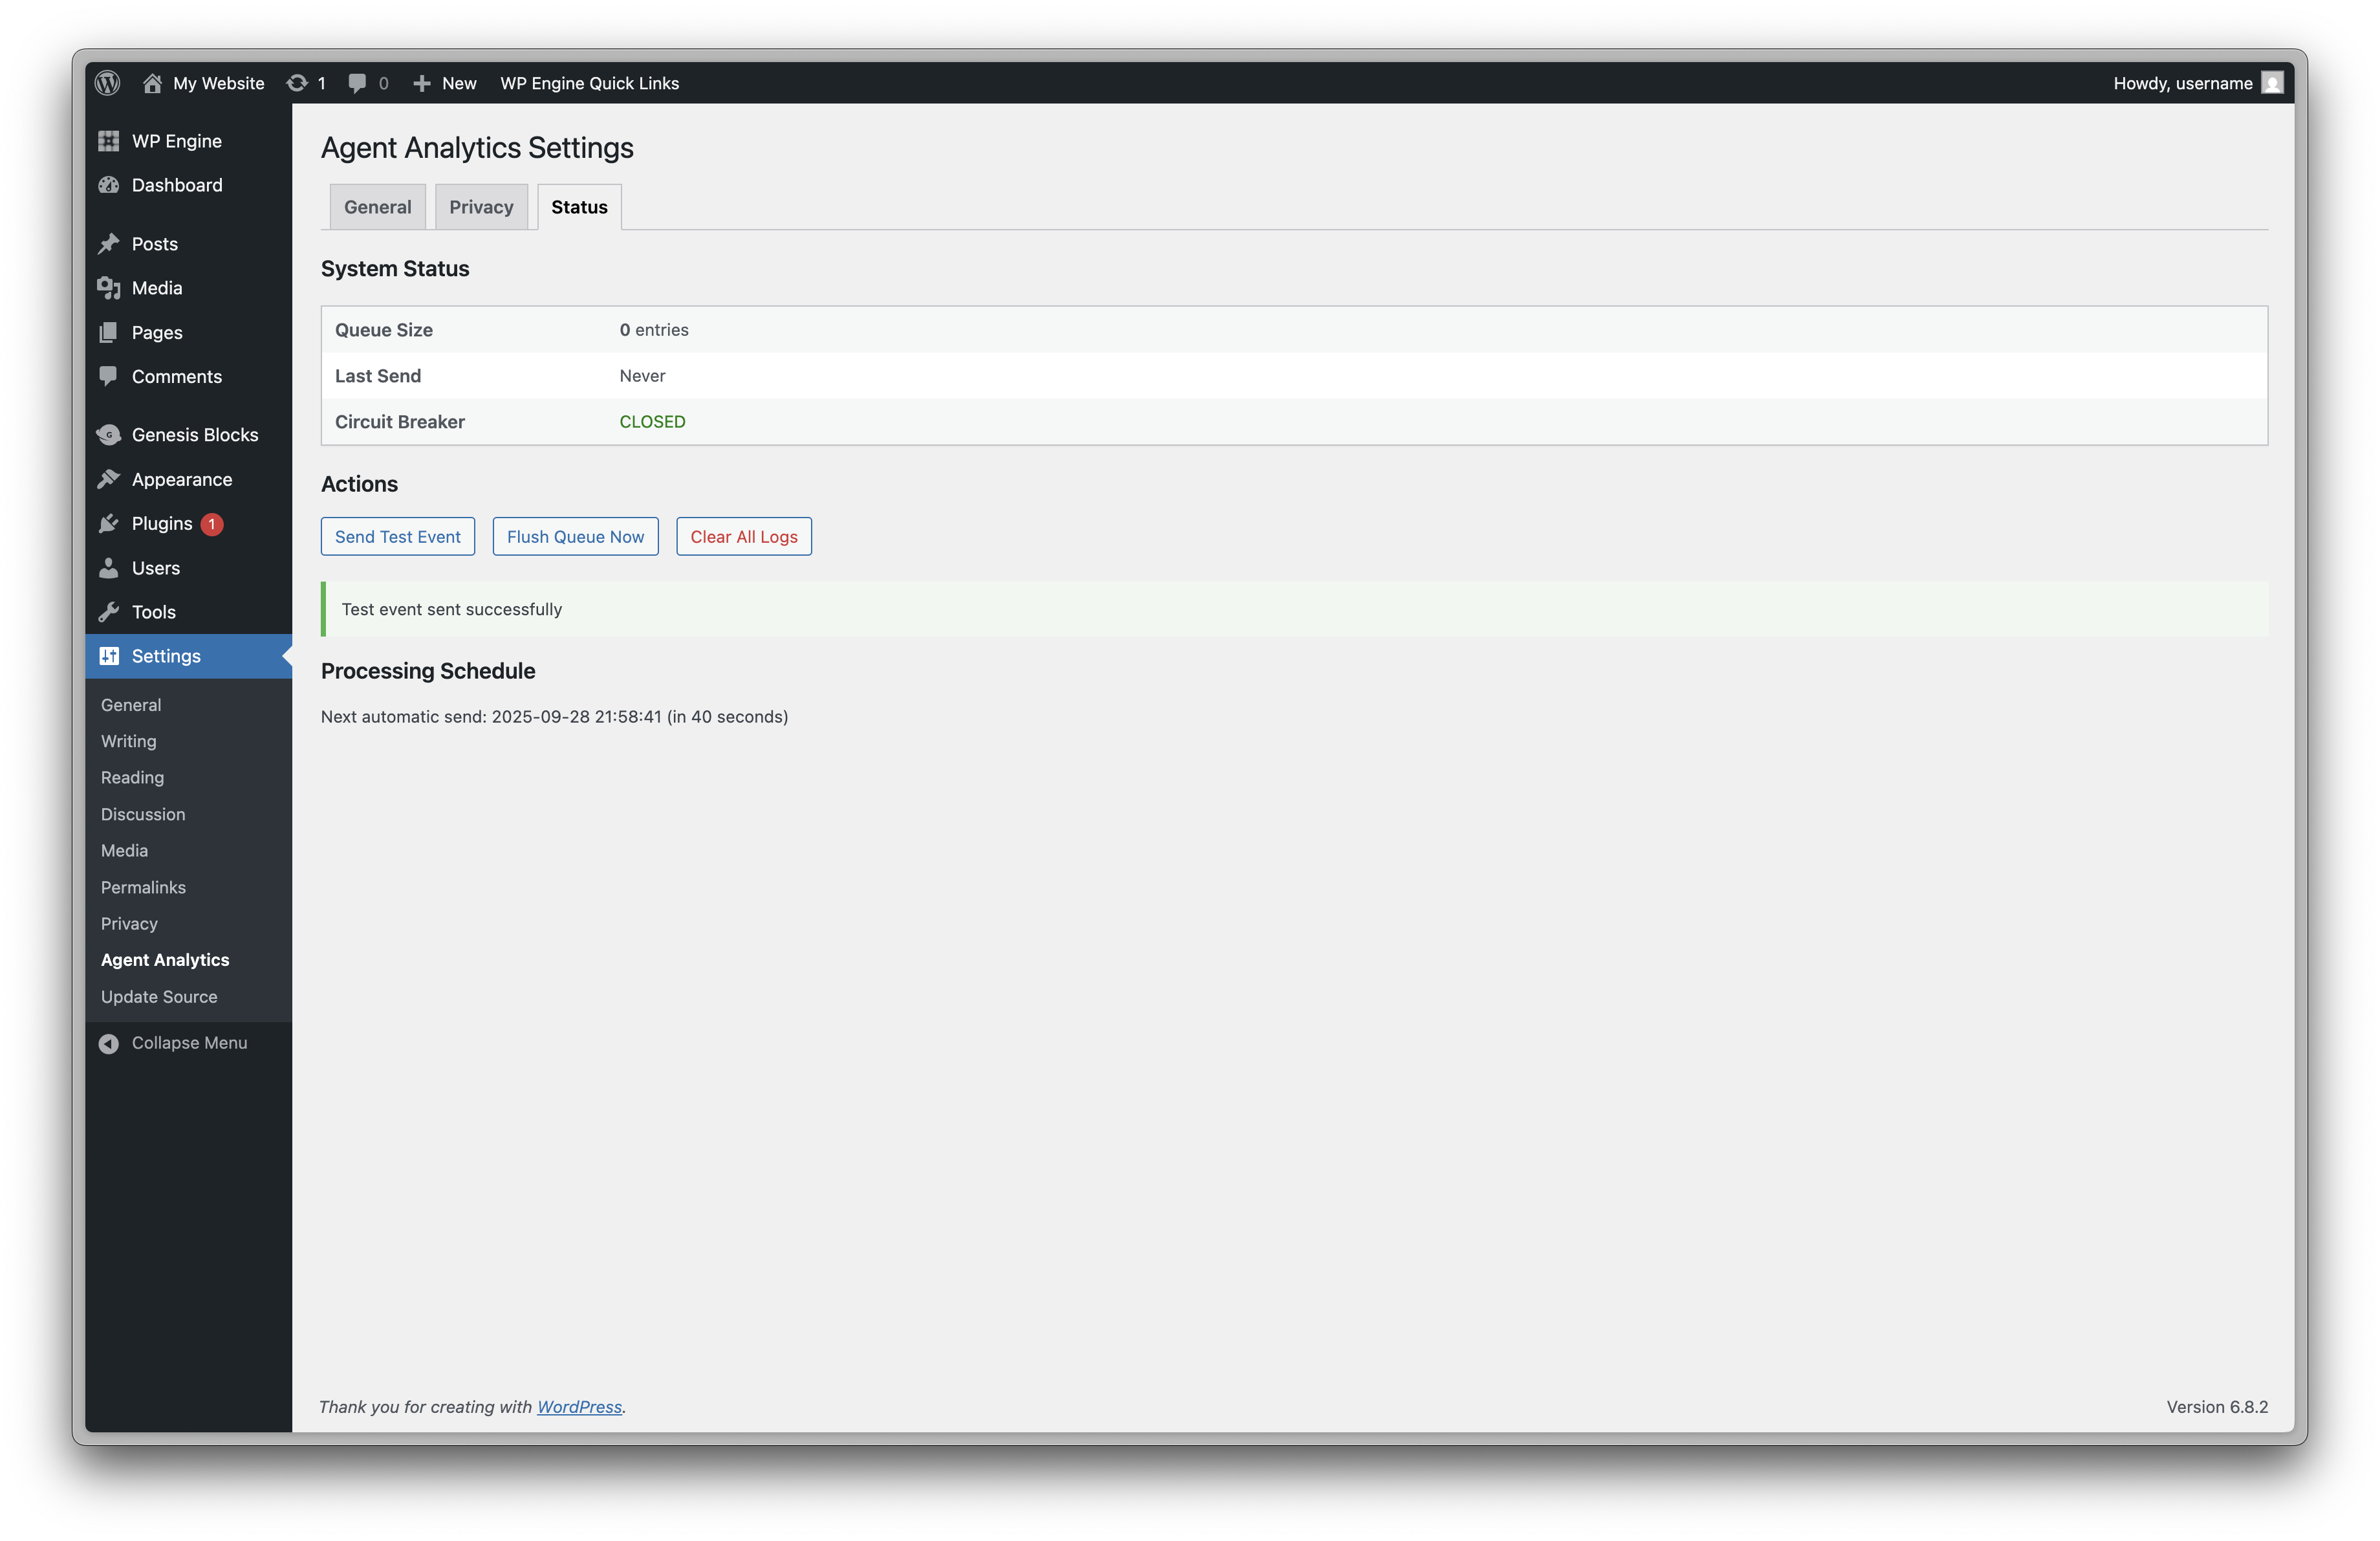 If the test fails, double-check your Log Ingestion Token and ensure your server can make outbound HTTPS requests to `artemis.api.tryprofound.com`.
After configuration:
1. Visit a few pages on your public website (not logged into WordPress admin)
2. Return to **Settings** → **Agent Analytics** → **Status**
3. Check that the **Next automatic send** shows a time within the next minute
4. Verify the **Queue size** increases as you browse, then decreases after automatic sending
That's it! You have successfully configured Agent Analytics for your WordPress site. Data should begin appearing in your Profound dashboard within minutes.
## Post-Installation Verification
To confirm everything is working correctly:
1. **Check the Status Tab**: The queue should periodically drain (every 60 seconds by default)
2. **Monitor Your Dashboard**: Log into your Profound account and verify data is appearing
3. **Review Processing Schedule**: Ensure "Next automatic send" updates regularly
## Troubleshooting
### Logs Not Sending
* Verify your Log Ingestion Token is correct and starts with `bot_`
* Check that **Enable Logging** is checked in General settings
* Ensure WordPress Cron is running (visit your site frontend to trigger it)
* Look for any error messages in the Status tab
### Test Event Fails
* Confirm your server allows outbound HTTPS connections
* Check if a firewall is blocking connections to `artemis.api.tryprofound.com`
* Verify your Log Ingestion Token has no extra spaces or characters
### Queue Growing But Not Sending
* The automatic sending requires site visits to trigger WordPress Cron
* Consider setting up a real cron job for consistent processing
* Click **Re-schedule Automatic Sending** if the schedule appears missing
### Wrong IP Addresses
* The plugin automatically detects proxy headers from CDNs and managed hosts
* If IPs appear incorrect, your host may use non-standard headers
* Contact support for assistance with custom IP detection
## Additional Resources
* [Security & Privacy Configuration](/agent-analytics/wordpress/security) - Detailed privacy settings and data handling
* [Plugin Overview](/agent-analytics/wordpress/introduction) - Complete feature documentation
* Contact [support@tryprofound.com](mailto:support@tryprofound.com) for integration assistance
If the test fails, double-check your Log Ingestion Token and ensure your server can make outbound HTTPS requests to `artemis.api.tryprofound.com`.
After configuration:
1. Visit a few pages on your public website (not logged into WordPress admin)
2. Return to **Settings** → **Agent Analytics** → **Status**
3. Check that the **Next automatic send** shows a time within the next minute
4. Verify the **Queue size** increases as you browse, then decreases after automatic sending
That's it! You have successfully configured Agent Analytics for your WordPress site. Data should begin appearing in your Profound dashboard within minutes.
## Post-Installation Verification
To confirm everything is working correctly:
1. **Check the Status Tab**: The queue should periodically drain (every 60 seconds by default)
2. **Monitor Your Dashboard**: Log into your Profound account and verify data is appearing
3. **Review Processing Schedule**: Ensure "Next automatic send" updates regularly
## Troubleshooting
### Logs Not Sending
* Verify your Log Ingestion Token is correct and starts with `bot_`
* Check that **Enable Logging** is checked in General settings
* Ensure WordPress Cron is running (visit your site frontend to trigger it)
* Look for any error messages in the Status tab
### Test Event Fails
* Confirm your server allows outbound HTTPS connections
* Check if a firewall is blocking connections to `artemis.api.tryprofound.com`
* Verify your Log Ingestion Token has no extra spaces or characters
### Queue Growing But Not Sending
* The automatic sending requires site visits to trigger WordPress Cron
* Consider setting up a real cron job for consistent processing
* Click **Re-schedule Automatic Sending** if the schedule appears missing
### Wrong IP Addresses
* The plugin automatically detects proxy headers from CDNs and managed hosts
* If IPs appear incorrect, your host may use non-standard headers
* Contact support for assistance with custom IP detection
## Additional Resources
* [Security & Privacy Configuration](/agent-analytics/wordpress/security) - Detailed privacy settings and data handling
* [Plugin Overview](/agent-analytics/wordpress/introduction) - Complete feature documentation
* Contact [support@tryprofound.com](mailto:support@tryprofound.com) for integration assistance