> ## Documentation Index
> Fetch the complete documentation index at: https://docs.tryprofound.com/llms.txt
> Use this file to discover all available pages before exploring further.
# Projects を使い始める
> Project を作成し、コンテキストを追加し、チャットで作業し、Aim の提案からタスクを開始します
このガイドでは、空の Projects ページから始めて、コンテキストとチャットを備えた共有 Project を作成し、AI Marketer (Aim) の提案から最初のタスクを開始するまでの手順を説明します。
## ステップ 1:Project を作成する
### Projects ページから作成する
1. Profound の左サイドバーで **Projects** に移動し、**+ New Project** を選択します。新しい Project のフォームが開きます。
 2. **Project name** を入力し、**Tell Aim what to work on** に目標を記述します。
3. Project の **Visibility** を選択します。
2. **Project name** を入力し、**Tell Aim what to work on** に目標を記述します。
3. Project の **Visibility** を選択します。
- **Private**:自分と招待されたメンバーのみが Project を閲覧・使用できます。
- **Your organization**:Profound の組織内の全員が Project を閲覧・使用できます。
4. **Create Project** を選択します。
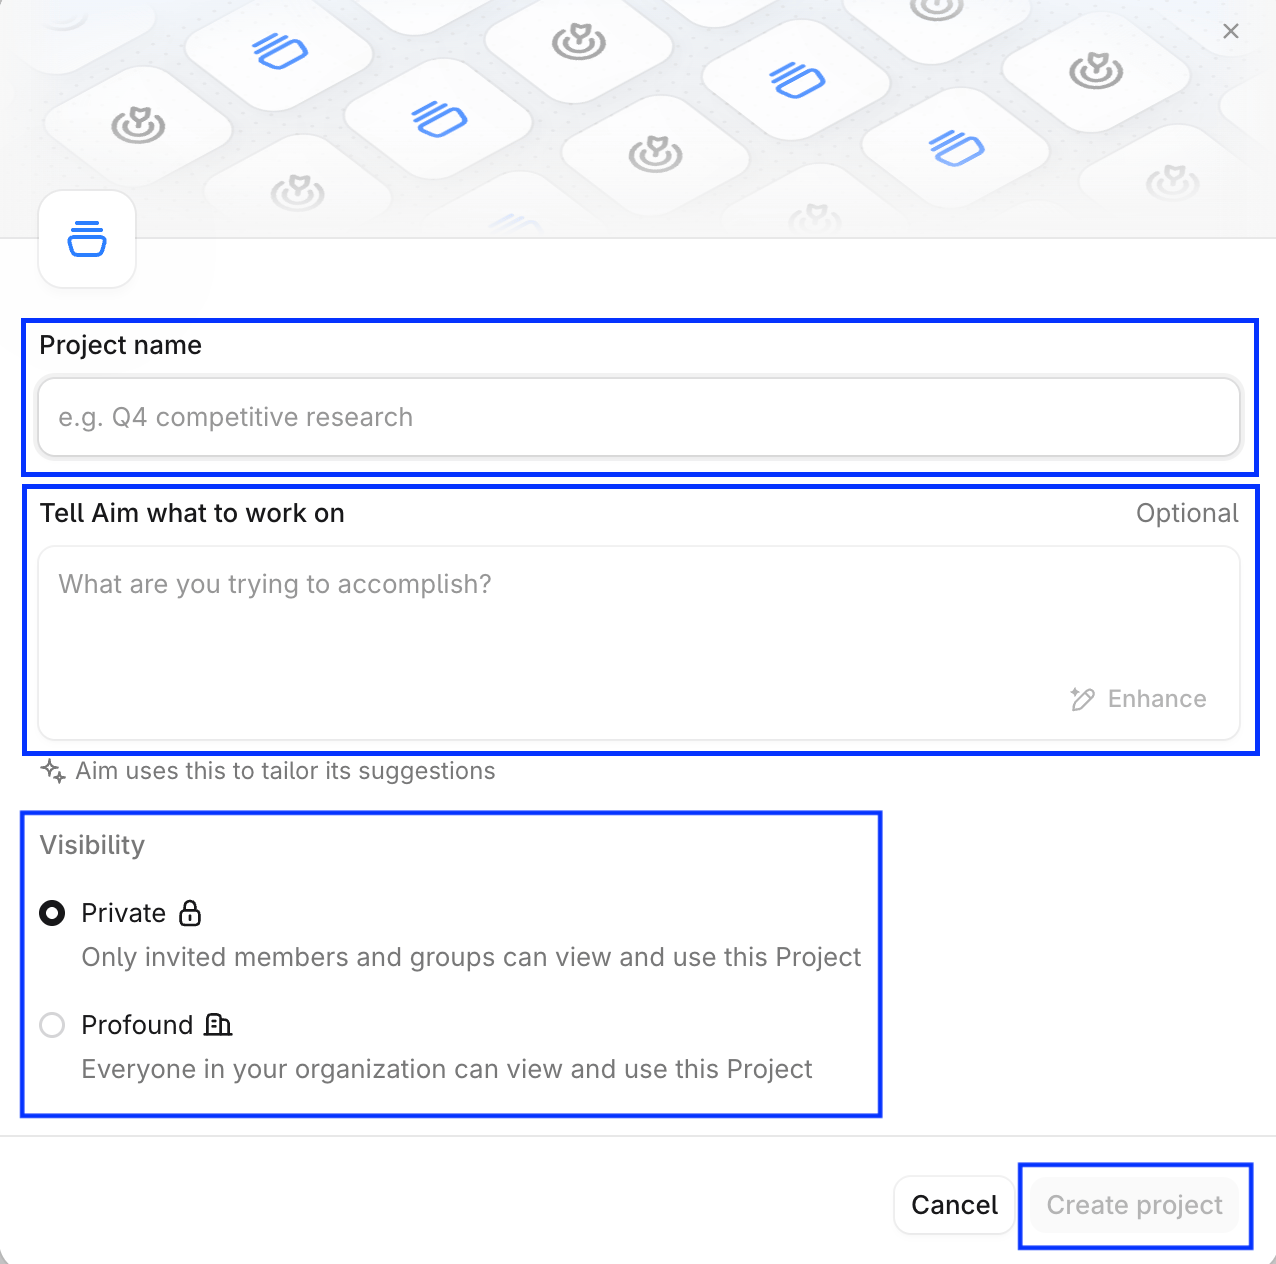 作成後、Aim はすぐに新しい Project 向けの提案の生成を開始します。
### Project の提案から作成する
**Projects** ページで、**New Project Suggestions** の下にある提案カードを開きます。説明とタスクを確認し、**Create Project** を選択します。役に立たない場合は **Archive** を選択します。詳しくは [Suggestions from Aim](/ja-jp/projects/suggestions-from-aim) をご覧ください。
### Profound のホームページから作成する
ホームページの Aim チャットボックスの下で、**Start a project** > **Create a new Project** を選択します。
作成後、Aim はすぐに新しい Project 向けの提案の生成を開始します。
### Project の提案から作成する
**Projects** ページで、**New Project Suggestions** の下にある提案カードを開きます。説明とタスクを確認し、**Create Project** を選択します。役に立たない場合は **Archive** を選択します。詳しくは [Suggestions from Aim](/ja-jp/projects/suggestions-from-aim) をご覧ください。
### Profound のホームページから作成する
ホームページの Aim チャットボックスの下で、**Start a project** > **Create a new Project** を選択します。
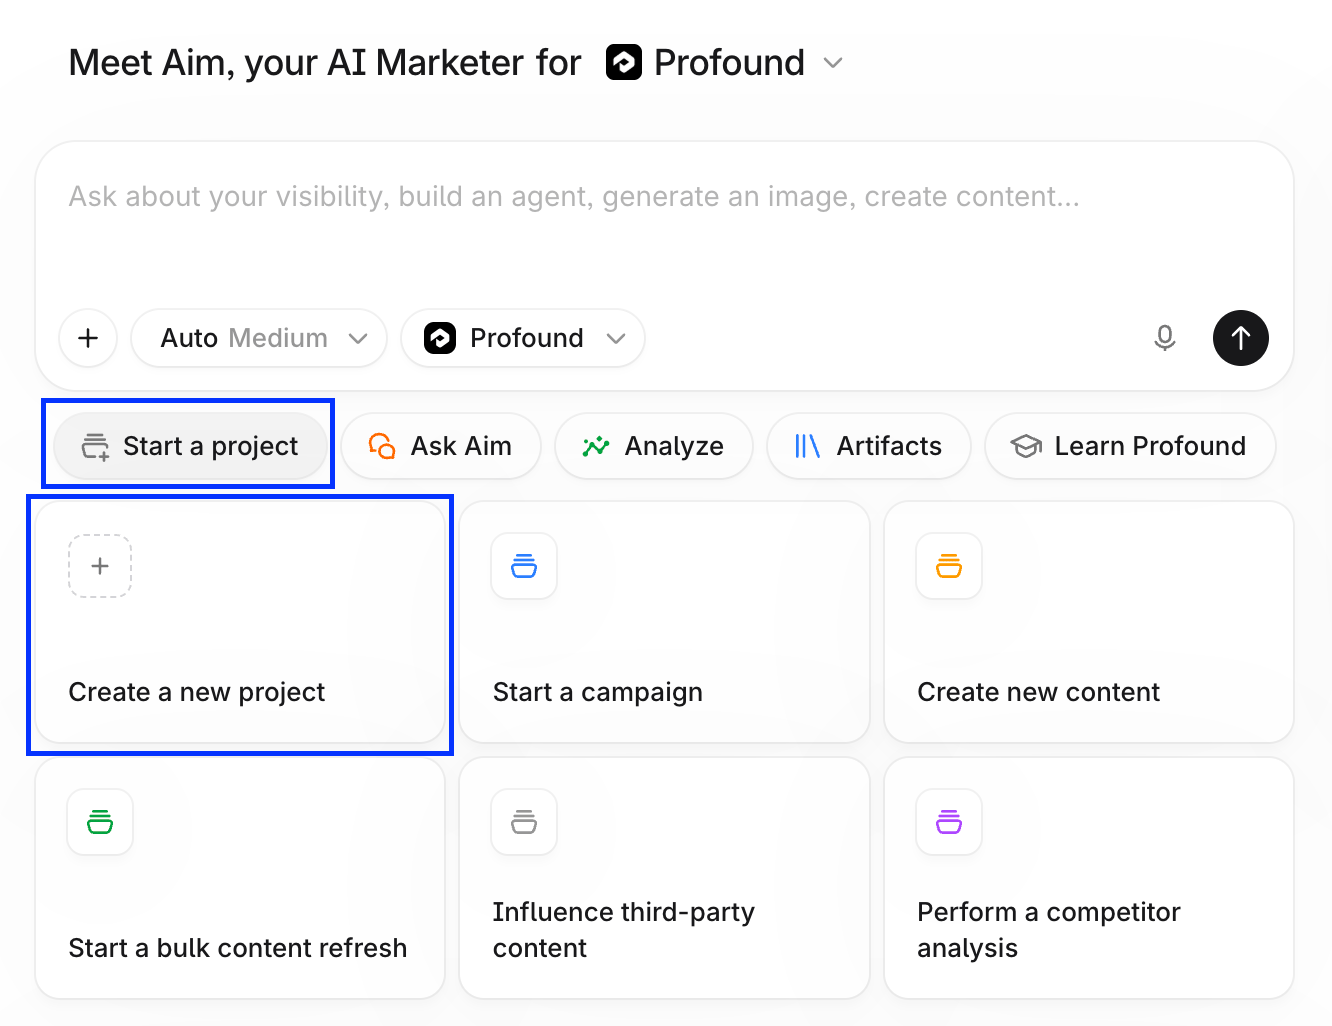 または、チャットボックスで Aim に Project の開始を依頼し、その目標を説明します。例:
```txt wrap theme={null}
Start a Project for our launch of Instant Payouts, a new feature that lets small-business customers move money from their account to their bank in under a minute. It goes live on November 12.
The goal is to make sure that when someone asks an AI assistant about instant payouts for small businesses, or compares payout speeds between us and other payment providers, we show up and the answer describes the feature correctly.
```
これだけで、Aim はコンテキストを分析してタスクを提案できます。実施したいタスクがすでに決まっている場合は、プロンプトに記述してください。
何を依頼すればよいかわからない場合は、チャットボックスの下にある **Start a project** を選択し、**Create new content** や **Perform a competitor analysis** などのテンプレートを選びます。テンプレートによってチャットボックスに概要が事前入力されます。目標に合わせて調整してから送信してください。Aim は不足している情報を質問し、確認用の計画を提案したうえで Project を作成します。
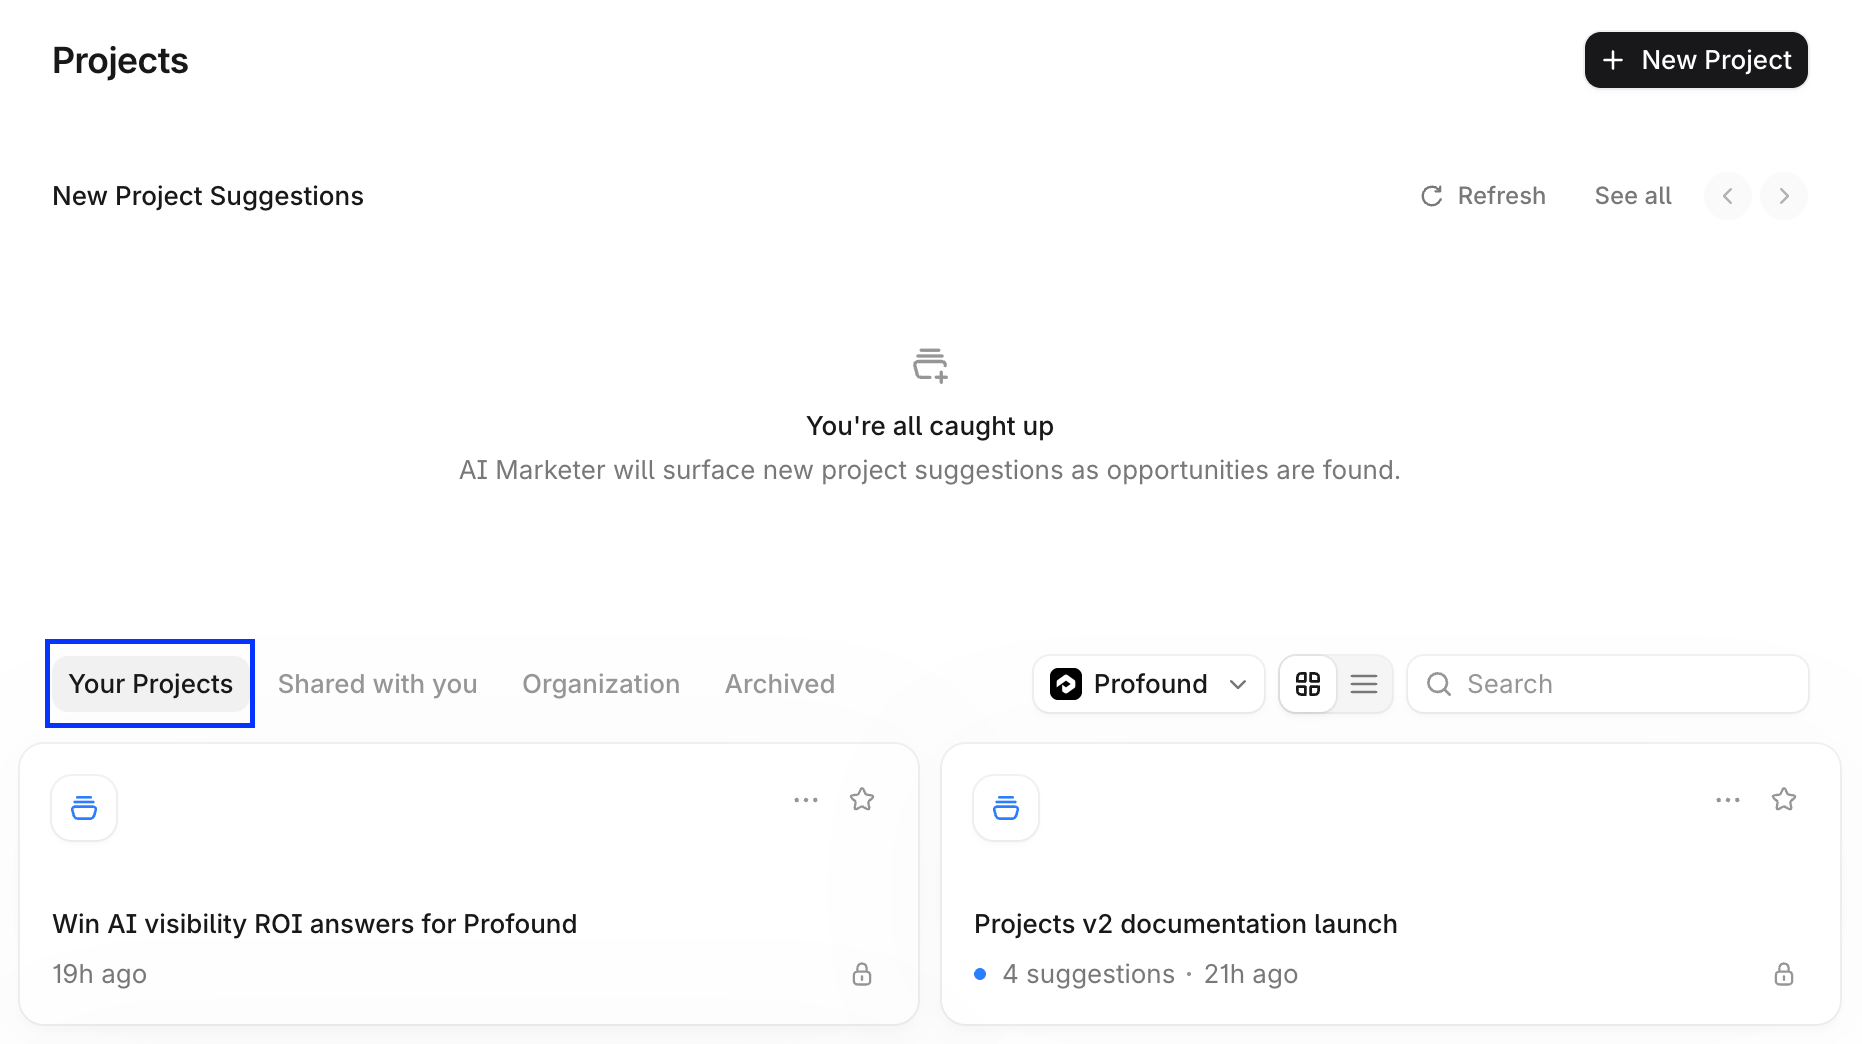
新しい Project は、**Projects** ページの **Your Projects** の下に表示されます。Project を選択すると、そのページが開きます。
または、チャットボックスで Aim に Project の開始を依頼し、その目標を説明します。例:
```txt wrap theme={null}
Start a Project for our launch of Instant Payouts, a new feature that lets small-business customers move money from their account to their bank in under a minute. It goes live on November 12.
The goal is to make sure that when someone asks an AI assistant about instant payouts for small businesses, or compares payout speeds between us and other payment providers, we show up and the answer describes the feature correctly.
```
これだけで、Aim はコンテキストを分析してタスクを提案できます。実施したいタスクがすでに決まっている場合は、プロンプトに記述してください。
何を依頼すればよいかわからない場合は、チャットボックスの下にある **Start a project** を選択し、**Create new content** や **Perform a competitor analysis** などのテンプレートを選びます。テンプレートによってチャットボックスに概要が事前入力されます。目標に合わせて調整してから送信してください。Aim は不足している情報を質問し、確認用の計画を提案したうえで Project を作成します。
新しい Project は、**Projects** ページの **Your Projects** の下に表示されます。Project を選択すると、そのページが開きます。
 ## ステップ 2:指示とコンテキストを追加する
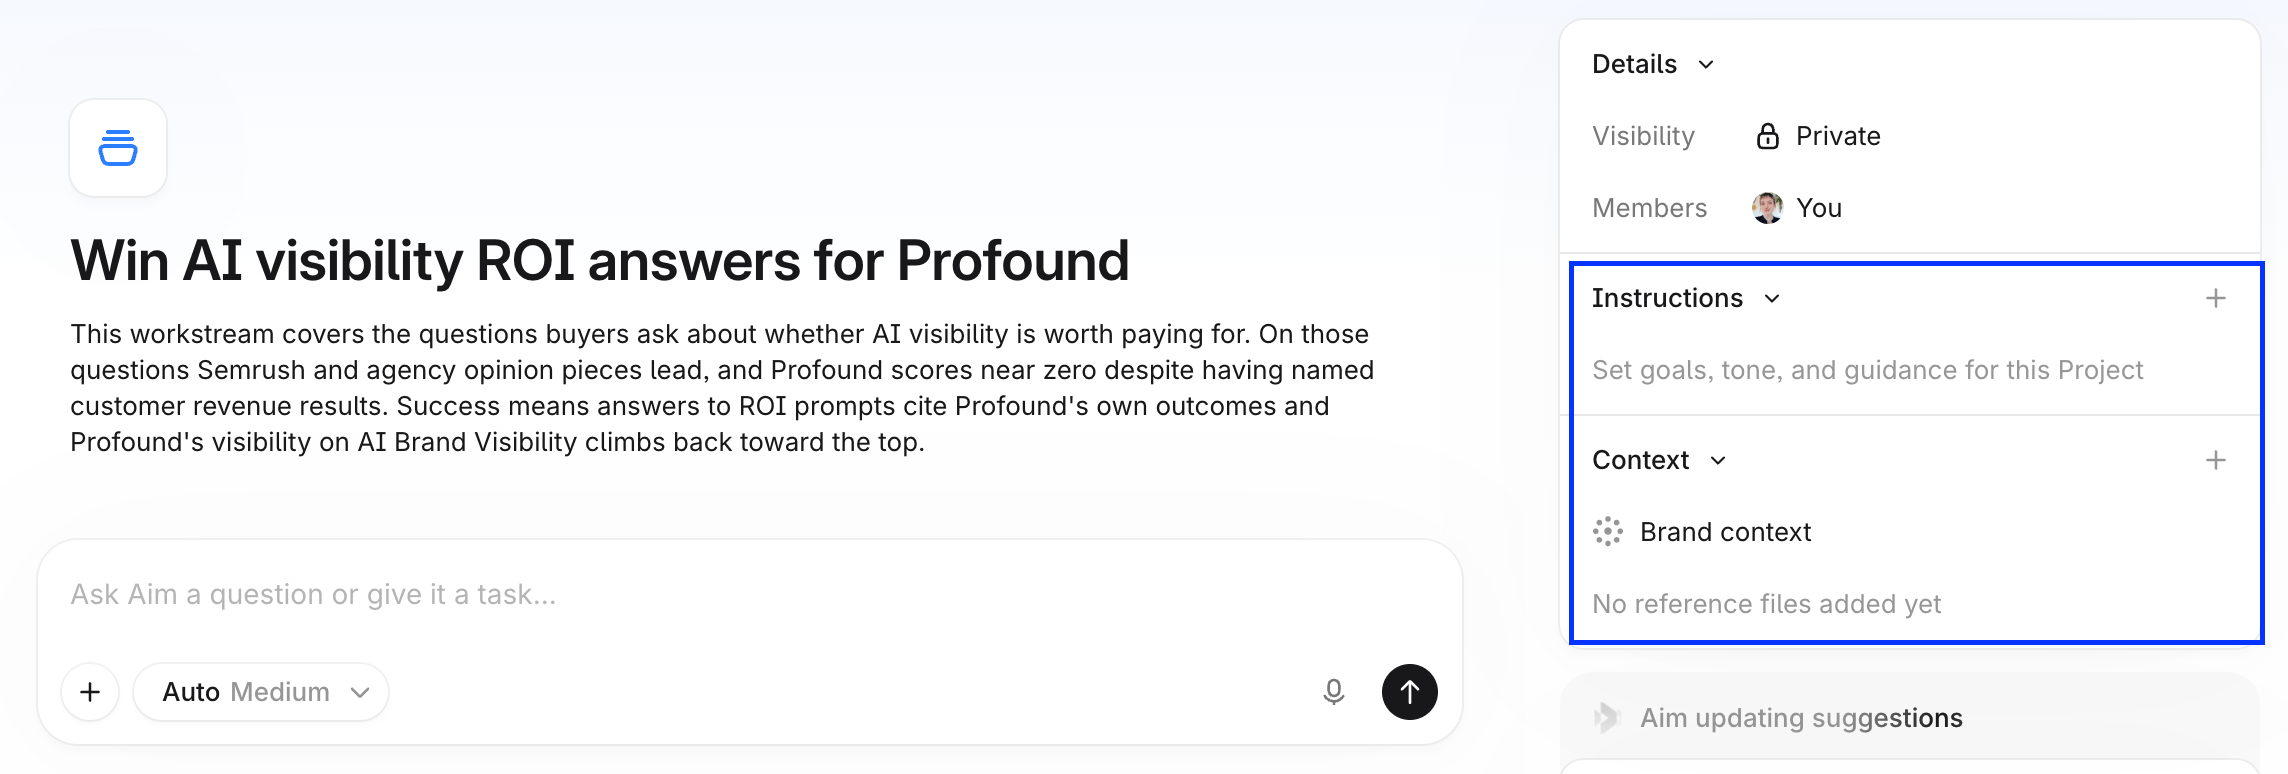
Project ページの右サイドバーには、**Instructions** セクションと **Context** セクションがあります。
## ステップ 2:指示とコンテキストを追加する
Project ページの右サイドバーには、**Instructions** セクションと **Context** セクションがあります。
 ### 指示を追加する
**Instructions** の横にある **+** を選択し、この Project で Aim が従う目標、トーン、ガイダンスを設定します。例:
```txt wrap theme={null}
Write in plain, confident English. Use short sentences, no jargon, and no exclamation marks.
```
または
```txt wrap theme={null}
Only make claims about speed, fees, and availability that appear in the launch brief attached to this Project.
```
### コンテキストを追加する
**Context** の横にある **+** を選択して、ファイル、写真、または Knowledge Base のドキュメントを追加します。Aim は、Project 内のすべてのチャットでこのコンテキストを使用し、提案の作成にも活用します。
## ステップ 3:チャットでタスクに取り組む
Project ページを開くと、チャットボックスが表示されます。Aim に質問したり、タスクを依頼したりできます。Aim は Project の指示とコンテキストを使って回答し、チャットを Project に保存するため、いつでも戻って確認できます。
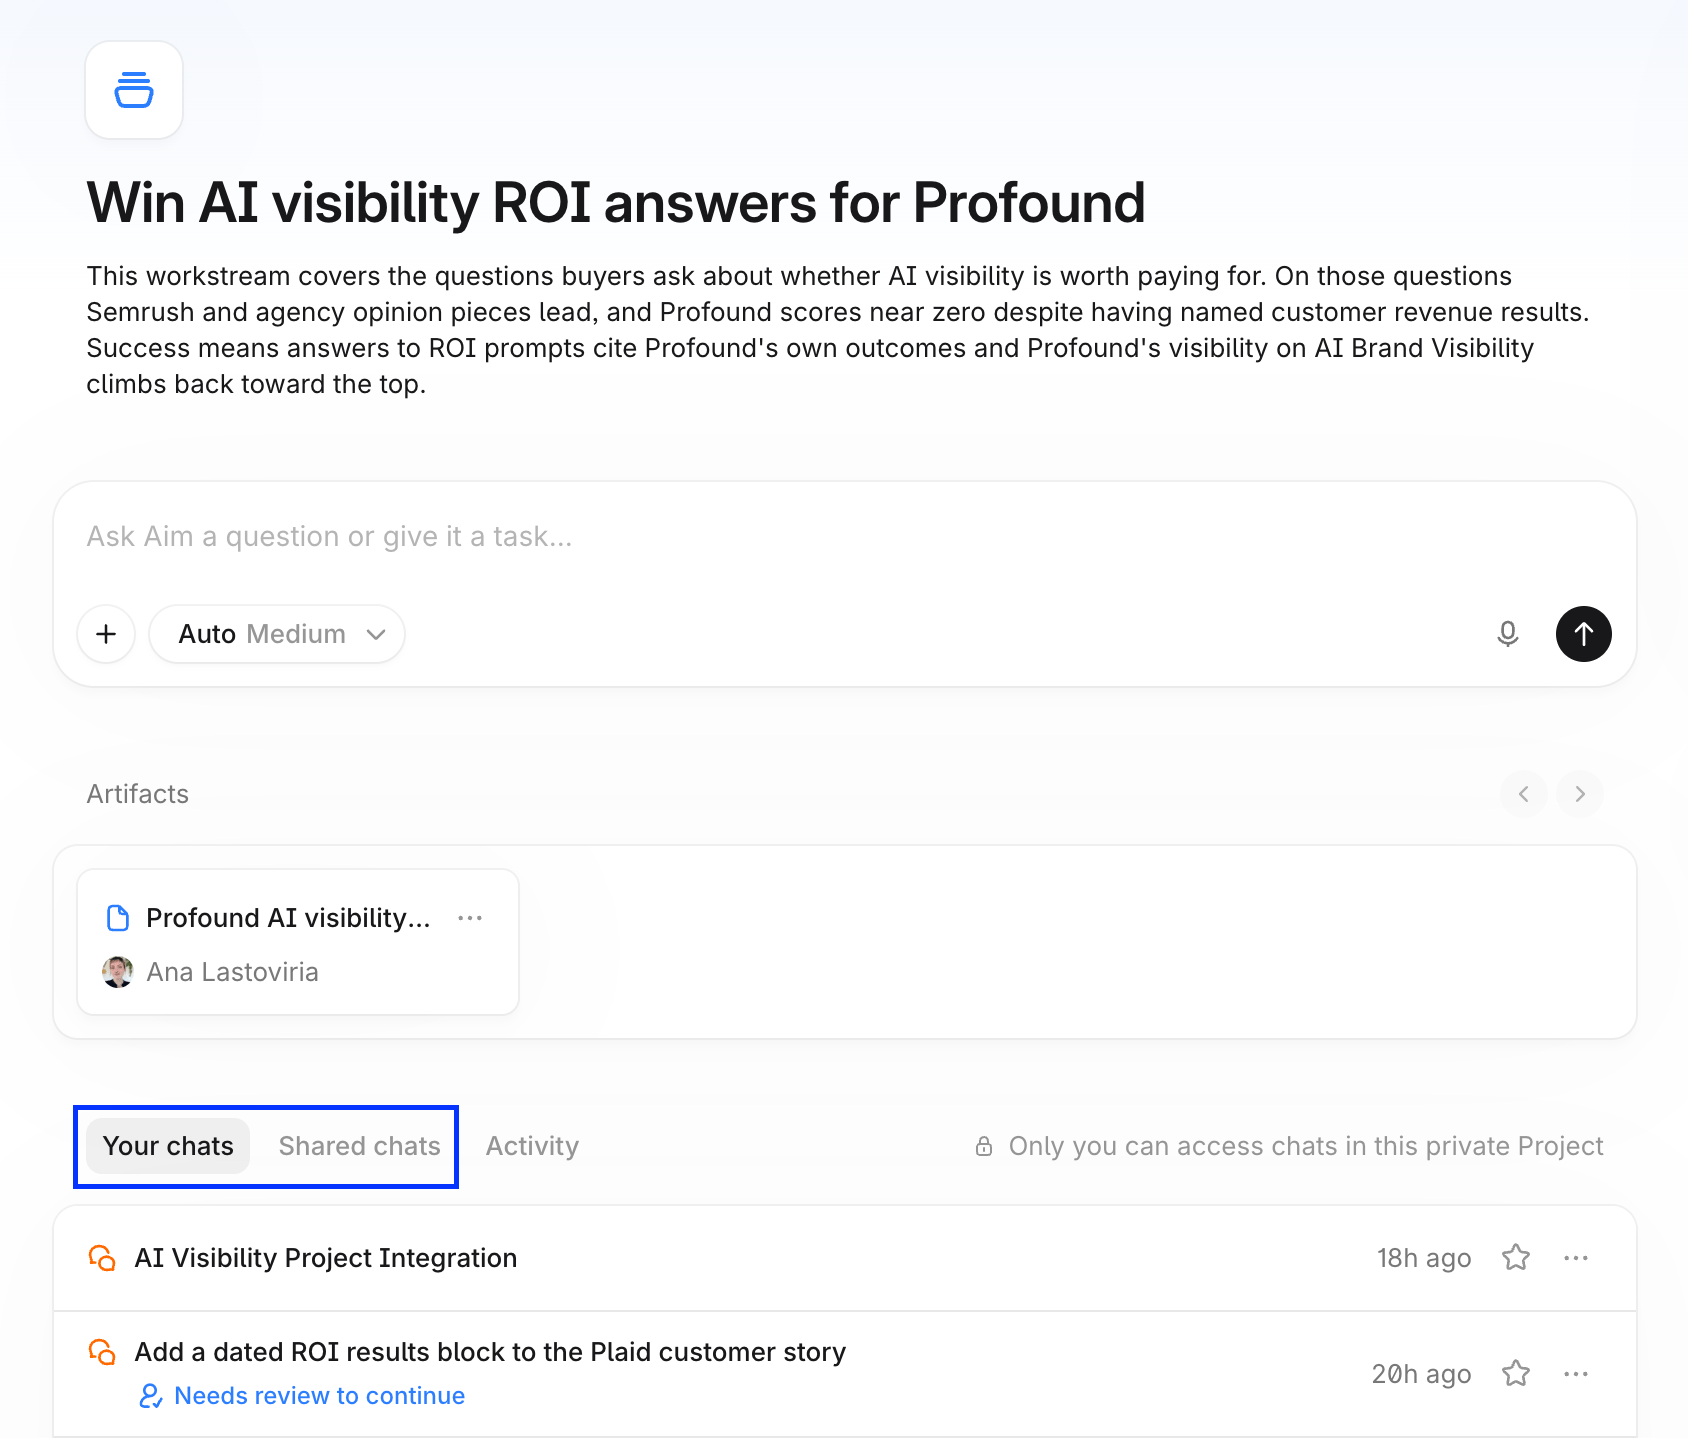
自分が開始したチャットは **Your chats** タブに、共有されたチャットは **Shared chats** タブに表示されます。Aim が返信を待っている場合、チャットのステータスは **Needs review** と表示されます。
### 指示を追加する
**Instructions** の横にある **+** を選択し、この Project で Aim が従う目標、トーン、ガイダンスを設定します。例:
```txt wrap theme={null}
Write in plain, confident English. Use short sentences, no jargon, and no exclamation marks.
```
または
```txt wrap theme={null}
Only make claims about speed, fees, and availability that appear in the launch brief attached to this Project.
```
### コンテキストを追加する
**Context** の横にある **+** を選択して、ファイル、写真、または Knowledge Base のドキュメントを追加します。Aim は、Project 内のすべてのチャットでこのコンテキストを使用し、提案の作成にも活用します。
## ステップ 3:チャットでタスクに取り組む
Project ページを開くと、チャットボックスが表示されます。Aim に質問したり、タスクを依頼したりできます。Aim は Project の指示とコンテキストを使って回答し、チャットを Project に保存するため、いつでも戻って確認できます。
自分が開始したチャットは **Your chats** タブに、共有されたチャットは **Shared chats** タブに表示されます。Aim が返信を待っている場合、チャットのステータスは **Needs review** と表示されます。
 ### ファイル、スキル、Agents を追加する
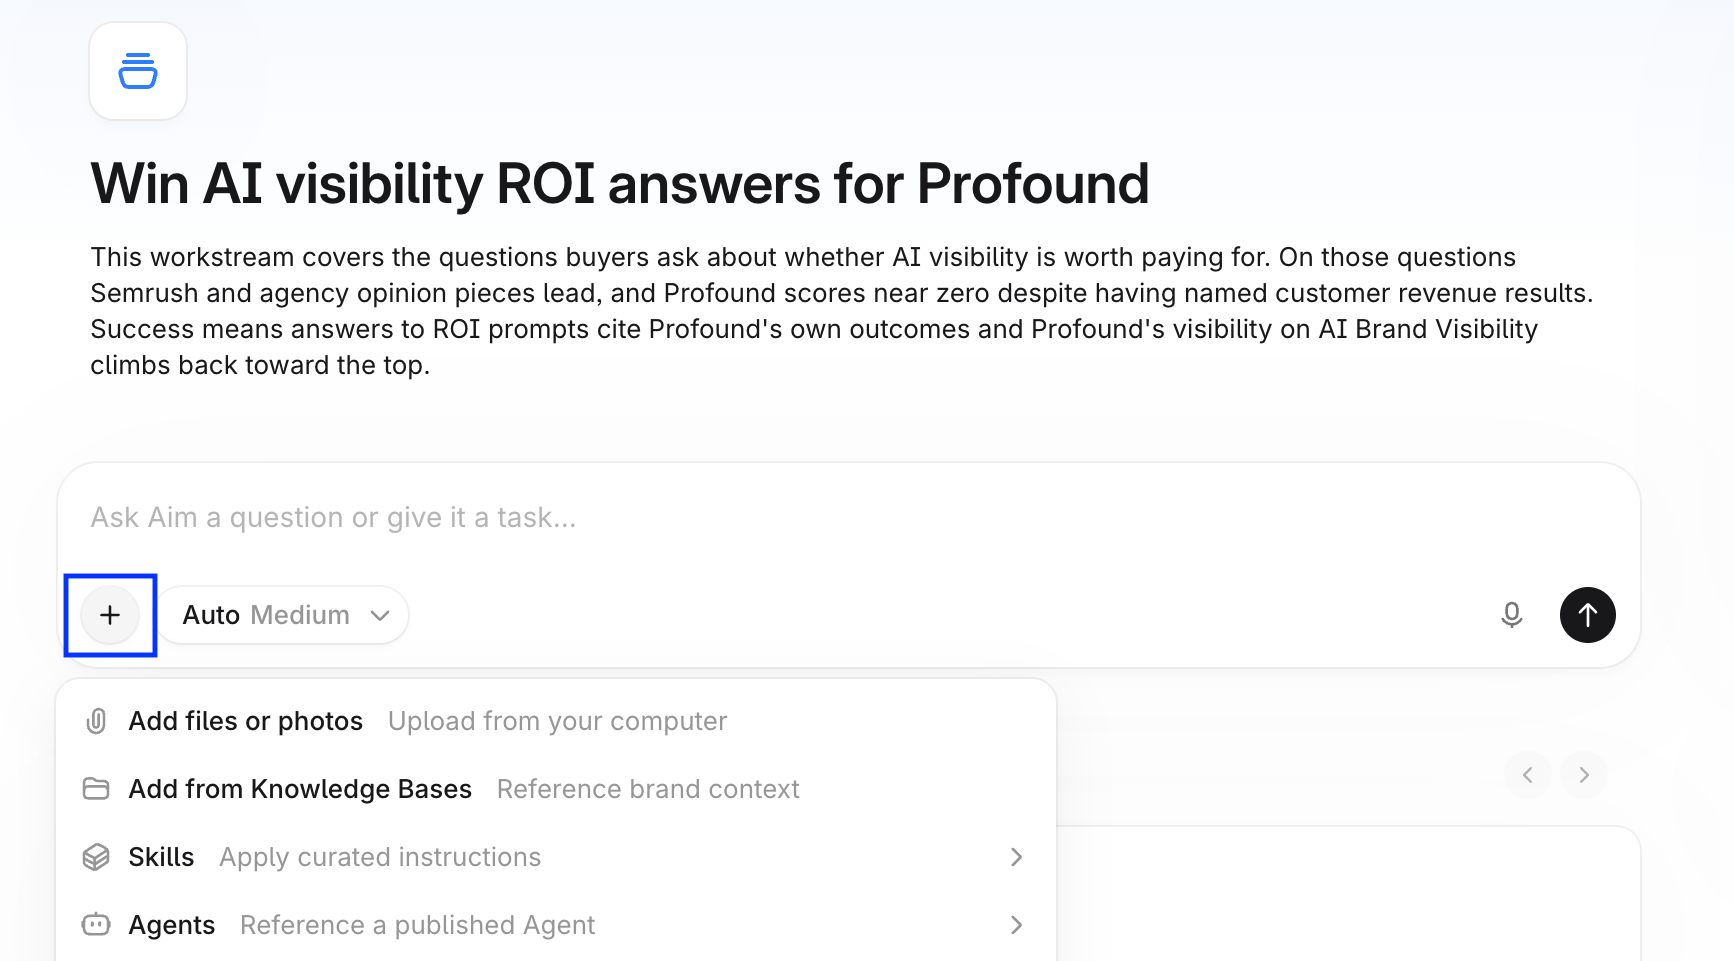
チャットボックスで **+** を選択すると、ファイル、画像、Knowledge Base のドキュメント、Agents を追加したり、外部ツールを接続したりできます。チャット内で `/` を入力して、ファイルやスキルを追加したり、Agent を参照したりすることもできます。
### ファイル、スキル、Agents を追加する
チャットボックスで **+** を選択すると、ファイル、画像、Knowledge Base のドキュメント、Agents を追加したり、外部ツールを接続したりできます。チャット内で `/` を入力して、ファイルやスキルを追加したり、Agent を参照したりすることもできます。
 ## ステップ 4:提案からタスクを開始する
Project ページの右サイドバーで、**Suggestions for you** パネルを開きます。
## ステップ 4:提案からタスクを開始する
Project ページの右サイドバーで、**Suggestions for you** パネルを開きます。
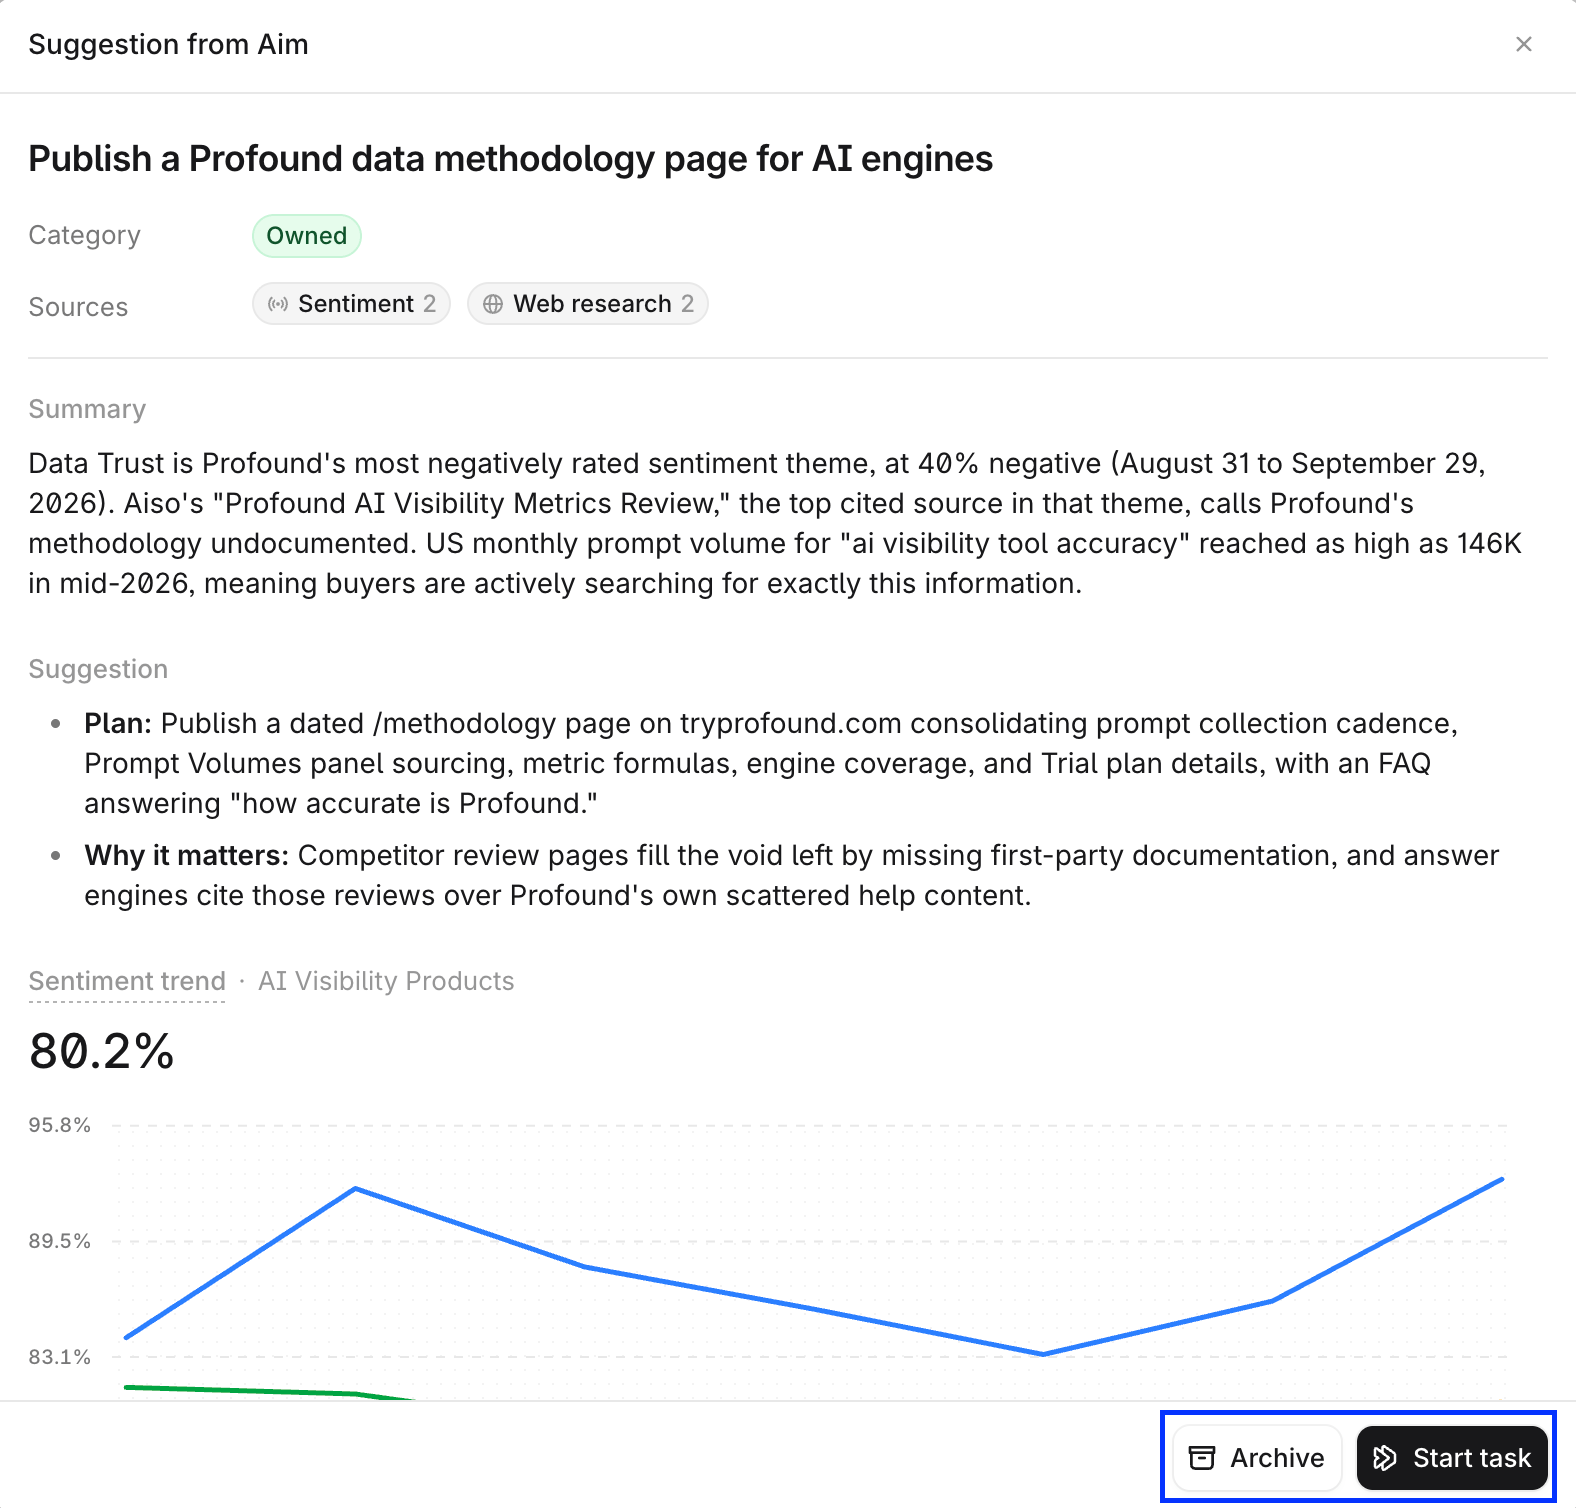
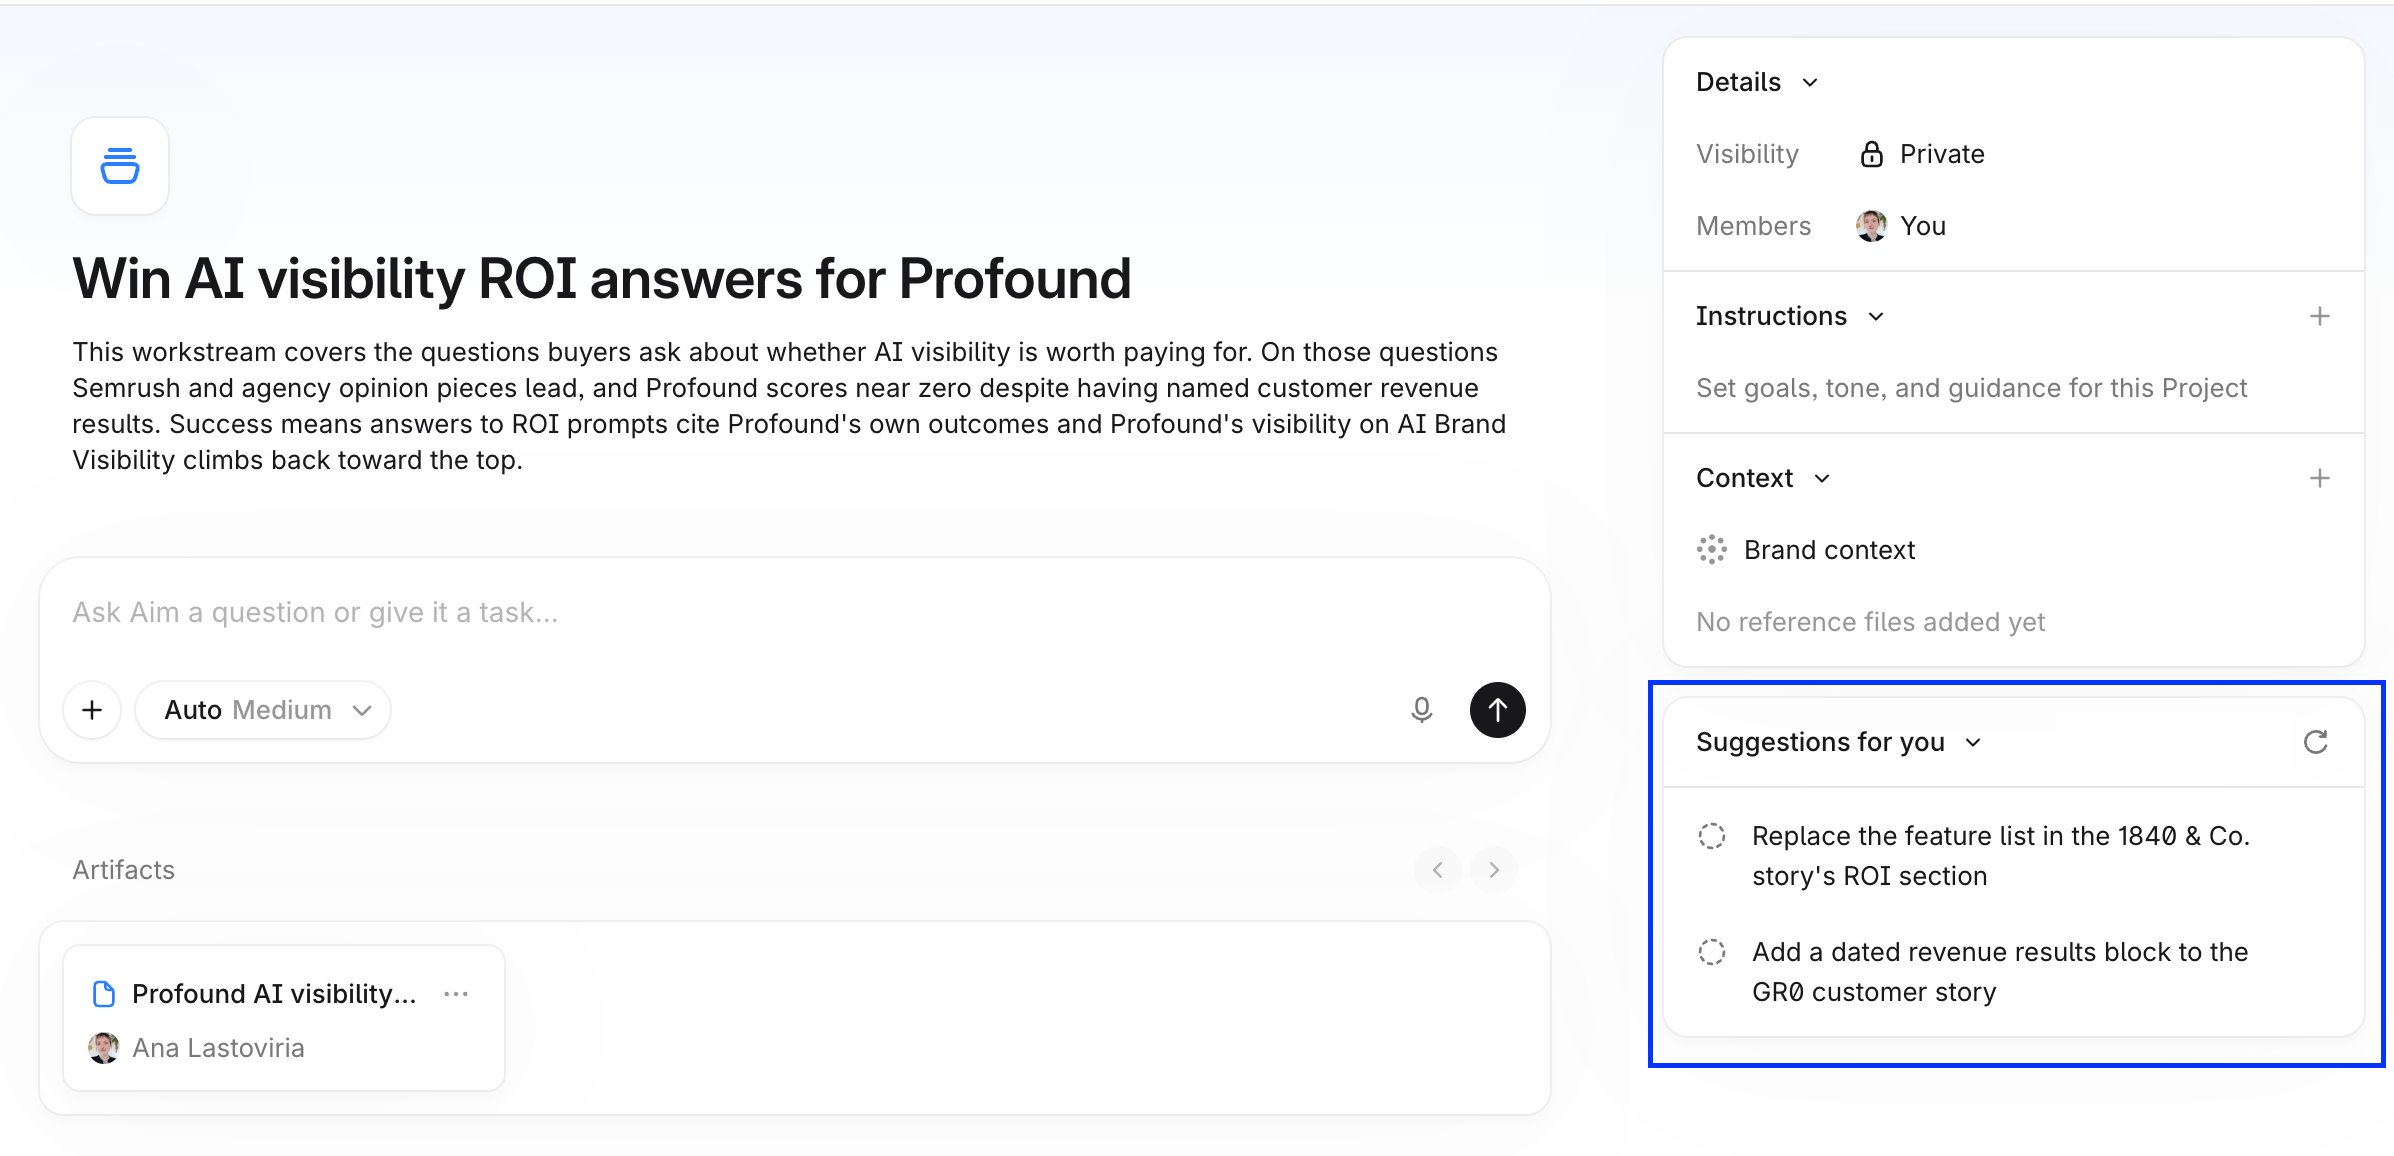 各提案は、Project のコンテキストと過去のチャットに基づいて Aim が推奨するタスクです。提案を開くと、概要、計画、カテゴリ、ソース、そしてそれが役立つ理由を確認できます。
提案を実行するには、カードの **Start task** を選択します。Aim が新しいチャットを開き、計画に沿って作業を開始します。提案を却下するには、**Archive** を選択します。
各提案は、Project のコンテキストと過去のチャットに基づいて Aim が推奨するタスクです。提案を開くと、概要、計画、カテゴリ、ソース、そしてそれが役立つ理由を確認できます。
提案を実行するには、カードの **Start task** を選択します。Aim が新しいチャットを開き、計画に沿って作業を開始します。提案を却下するには、**Archive** を選択します。
 提案をアーカイブする際にフィードバックを追加すると、今後の提案の精度が向上します。
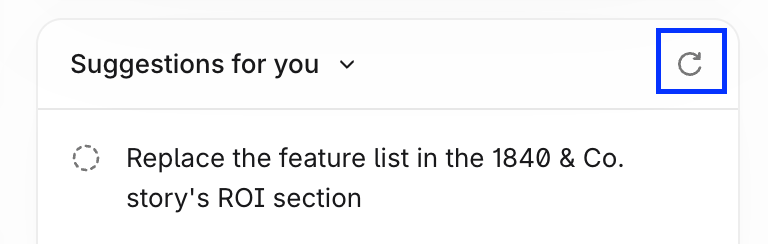
新しい提案を確認するには、パネルの更新アイコンを選択します。
提案をアーカイブする際にフィードバックを追加すると、今後の提案の精度が向上します。
新しい提案を確認するには、パネルの更新アイコンを選択します。
 ## ステップ 5:Project をチームと共有する
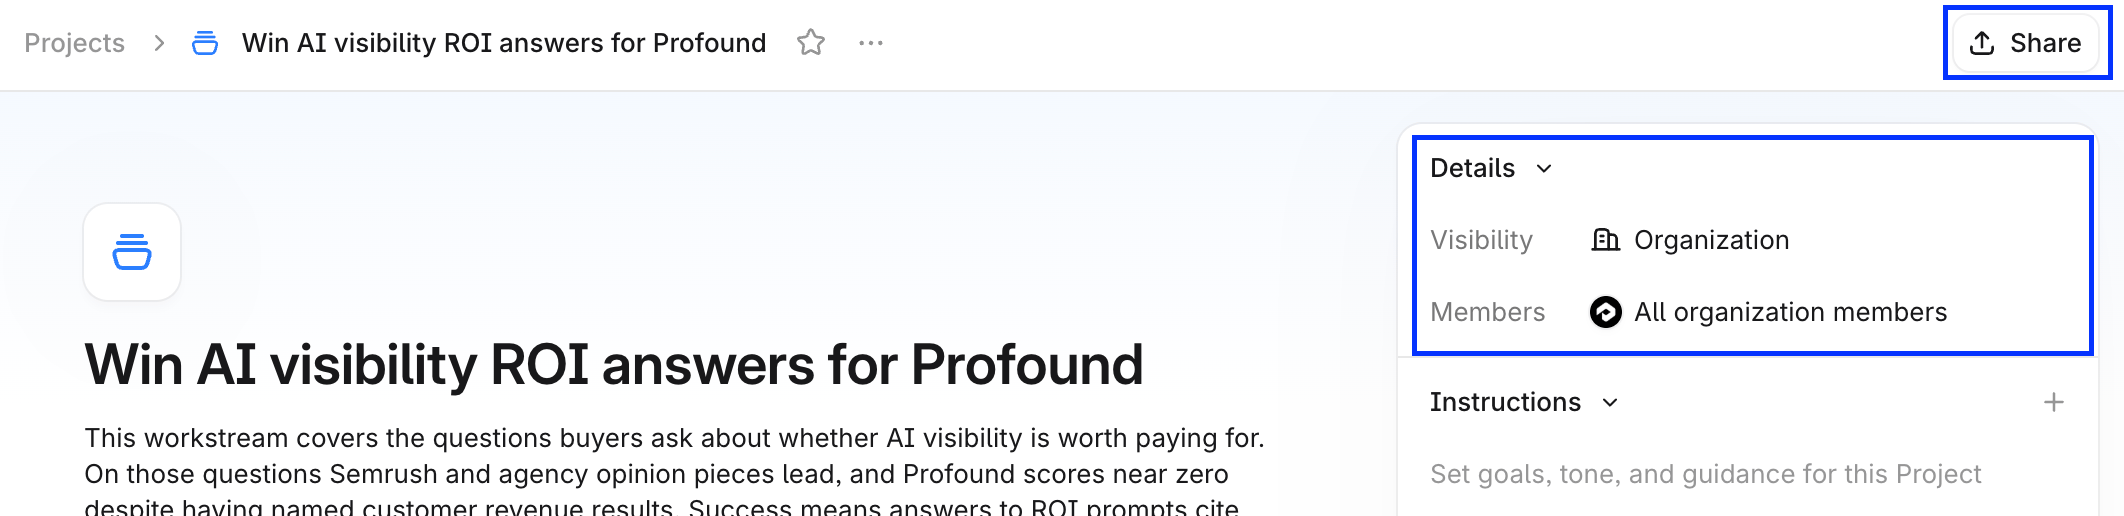
Project ページの上部で **Share** を選択します。一般アクセスを **Your organization** に設定するか、**Only people invited** を選択して組織内のメンバーを検索して招待します。招待されたメンバーは、Project ページの右サイドバーの **Details** の下に表示されます。
## ステップ 5:Project をチームと共有する
Project ページの上部で **Share** を選択します。一般アクセスを **Your organization** に設定するか、**Only people invited** を選択して組織内のメンバーを検索して招待します。招待されたメンバーは、Project ページの右サイドバーの **Details** の下に表示されます。
 メンバーは Project、そのコンテキスト、チャットを閲覧でき、自分でチャットを開始したり Artifact を追加したりできます。各チャットは、開始したメンバー以外には閲覧専用です。すべてのチャットの Artifact は Project の **Artifacts** セクションに表示され、どのメンバーでも開くことができます。