> ## Documentation Index
> Fetch the complete documentation index at: https://docs.tryprofound.com/llms.txt
> Use this file to discover all available pages before exploring further.
# Connect WRITER AI Studio to Profound MCP
Connect Profound MCP to WRITER's AI Studio so your WRITER agents can pull live data directly from Profound.
## Before you start
You'll need:
* Access to [WRITER AI Studio](http://app.writer.com/aistudio)
* A [Profound](https://www.tryprofound.com/) account
## Setup guide
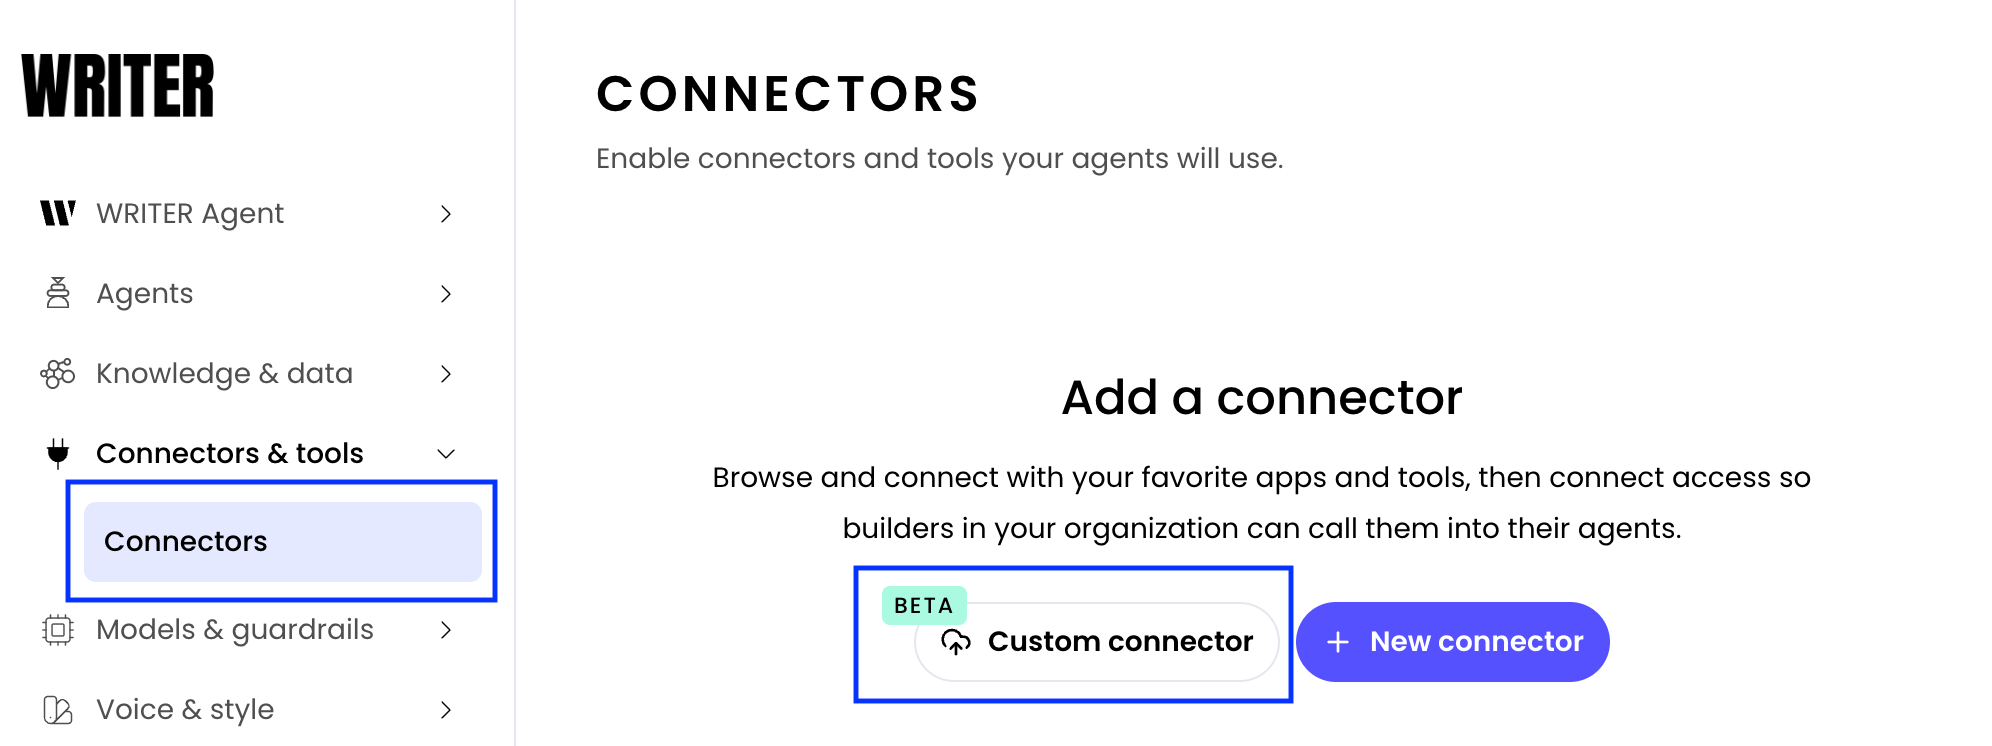
In WRITER AI Studio, go to **Connectors & Tools > Connectors** in the left sidebar and select **+ Custom connector**.
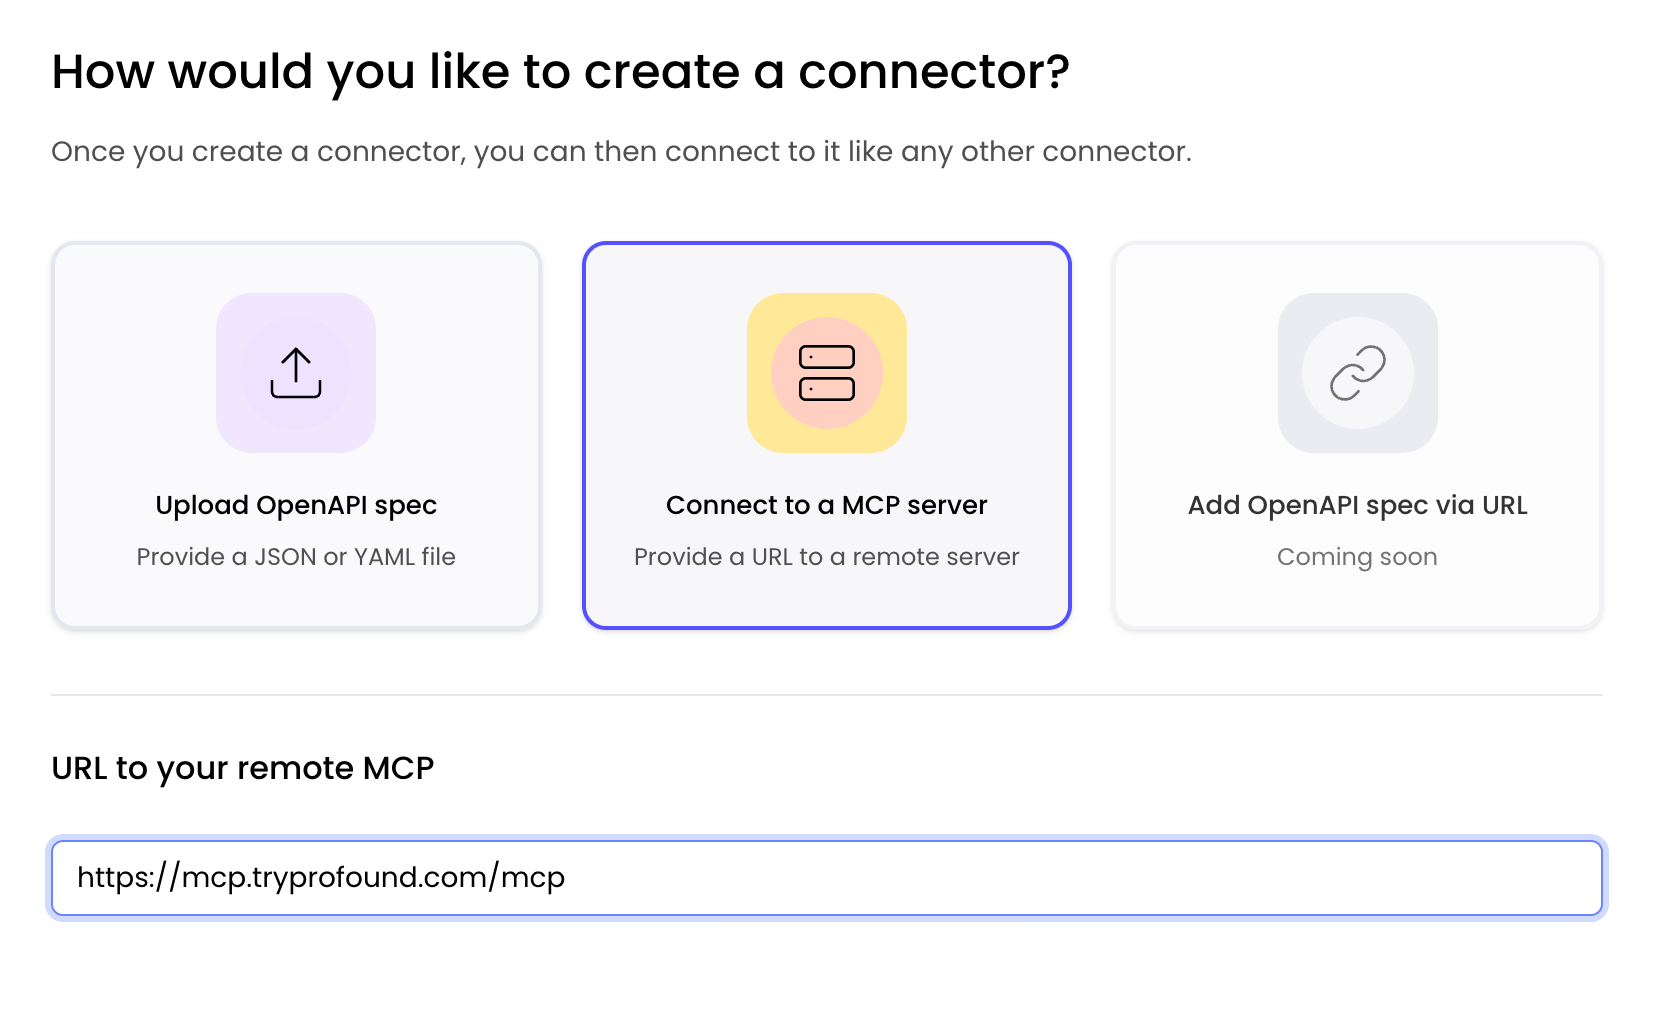
 When prompted to choose a connector type, select **Connect to an MCP server** and enter the Profound server URL: `https://mcp.tryprofound.com/mcp`.
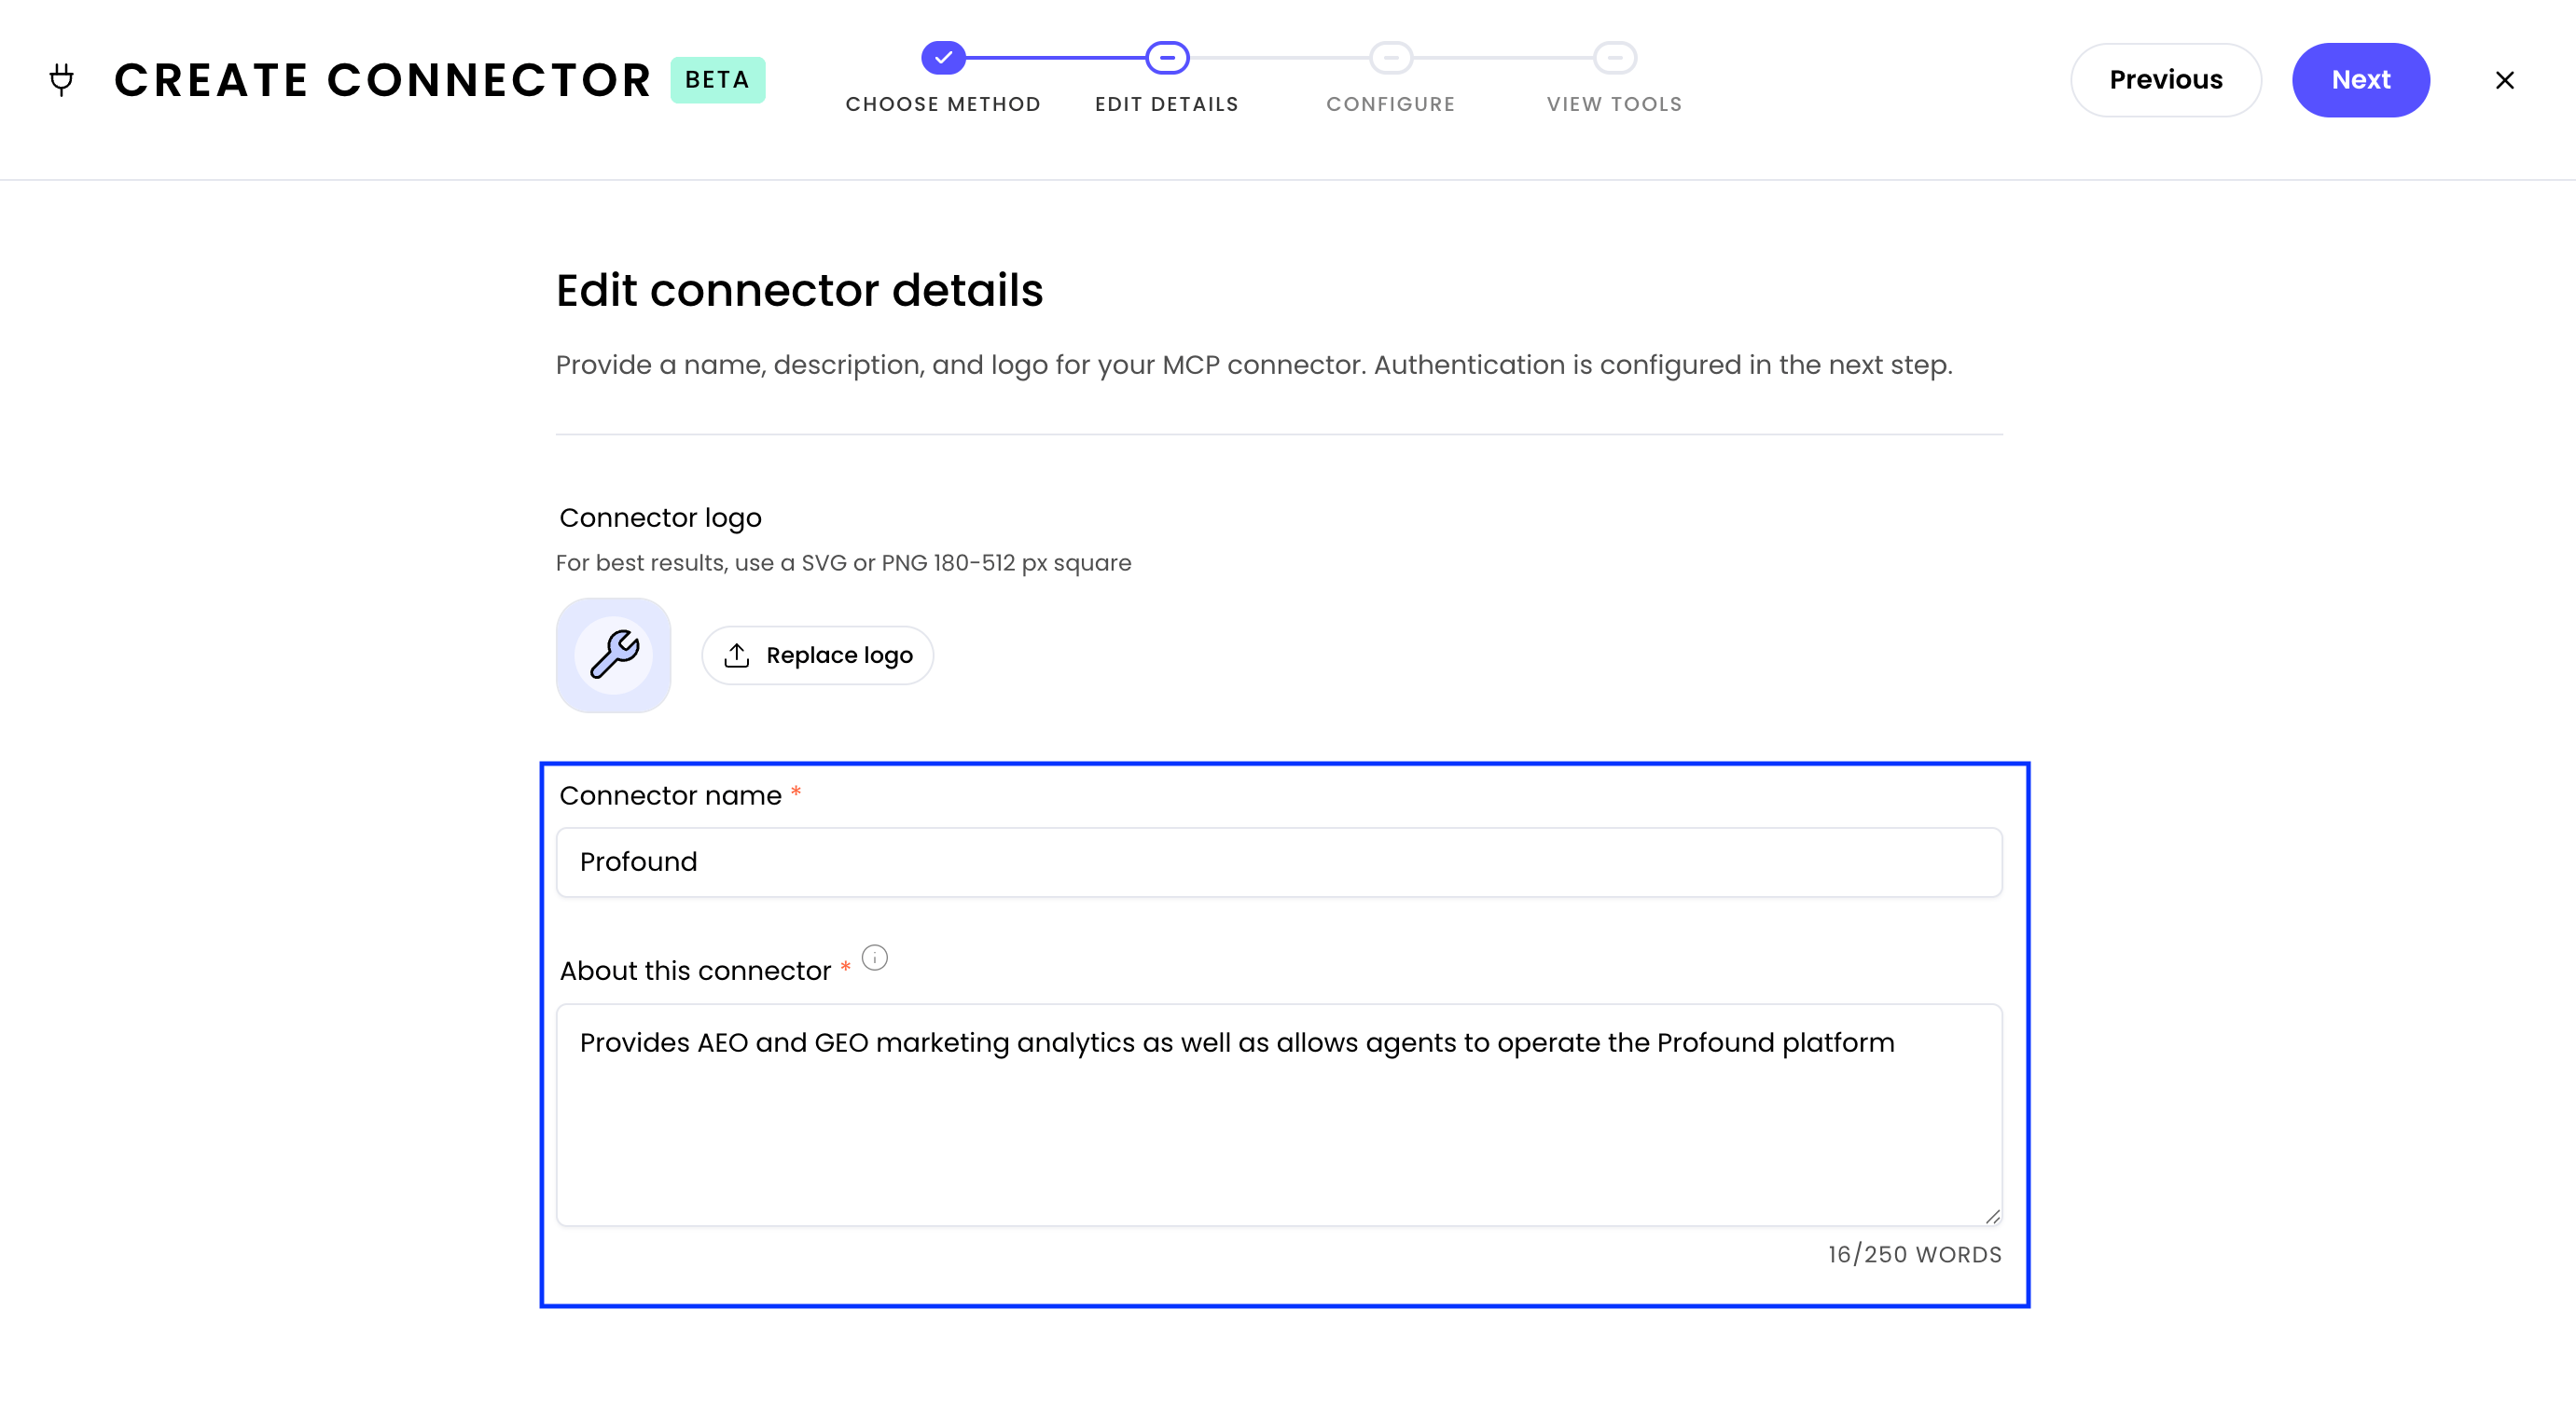
 In the **Edit connector details** screen, fill in the fields as follows:
* **Connector name:** Profound
* **About this connector:** Provides AEO and GEO marketing analytics as well as allows agents to operate the Profound platform
In the **Edit connector details** screen, fill in the fields as follows:
* **Connector name:** Profound
* **About this connector:** Provides AEO and GEO marketing analytics as well as allows agents to operate the Profound platform
 Select **Next**.
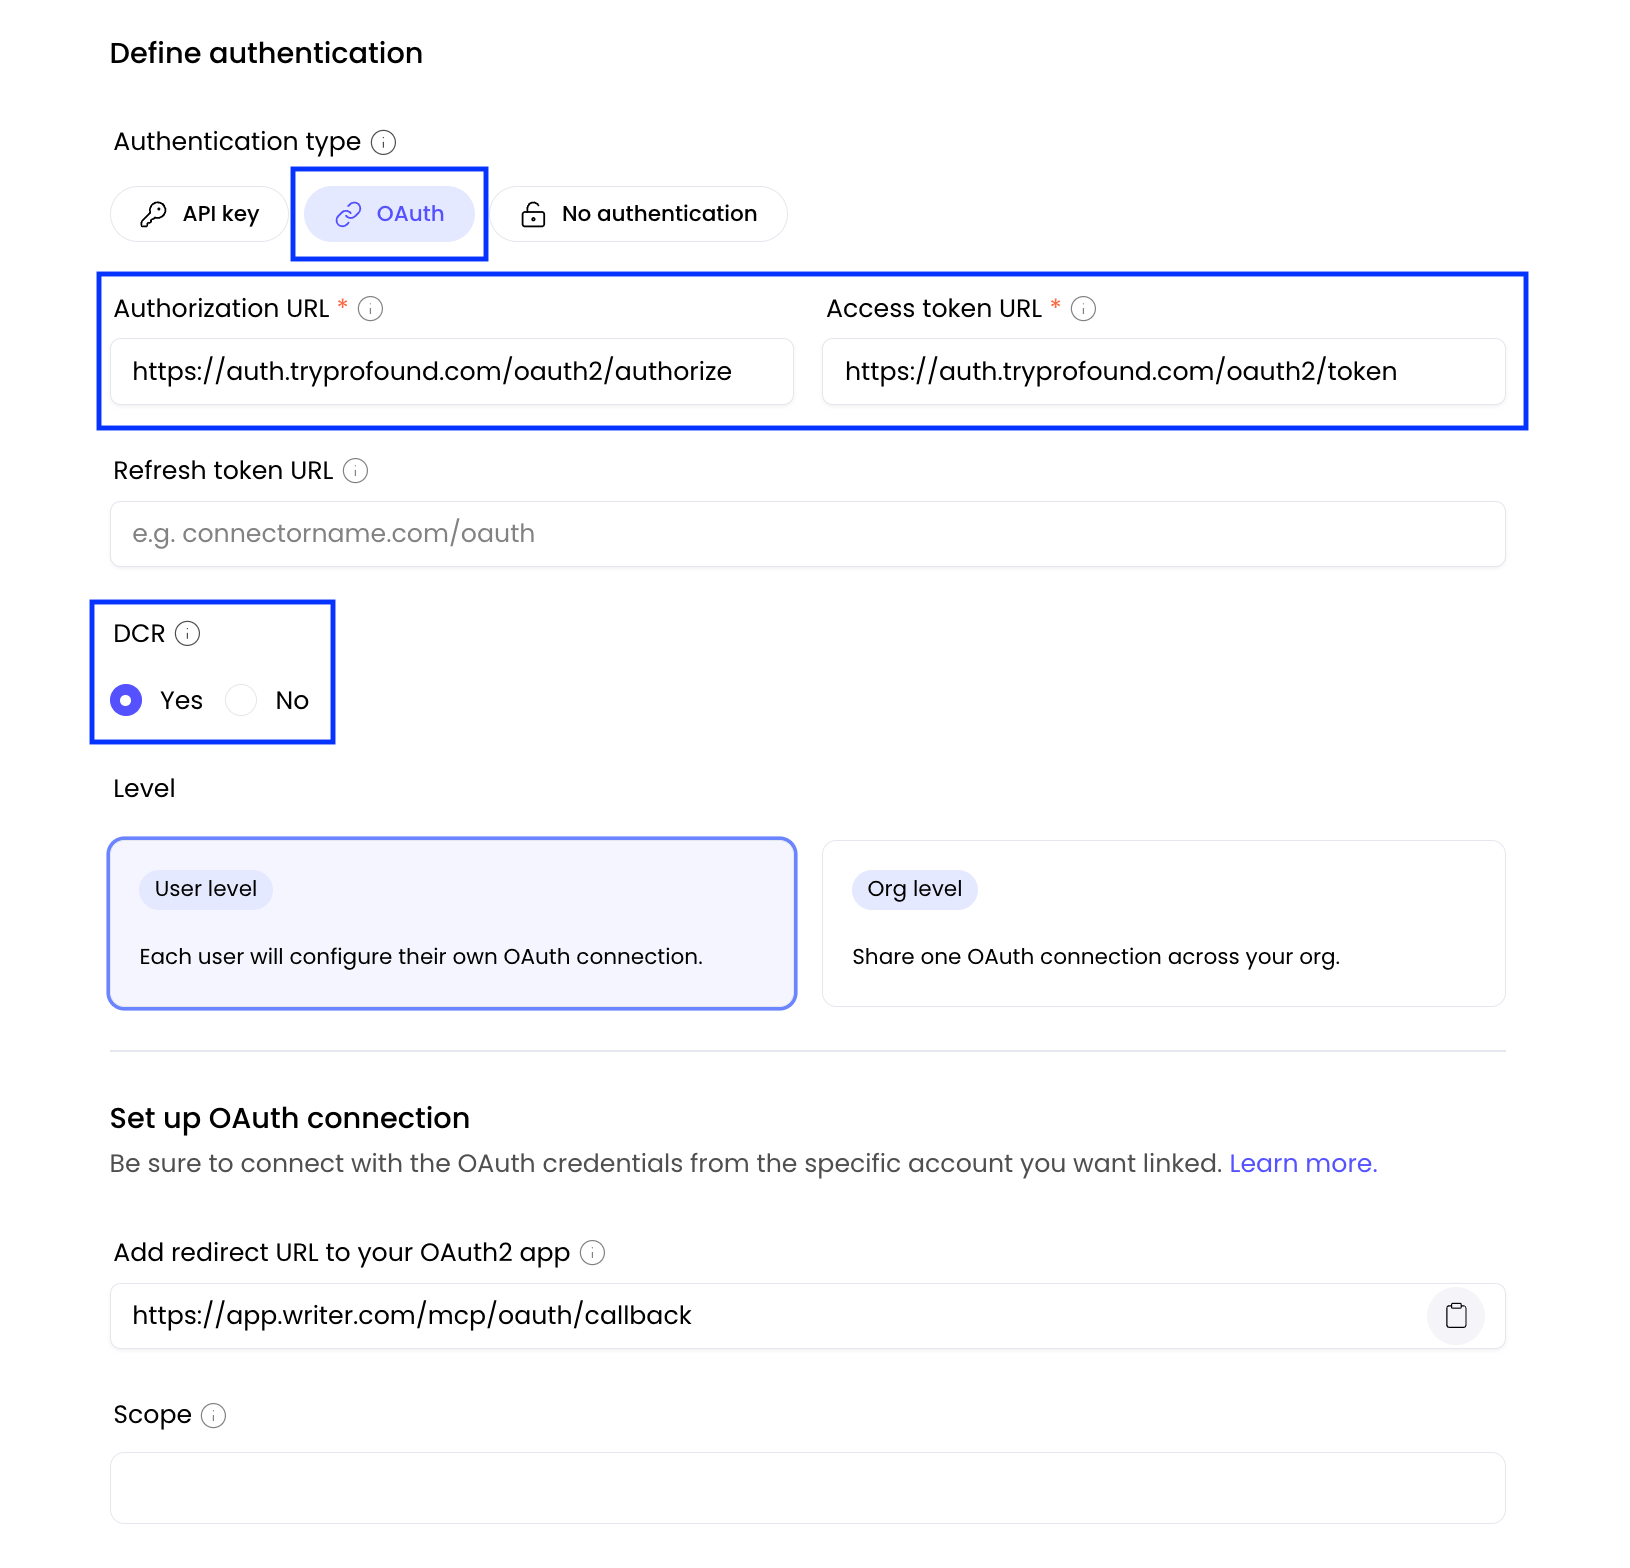
On the **Connect to Profound** screen, scroll to **Define Authentication** and fill in the fields:
* **Authentication type:** OAuth
* **Authorization URL:** `https://auth.tryprofound.com/oauth2/authorize`
* **Access token URL:** `https://auth.tryprofound.com/oauth2/token`
* **DCR:** Yes
Select **Next**.
On the **Connect to Profound** screen, scroll to **Define Authentication** and fill in the fields:
* **Authentication type:** OAuth
* **Authorization URL:** `https://auth.tryprofound.com/oauth2/authorize`
* **Access token URL:** `https://auth.tryprofound.com/oauth2/token`
* **DCR:** Yes
 Leave the rest of the fields empty or at their default values, and select **Next** to complete the connection.
To confirm everything is working:
1. Go to **Connectors & Tools > Connectors** in the left sidebar in the AI Studio UI.
2. Select **+ New connector**.
3. Look for the Profound connector in the list.
Leave the rest of the fields empty or at their default values, and select **Next** to complete the connection.
To confirm everything is working:
1. Go to **Connectors & Tools > Connectors** in the left sidebar in the AI Studio UI.
2. Select **+ New connector**.
3. Look for the Profound connector in the list.
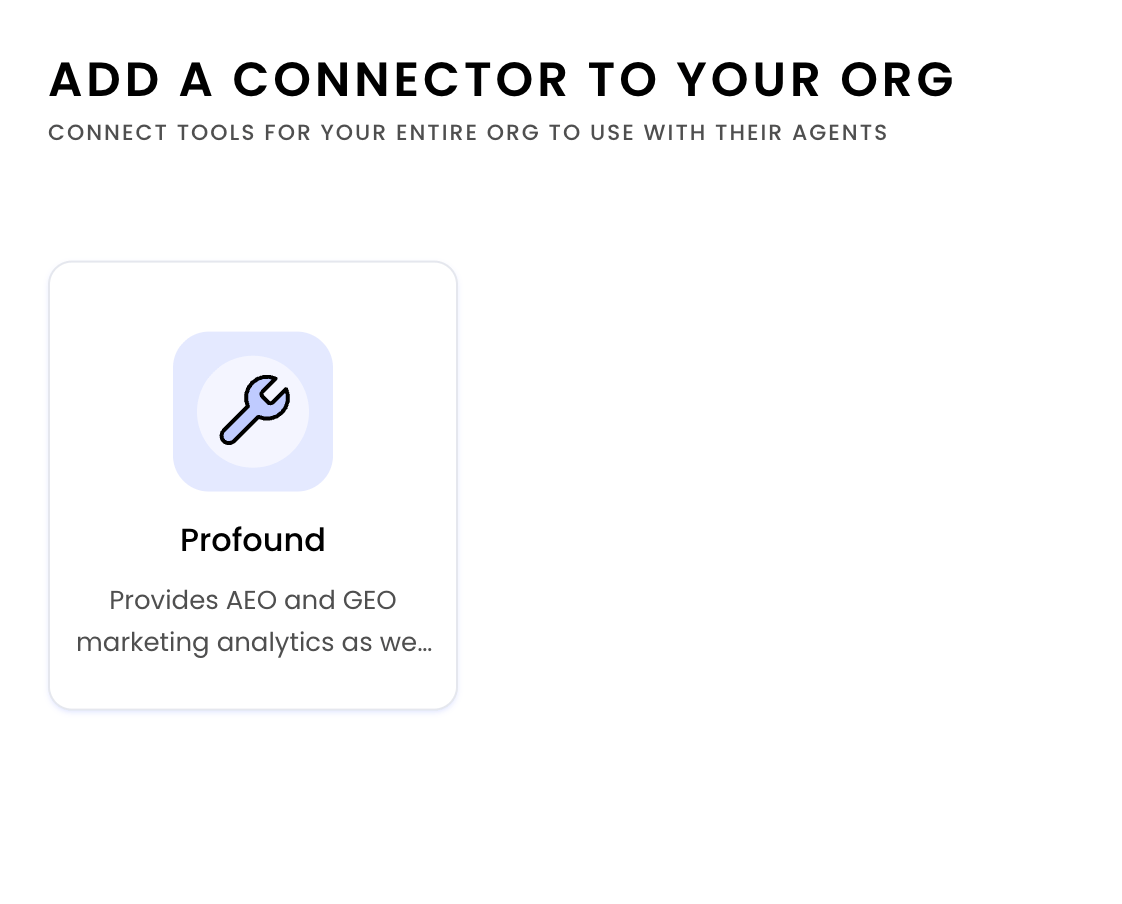 Your Profound MCP connector is now available to use.
For more details about configuring custom MCP connectors in AI Studio, see WRITER's [Custom connectors guide](https://dev.writer.com/home/custom-connectors).
## Troubleshooting
### Rate limit exceeded
If you see a `rate limit reached` error, it's coming from WRITER. Wait a few minutes and try creating a connector again.
### Connection failed
If the connection fails after the rate limit error, the connector may have still been created. Check your available connectors and if it's not there, try creating a connector again.
Your Profound MCP connector is now available to use.
For more details about configuring custom MCP connectors in AI Studio, see WRITER's [Custom connectors guide](https://dev.writer.com/home/custom-connectors).
## Troubleshooting
### Rate limit exceeded
If you see a `rate limit reached` error, it's coming from WRITER. Wait a few minutes and try creating a connector again.
### Connection failed
If the connection fails after the rate limit error, the connector may have still been created. Check your available connectors and if it's not there, try creating a connector again.