

QUICK FACTS
- SSO setup is self-serve. Anyone can complete it and pass the values to their IT team.
- You set up SSO in the configuration portal, which takes you outside Profound.
- Exit the setup and come back anytime. The values you entered or generated stay in place, and your team keeps signing in as usual until you enable SSO in the last step of this guide.
- Profound doesn’t publish fixed SSO connection values such as the redirect URI, and you don’t need to request them. The portal generates them for your organization as you follow the setup steps.
Before you start
You’ll need:- The Admin role in your Profound organization
- Administrative access to your IdP and to the OIDC authorization server your users sign in through
- The domain you want to enable for SSO
- Access to your DNS records to verify domain ownership
- An account in your IdP on the SSO domain, for running the test sign-in. You assign this account to the Profound application in Step 4
Setup steps
1
Open the SSO configuration portal
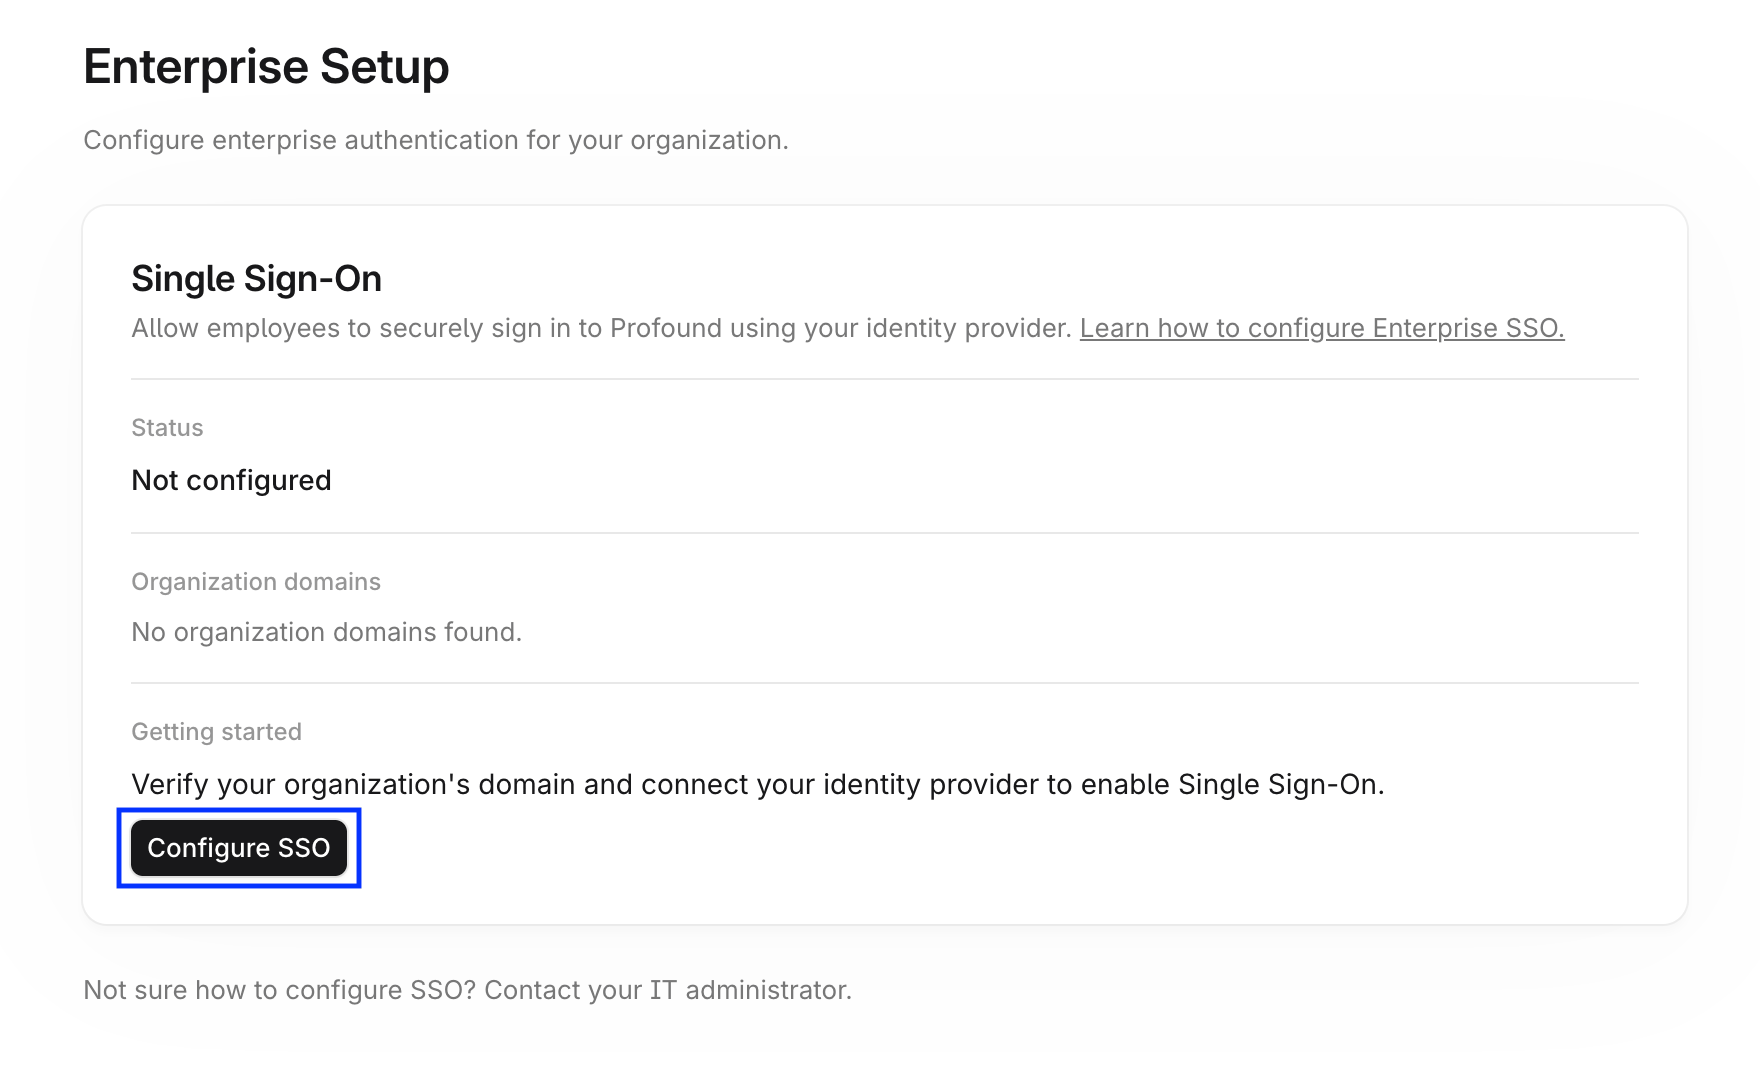
- In Profound, select your organization name at the top left of the screen, then select Settings.
- Select Enterprise Setup under Organization in the left navigation sidebar. The Single Sign-On card shows your current SSO status and verified domains.
-
Select Configure SSO to open the configuration portal.
2
Verify your domain
The portal takes you to the domain verification step. The Domain verification guide walks through this step and its troubleshooting in detail.After your domain is verified, the Single Sign-On card shows the status In progress until you enable SSO.
3
Select the custom OIDC option
On the identity provider step, select the custom OIDC option instead of a named provider.The portal switches to the Custom OIDC flow, which has its own steps:
- Provide an Identity Provider Name
- Create an Application
- Add Claims
- Provide your OIDC Configuration
- Test Single Sign-On
4
Create an application in your authorization server
The portal shows the Login redirect URI that your authorization server takes users to after they sign in. It’s generated for your connection and doesn’t appear anywhere else in Profound. Copy it from the portal.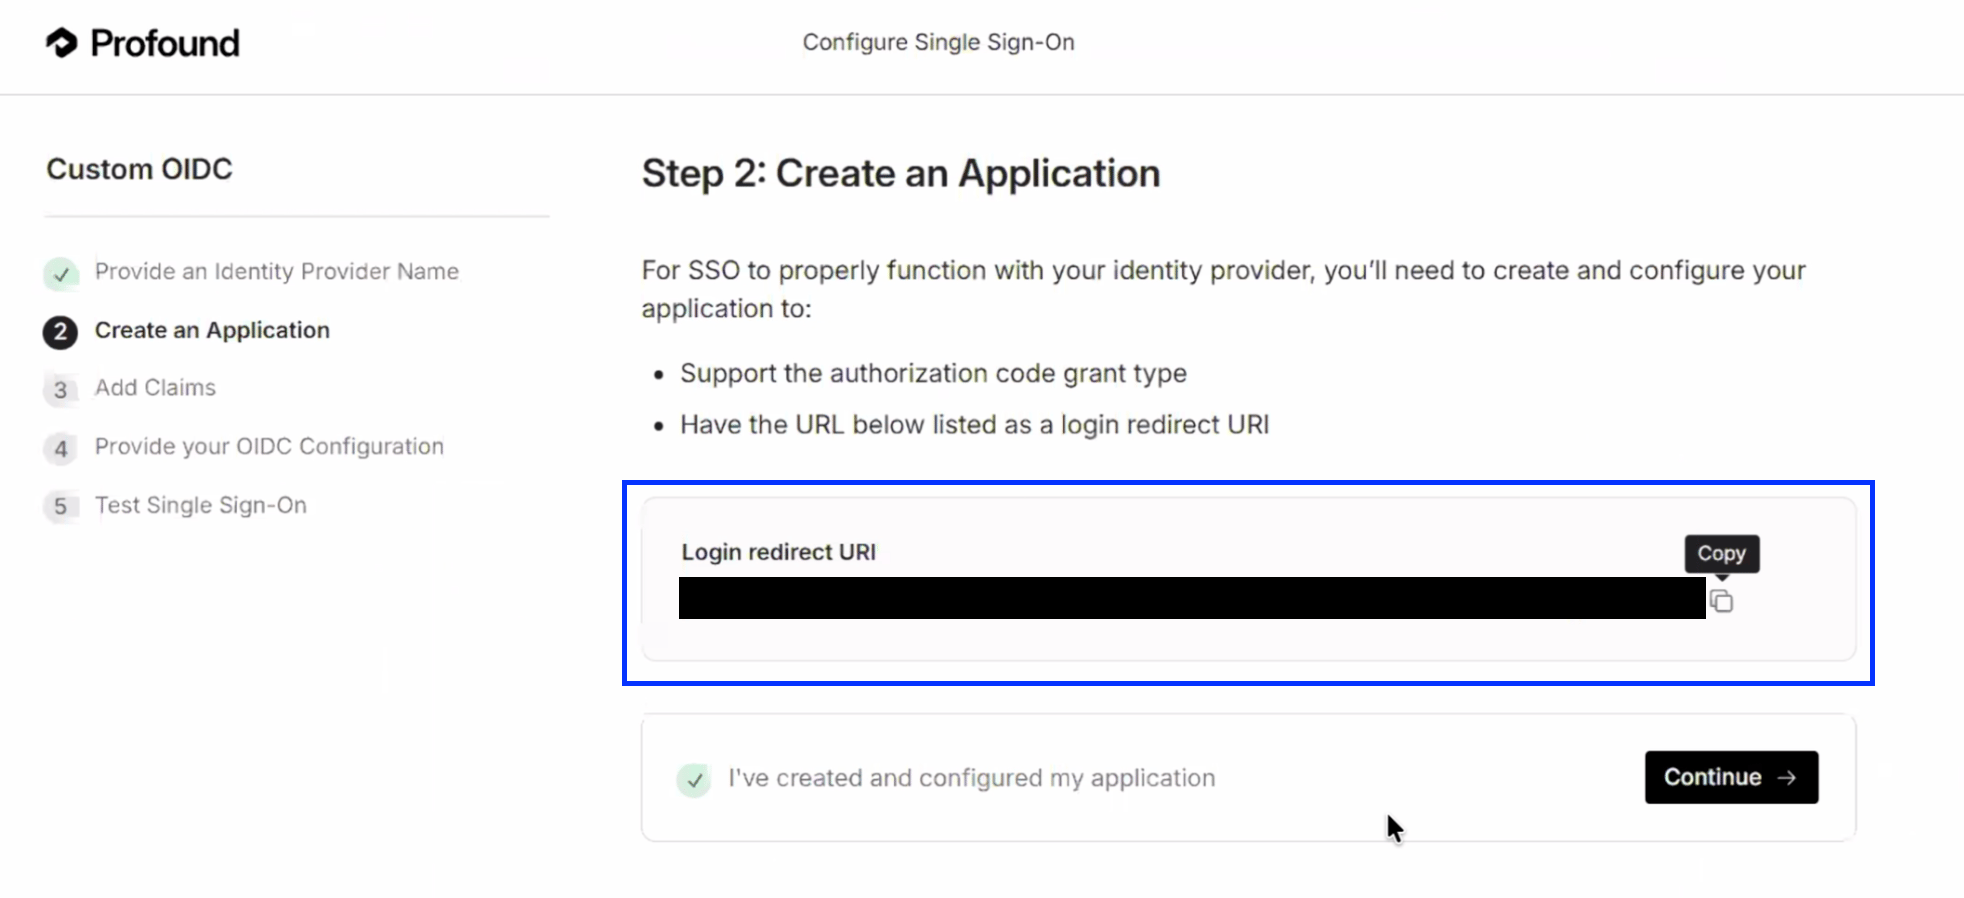
- Uses the OIDC sign-in method.
- Uses the authorization code grant.
- Authenticates with a client ID and client secret.
- Has Profound’s Login redirect URI as its sign-in redirect URI. Replace any placeholder your IdP pre-fills, such as a
localhostaddress. - Is assigned to the users or groups who sign in to Profound, including the account you plan to test with.
If your custom authorization server has its own access policies, make sure one of them allows the application you created for Profound to request tokens.
5
Add claims to the ID token
The portal lists the claims that Profound reads from the ID token your authorization server issues. For many providers the required claims are included by default. For others, you need to add them to the ID token in your authorization server’s settings.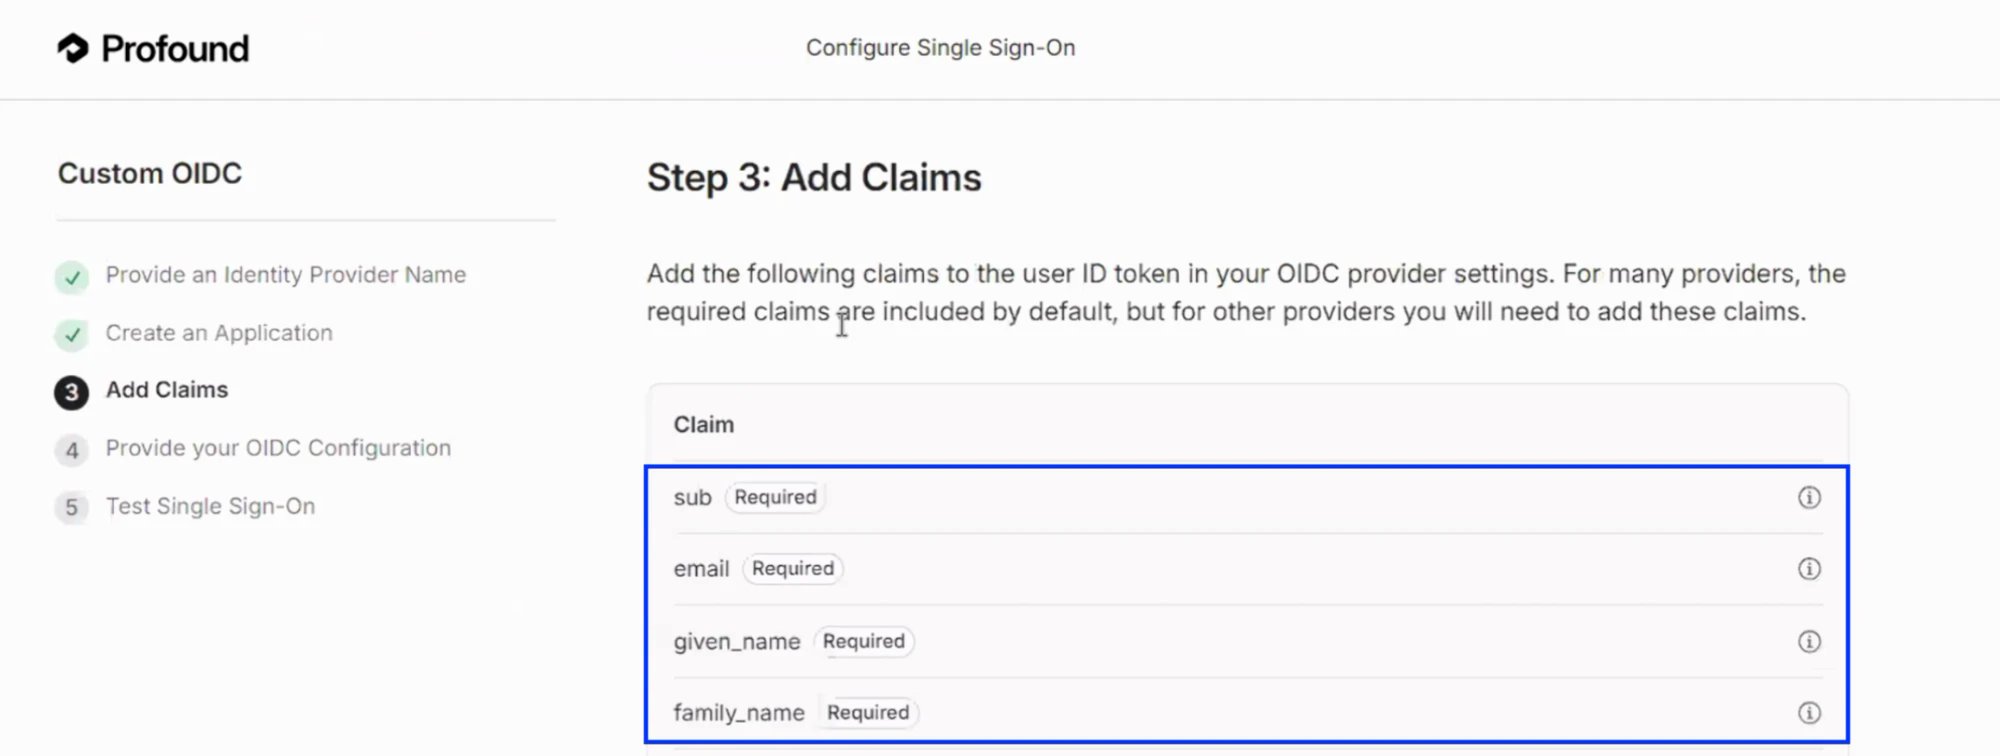
Add the claims, then select Continue.If your authorization server returns these claims only from its userinfo endpoint and not in the ID token, continue without adding them to the ID token and turn on Use userinfo endpoint in Step 6.
6
Provide your OIDC configuration
Enter the values from your authorization server:
-
Discovery endpoint: the URL of your authorization server’s OIDC discovery document. For example,
your-company.okta.com/.../.well-known/openid-configuration. -
Client ID and Client secret: the credentials of the application you created in Step 4.
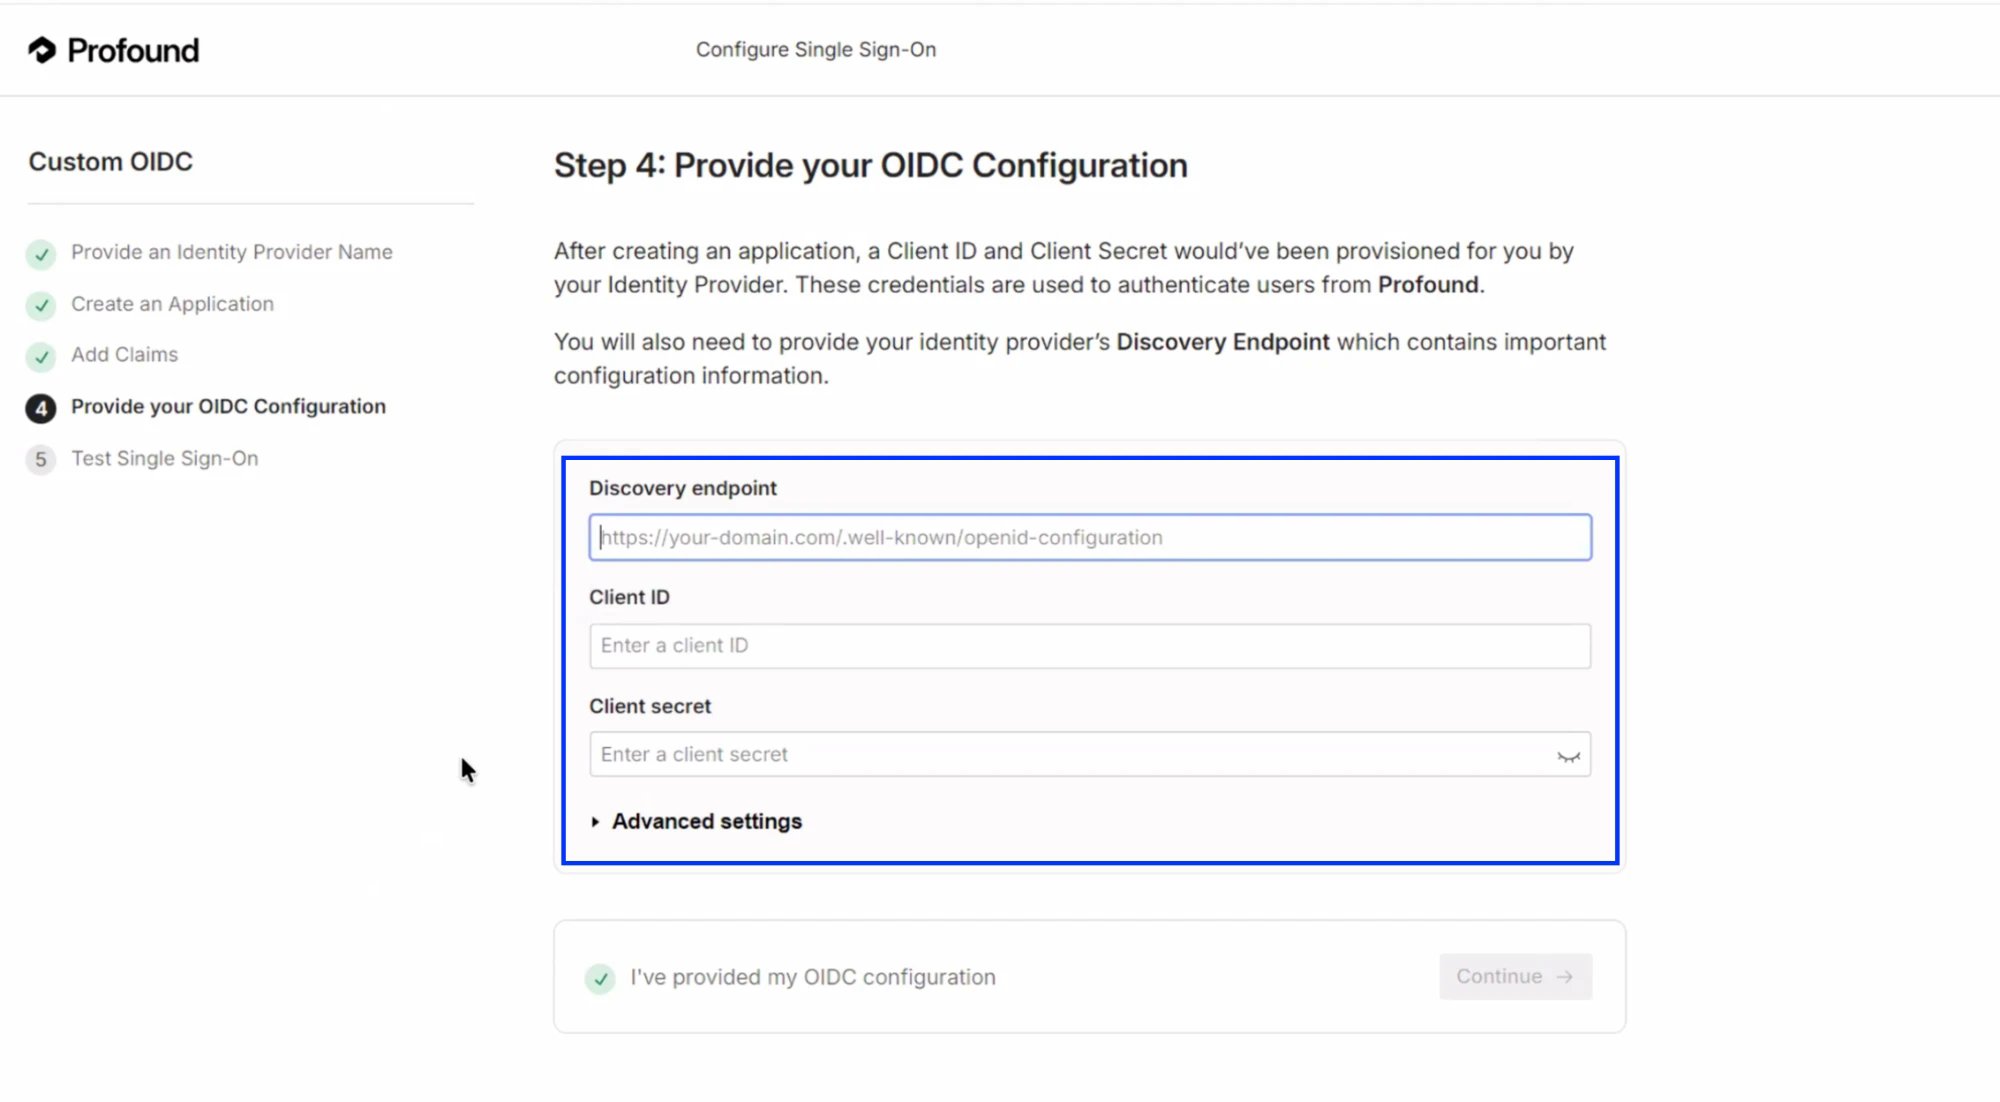
Select Continue. The portal checks that the discovery endpoint is reachable before it lets you continue.
7
Test single sign-on
When you’re ready to test the connection, select Continue to sign-in.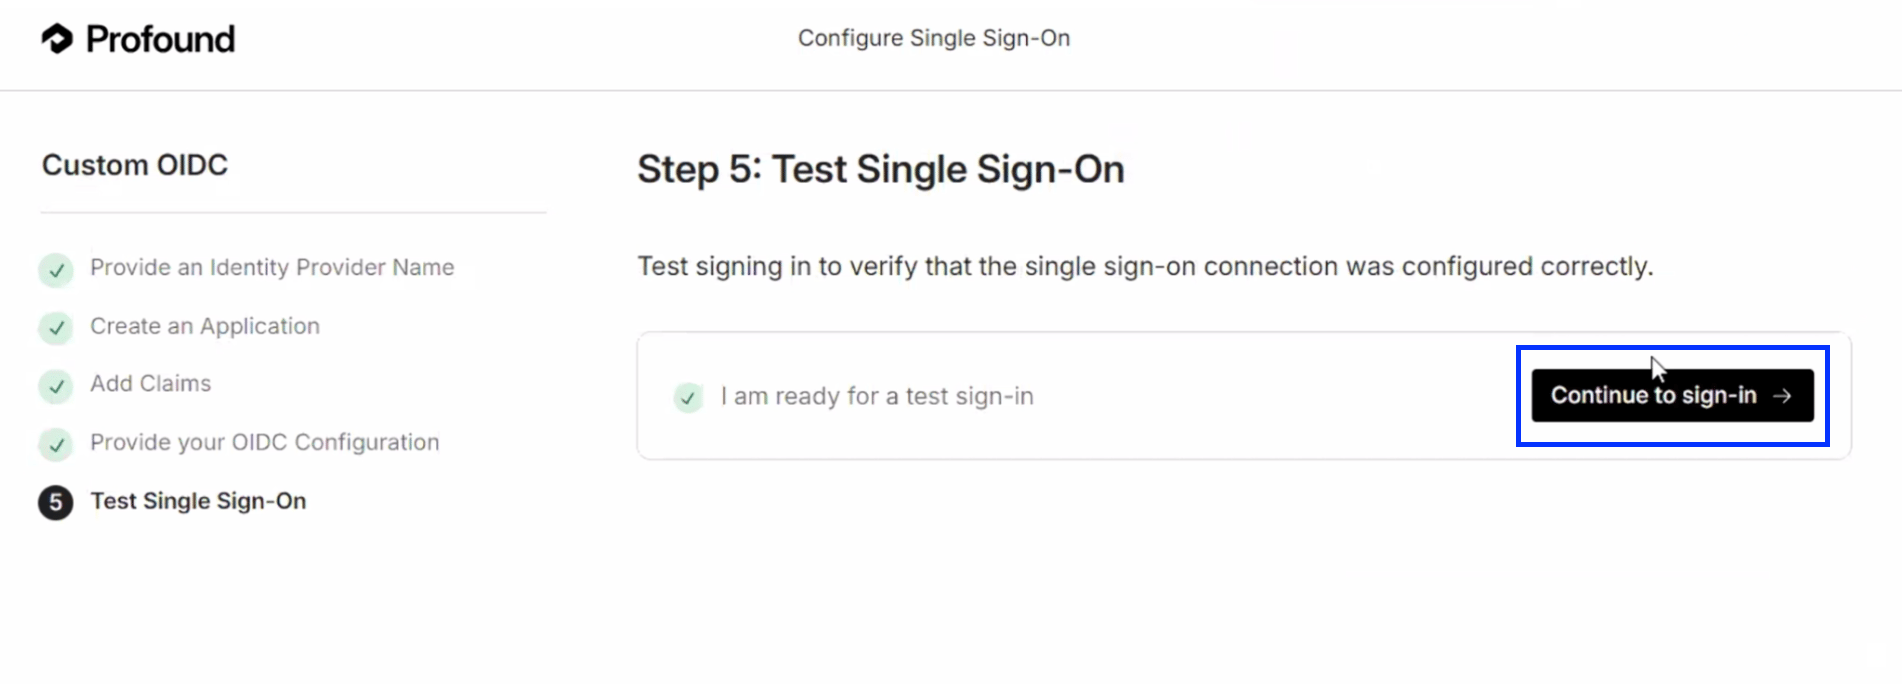
- If the test succeeds, continue to the next step.
- If the test fails, the portal shows the reason. Select Show session details for the session ID, which helps when you troubleshoot with your IdP administrator or Profound’s customer support. Correct the configuration, then select Retry Single Sign-On.
8
Enable SSO
After the test passes, enable SSO for your domain directly from the portal.Back on the Enterprise Setup page, the Single Sign-On card status reads SSO Enabled and your domain is marked Verified. Select Check status to refresh.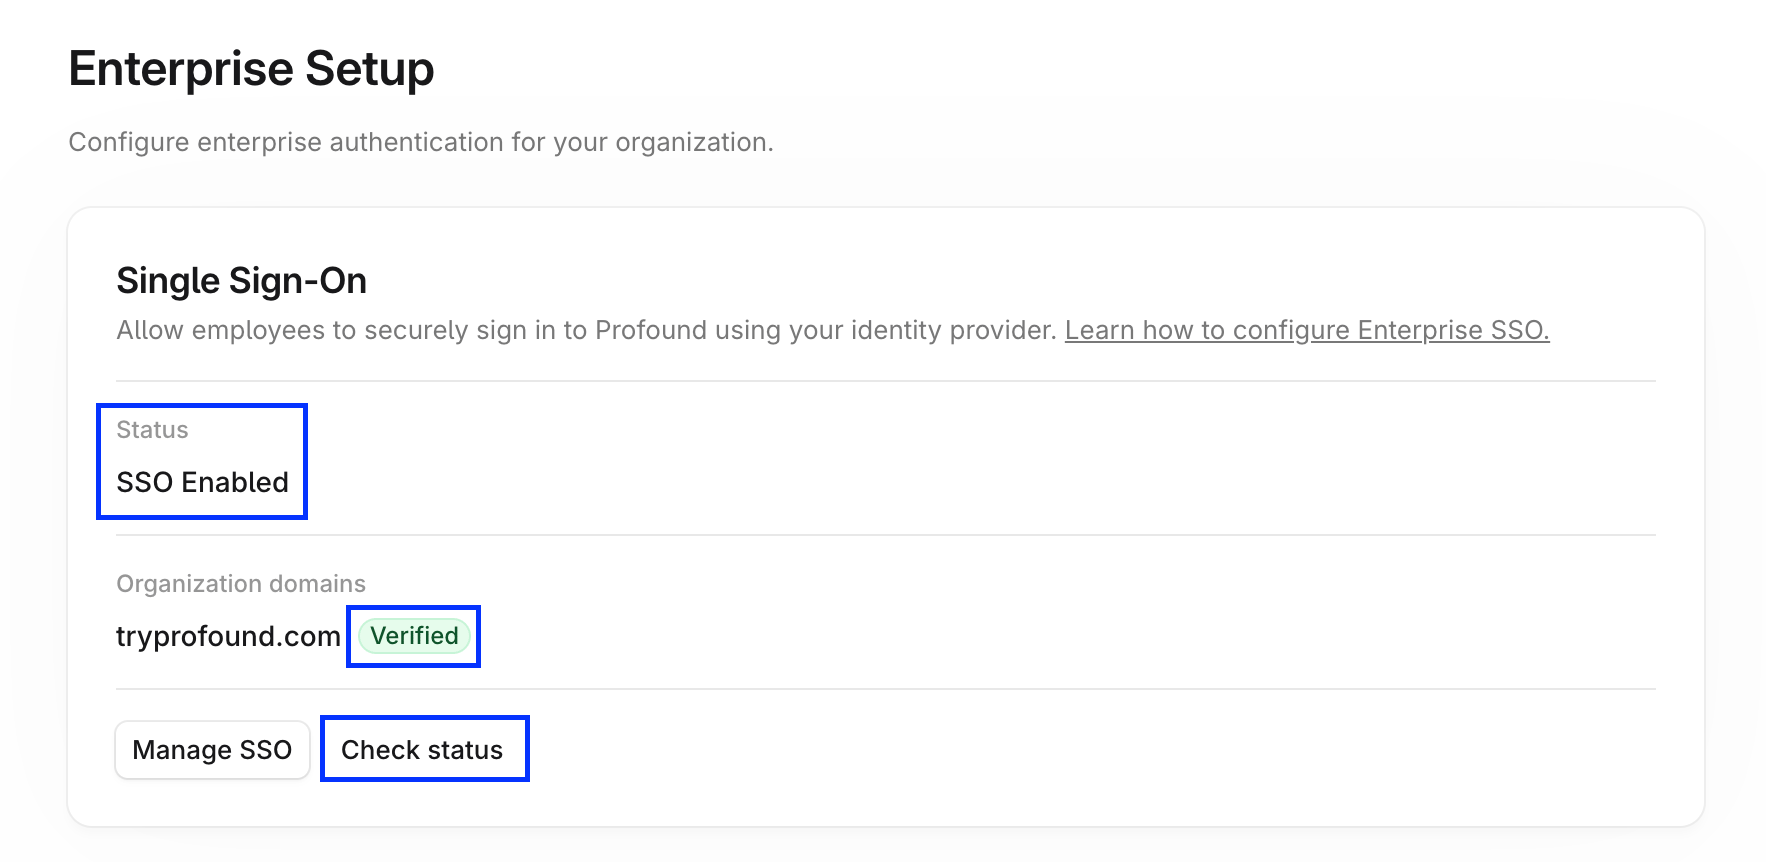
Troubleshooting
Discovery endpoint is unreachable.
Discovery endpoint is unreachable.
Check that the URL you entered is your authorization server’s OIDC discovery document. It must:
- Start with your authorization server’s issuer URL
- End with
/.well-known/openid-configuration
openid-configuration.The test sign-in fails with The identity provider denied access.
The test sign-in fails with The identity provider denied access.
Your IdP refused to sign the test user in to the Profound application. Make sure that the account you’re using to test the connection is assigned to the application in your IdP. If you use an Okta custom authorization server, also confirm that an access policy on that server applies to the Profound application.
Notes
- Each Profound organization needs its own SSO connection.
- Subdomains can’t use the same SSO connection as the root domain: each subdomain needs its own connection.
- Keep each domain’s verification TXT record in place for as long as SSO is enabled for that domain.
- Contact customer support if you need help during setup.