Create a Knowledge Base
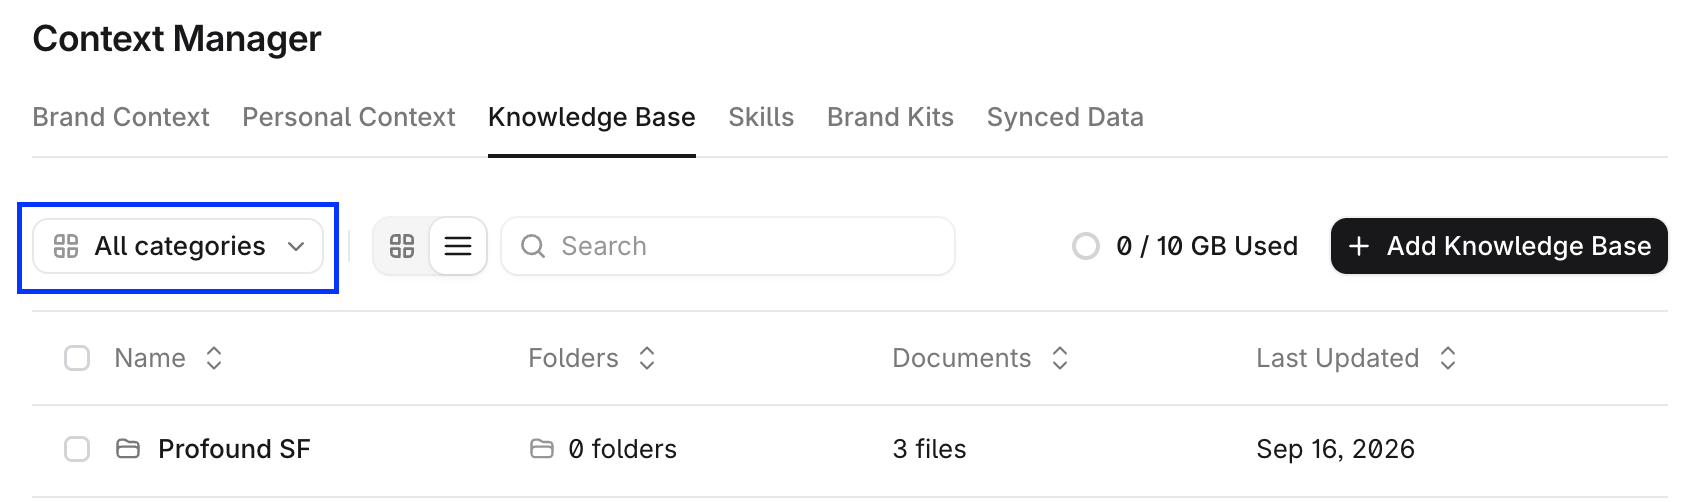
To add a new Knowledge Base:- In Profound platform, go to the Context Manager section in the left navigation bar. Select Knowledge Base tab at the top of the screen.
- Select + Add Knowledge Base.
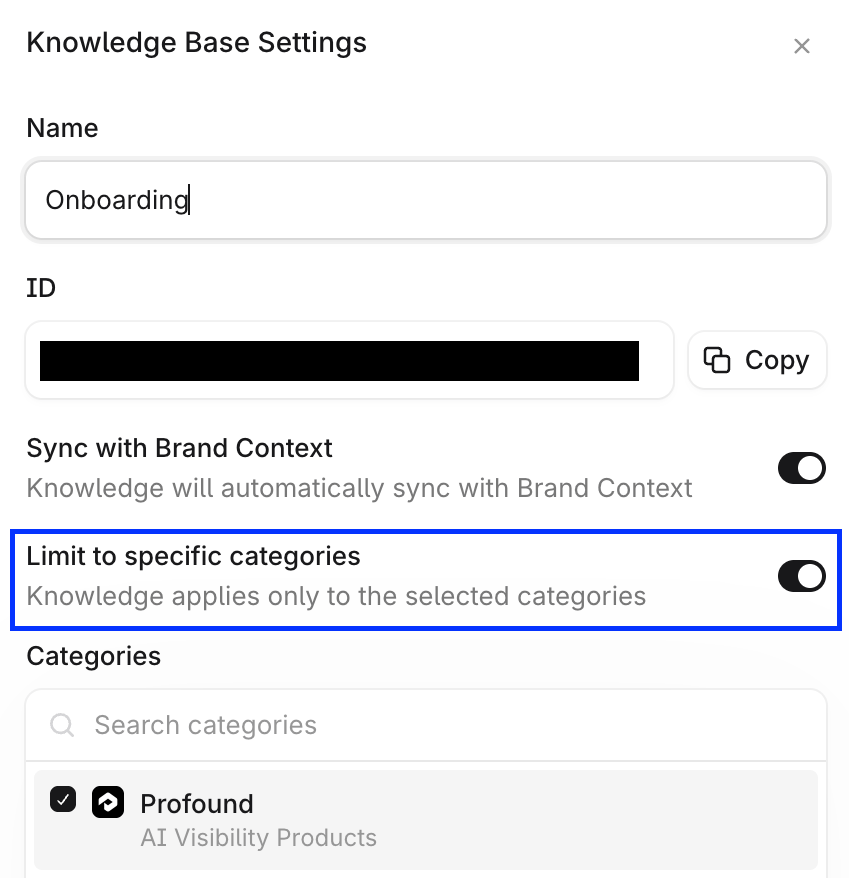
- Enter a name for the Knowledge Base.
- Turn on Sync with Brand Context to let the documents in the Knowledge Base contribute to your Brand Context. Leave it off if you want to use this Knowledge Base only for file storage and retrieval.
- Turn on Limit to specific categories to assign the contents to one or more specific categories, or leave it off to apply it’s contents to all categories.
- Select Create to confirm.
Add files to your Knowledge Base
There are multiple ways to upload content to a Knowledge Base. Once uploaded, materials are indexed and made available to every part of Profound.Upload files
To add a file to your Knowledge Base:- Select an existing Knowledge Base.
- Select + Add Files.
- Select the type of upload.
Scrape Specific URLs
Paste individual URLs to extract and store content from live webpages. This method is useful for importing content from sources such as blog posts or public product pages. To scrape a single page:- Select Scrape Page.
- Enter the full URL of the page you want to import.
- Select the sync cadence: how often do you want Profound to refresh the information from this source.
- Click Import URL to begin the process.
This option only scrapes the specific page referenced by the URL. It does not scrape every page within the domain. Use the Crawl Website option to scrape a full site.
Upload files directly
Upload files directly into your Knowledge Base. This method works well for documentation such as guides, policies, or internal reference materials. To upload a file:- Select Upload Files.
- Use Browse Files to select a file from your device, or drag and drop a file into the upload area.
Crawl Website
Index an entire site using a sitemap, or by crawling pages across a domain. Best used for documentation sites, help centers, or product catalogs. To crawl a website:- Select Crawl Website.
- Choose one of the following options:
- Sitemap – Points to a sitemap XML file, allowing the system to import all pages listed in the sitemap.
- Crawl – Progressively indexes pages across a domain. When selecting this option, configure additional options:
- maximum number of pages to crawl, the default is 100
- maximum crawl depth: the number of levels of the site structure to crawl (1 = crawl just the root page, 2 = root page and other pages linked from it, and so on). The default crawl depth is 3
Import from an external source (Notion, Google Drive, SharePoint, Granola)
Integrate your workspace, select files in the file picker, and import them to your Knowledge Base. Best used for internal documentation, similar use cases to direct file upload. To import files from an external source:- Select Import from … for your import source.
- If prompted, sign in to authorize the integration.
- Select files in the file picker.
- Select Import.
Granola import requires a Granola’s personal API key. Learn how to create it in Granola’s documentation.
Paste text
Manually create a document by pasting or entering text directly in the text editor. Both structured and unstructured text are supported. Best used for creating new documents from scratch, or as a workaround when other methods don’t work. To paste text as a document:- Select Paste Text.
- Provide the following information:
- Document name
- Document format (Markdown or Plain Text)
- Content
- Select Add Document to save the file to the Knowledge Base.
Manage files and content
Knowledge Bases follow a folder structure modeled after a standard filesystem hierarchy. This lets you organize files the same way you would in a typical operating system, by creating folders and subfolders. Within each Knowledge Base, you can:- View indexed files
- Add tags to files
- Create new files
- Delete outdated material
- Download previously uploaded content
Choose which categories a Knowledge Base applies to
By default, every Knowledge Base syncs with Brand Context and applies to all categories in your organization. If your organization has more than one category, you can assign each Knowledge Base to the categories it belongs to so context from one category doesn’t appear in another category’s Brand Context. Only users with access to a category can view and edit the Knowledge Bases and Brand Context for that category.Limit a Knowledge Base to select categories
To map a Knowledge Base to specific categories:- In the Knowledge Base settings, turn on Sync with Brand Context. This gives Context Manager access to its contents.
- Select Limit to select categories, then select the categories the Knowledge Base applies to.