Step 1: Create a deck

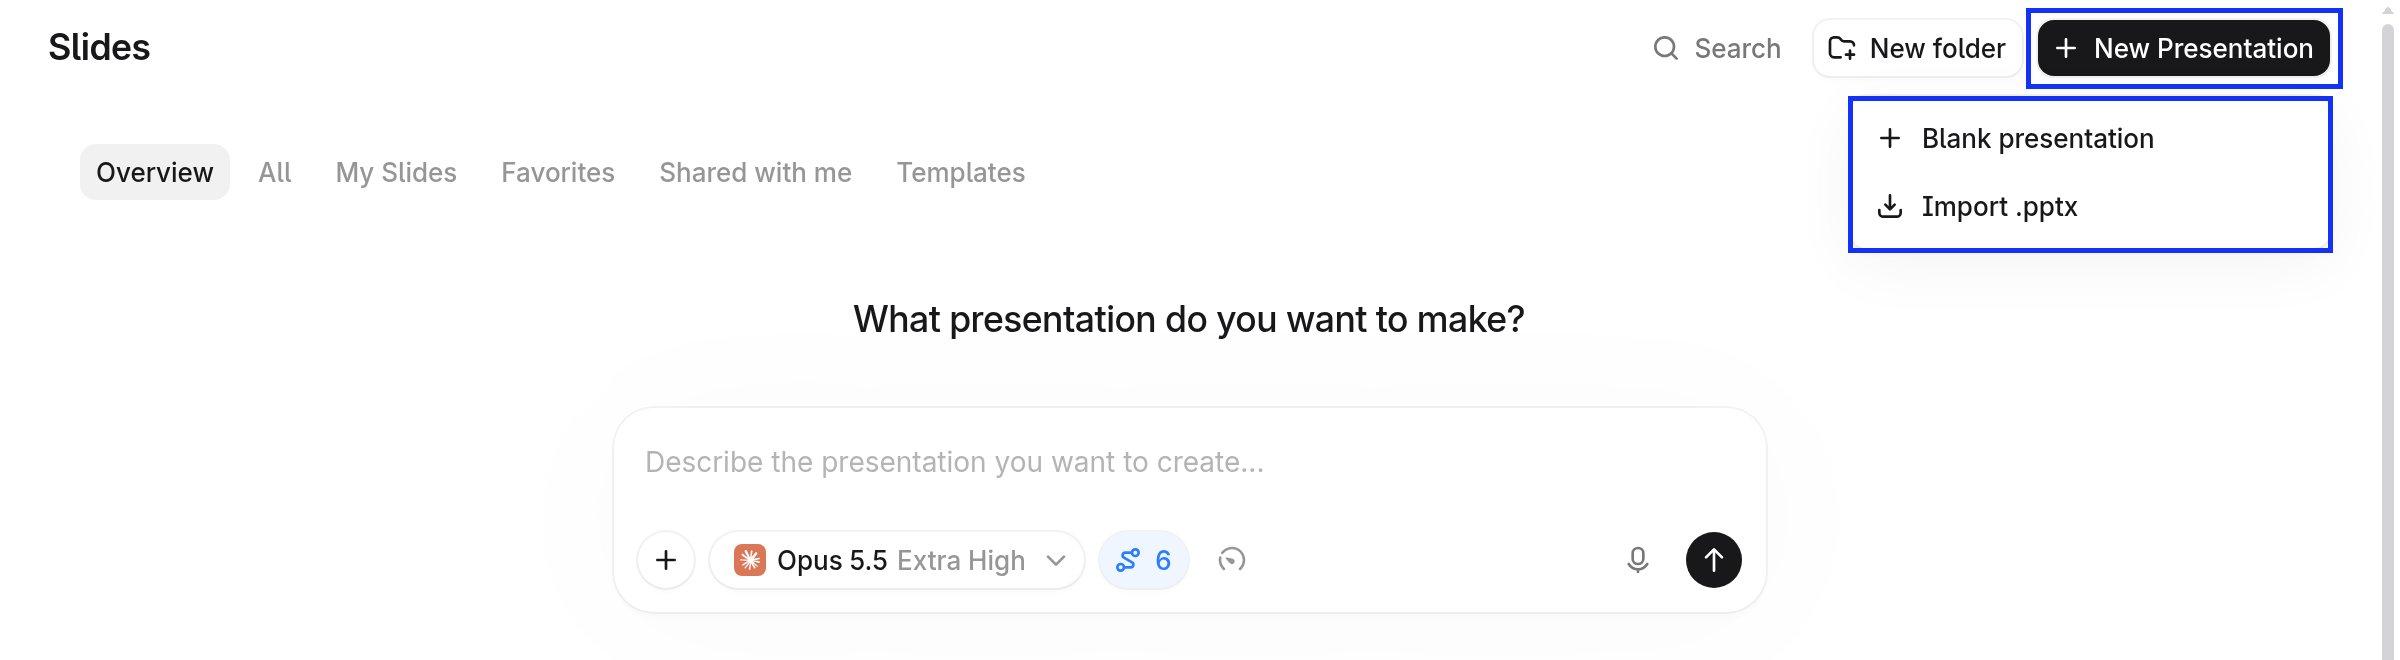
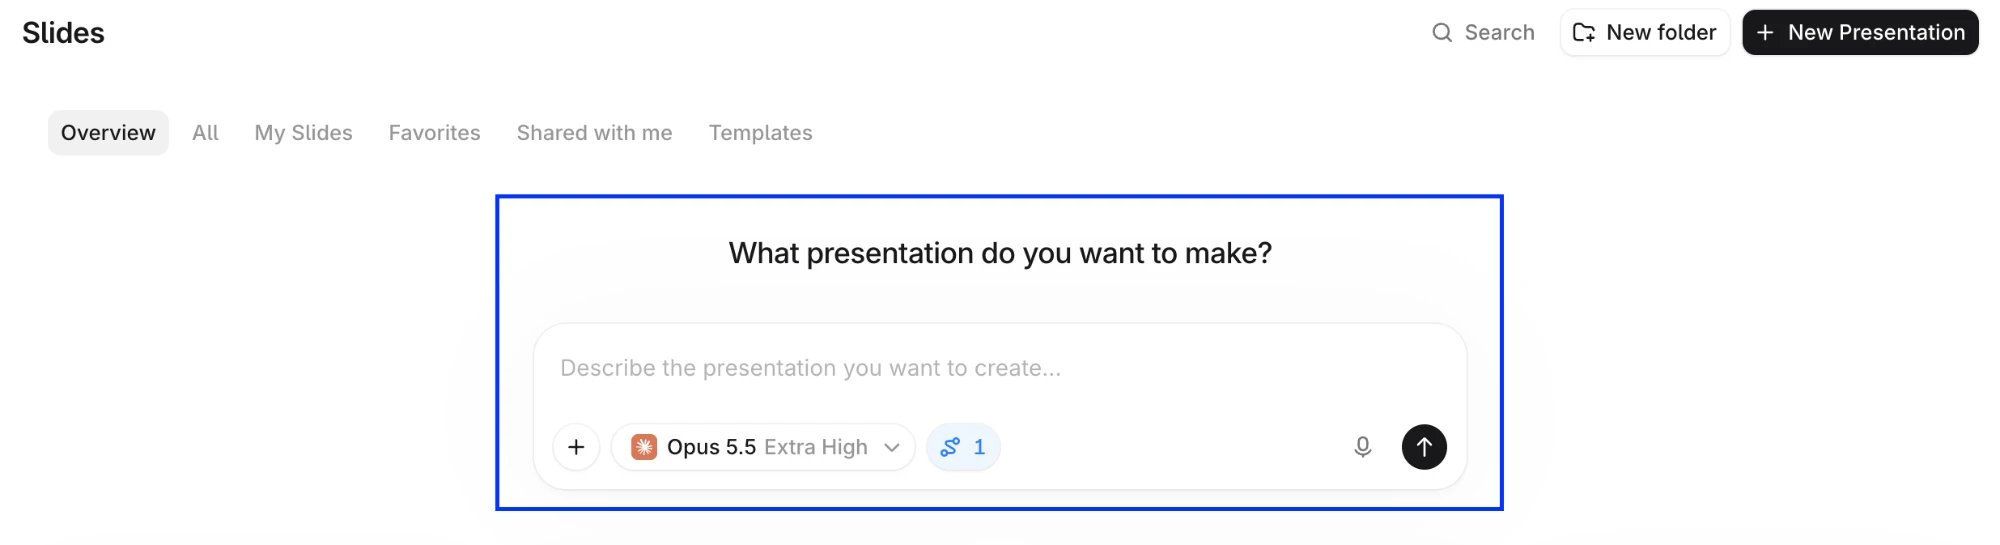
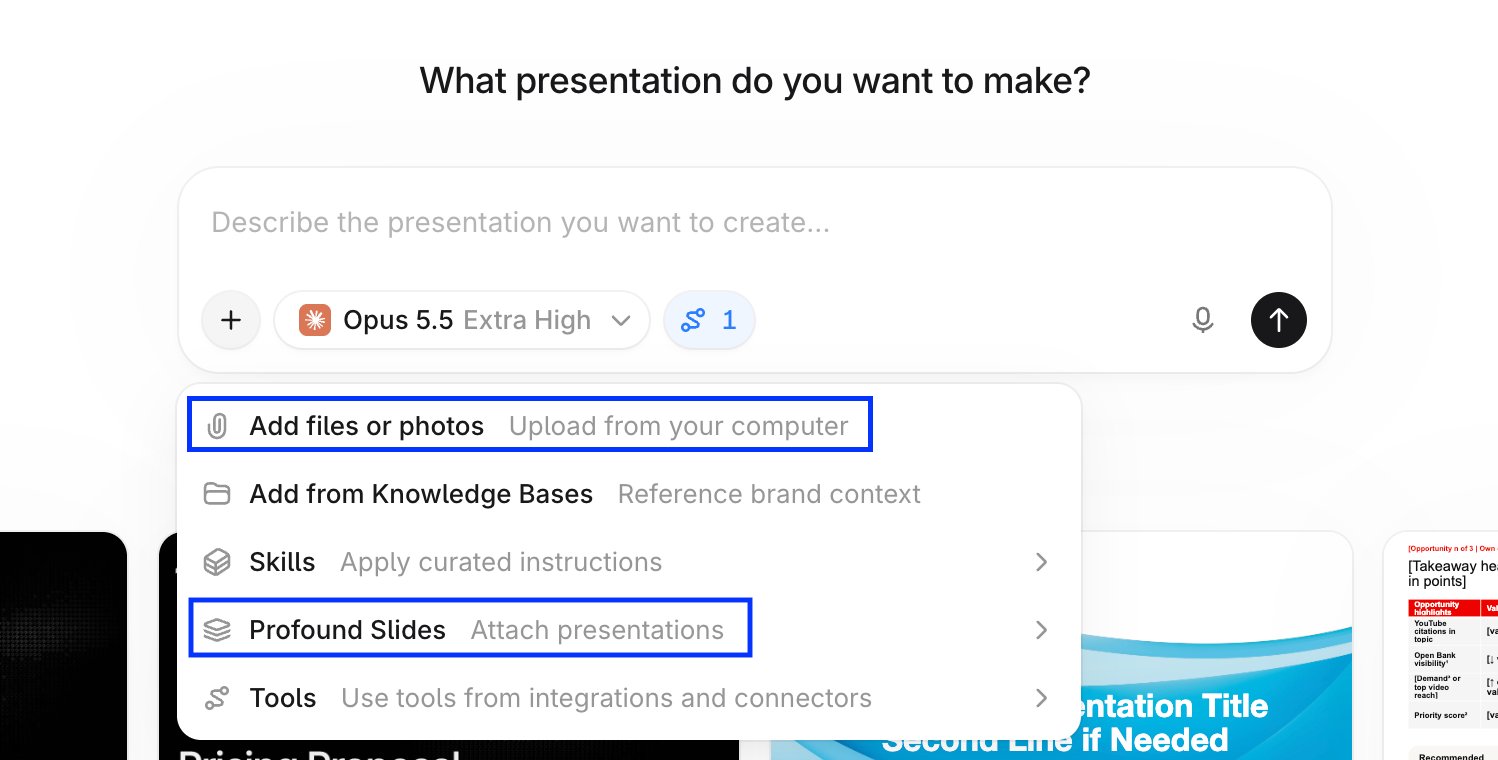
Go to Slides in the left sidebar in Profound. On the Overview tab, describe the presentation you want in the prompt box and send it. This opens an AI Marketer (Aim) chat with the deck next to it. Aim runs its research first, then builds the slides. A higher effort level in the prompt box produces better decks. The top of the Slides page on the Overview tab, with the prompt box highlighted To build on an existing deck or your organization’s design, attach a .pptx file or an existing Profound Slides deck to the prompt. Aim uses an attached deck as the template by default. You can also pick a pre-built design from the templates in the Start from a template section. The attachment menu under the prompt box, with Add files or photos and Profound Slides highlighted To skip Aim, select New Presentation in the top right and choose Blank presentation or Import .pptx. The New Presentation menu on the Slides page open, with Blank presentation and Import .pptx
Step 2: Edit the deck

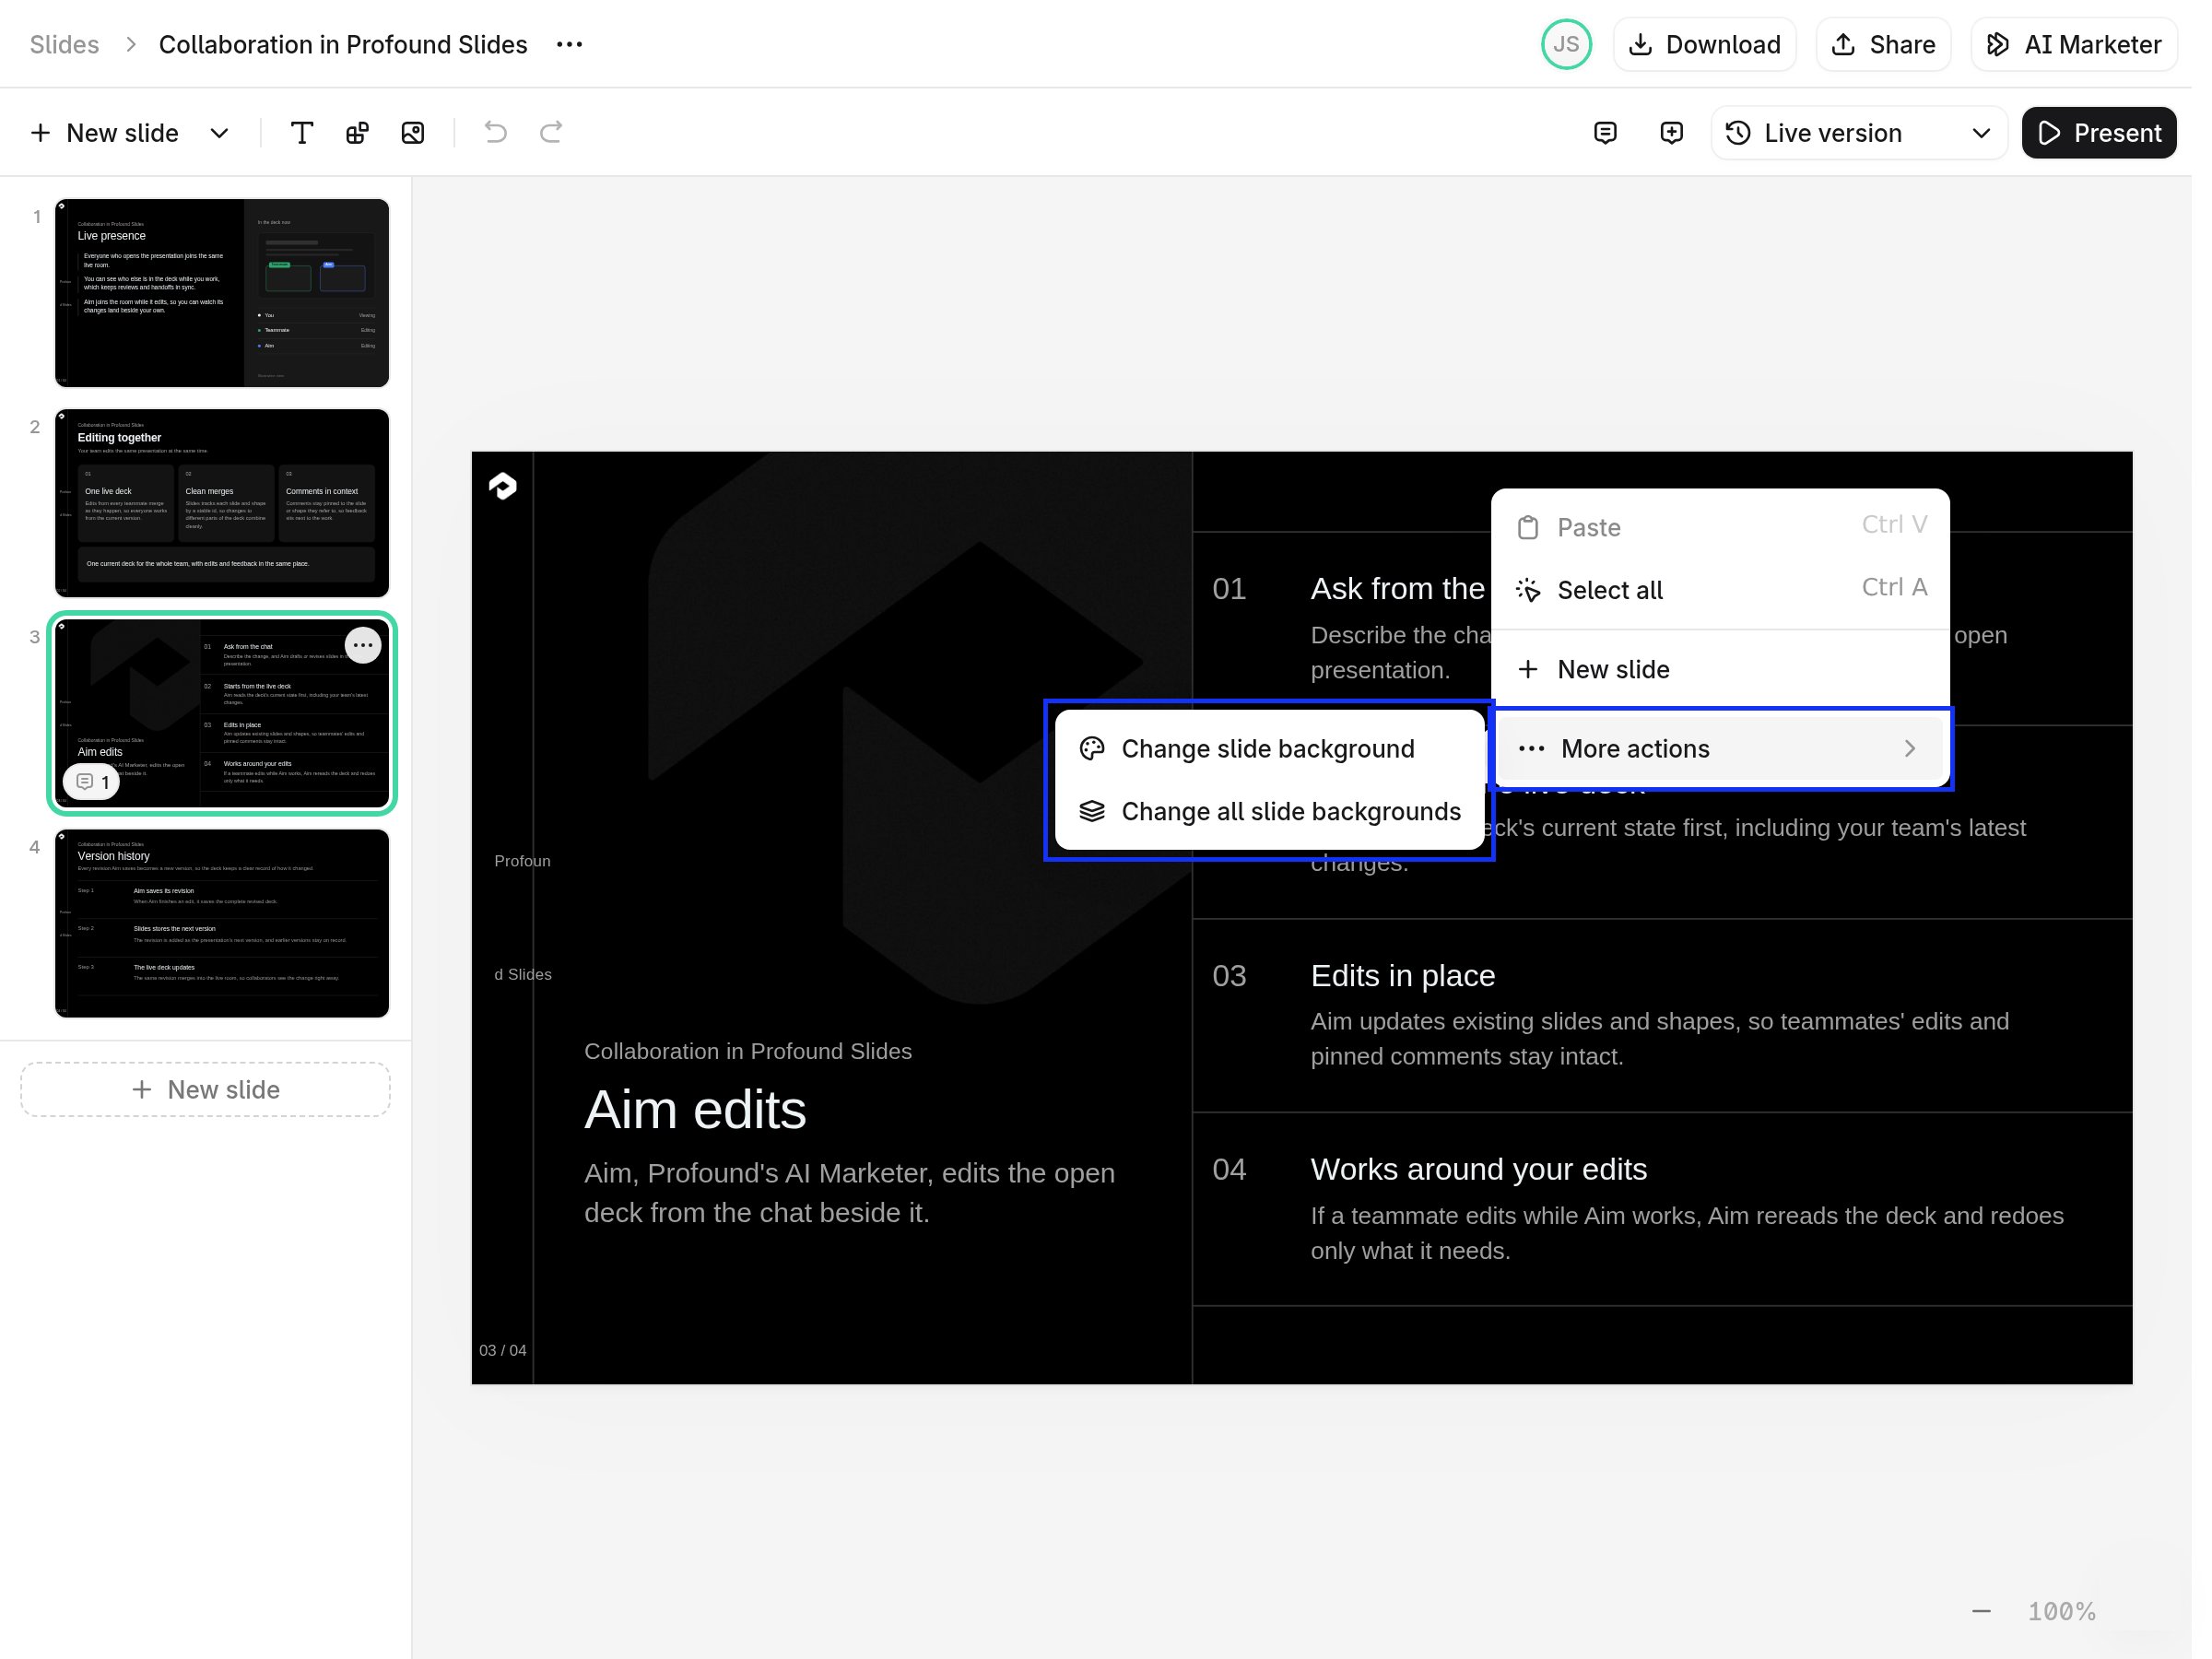
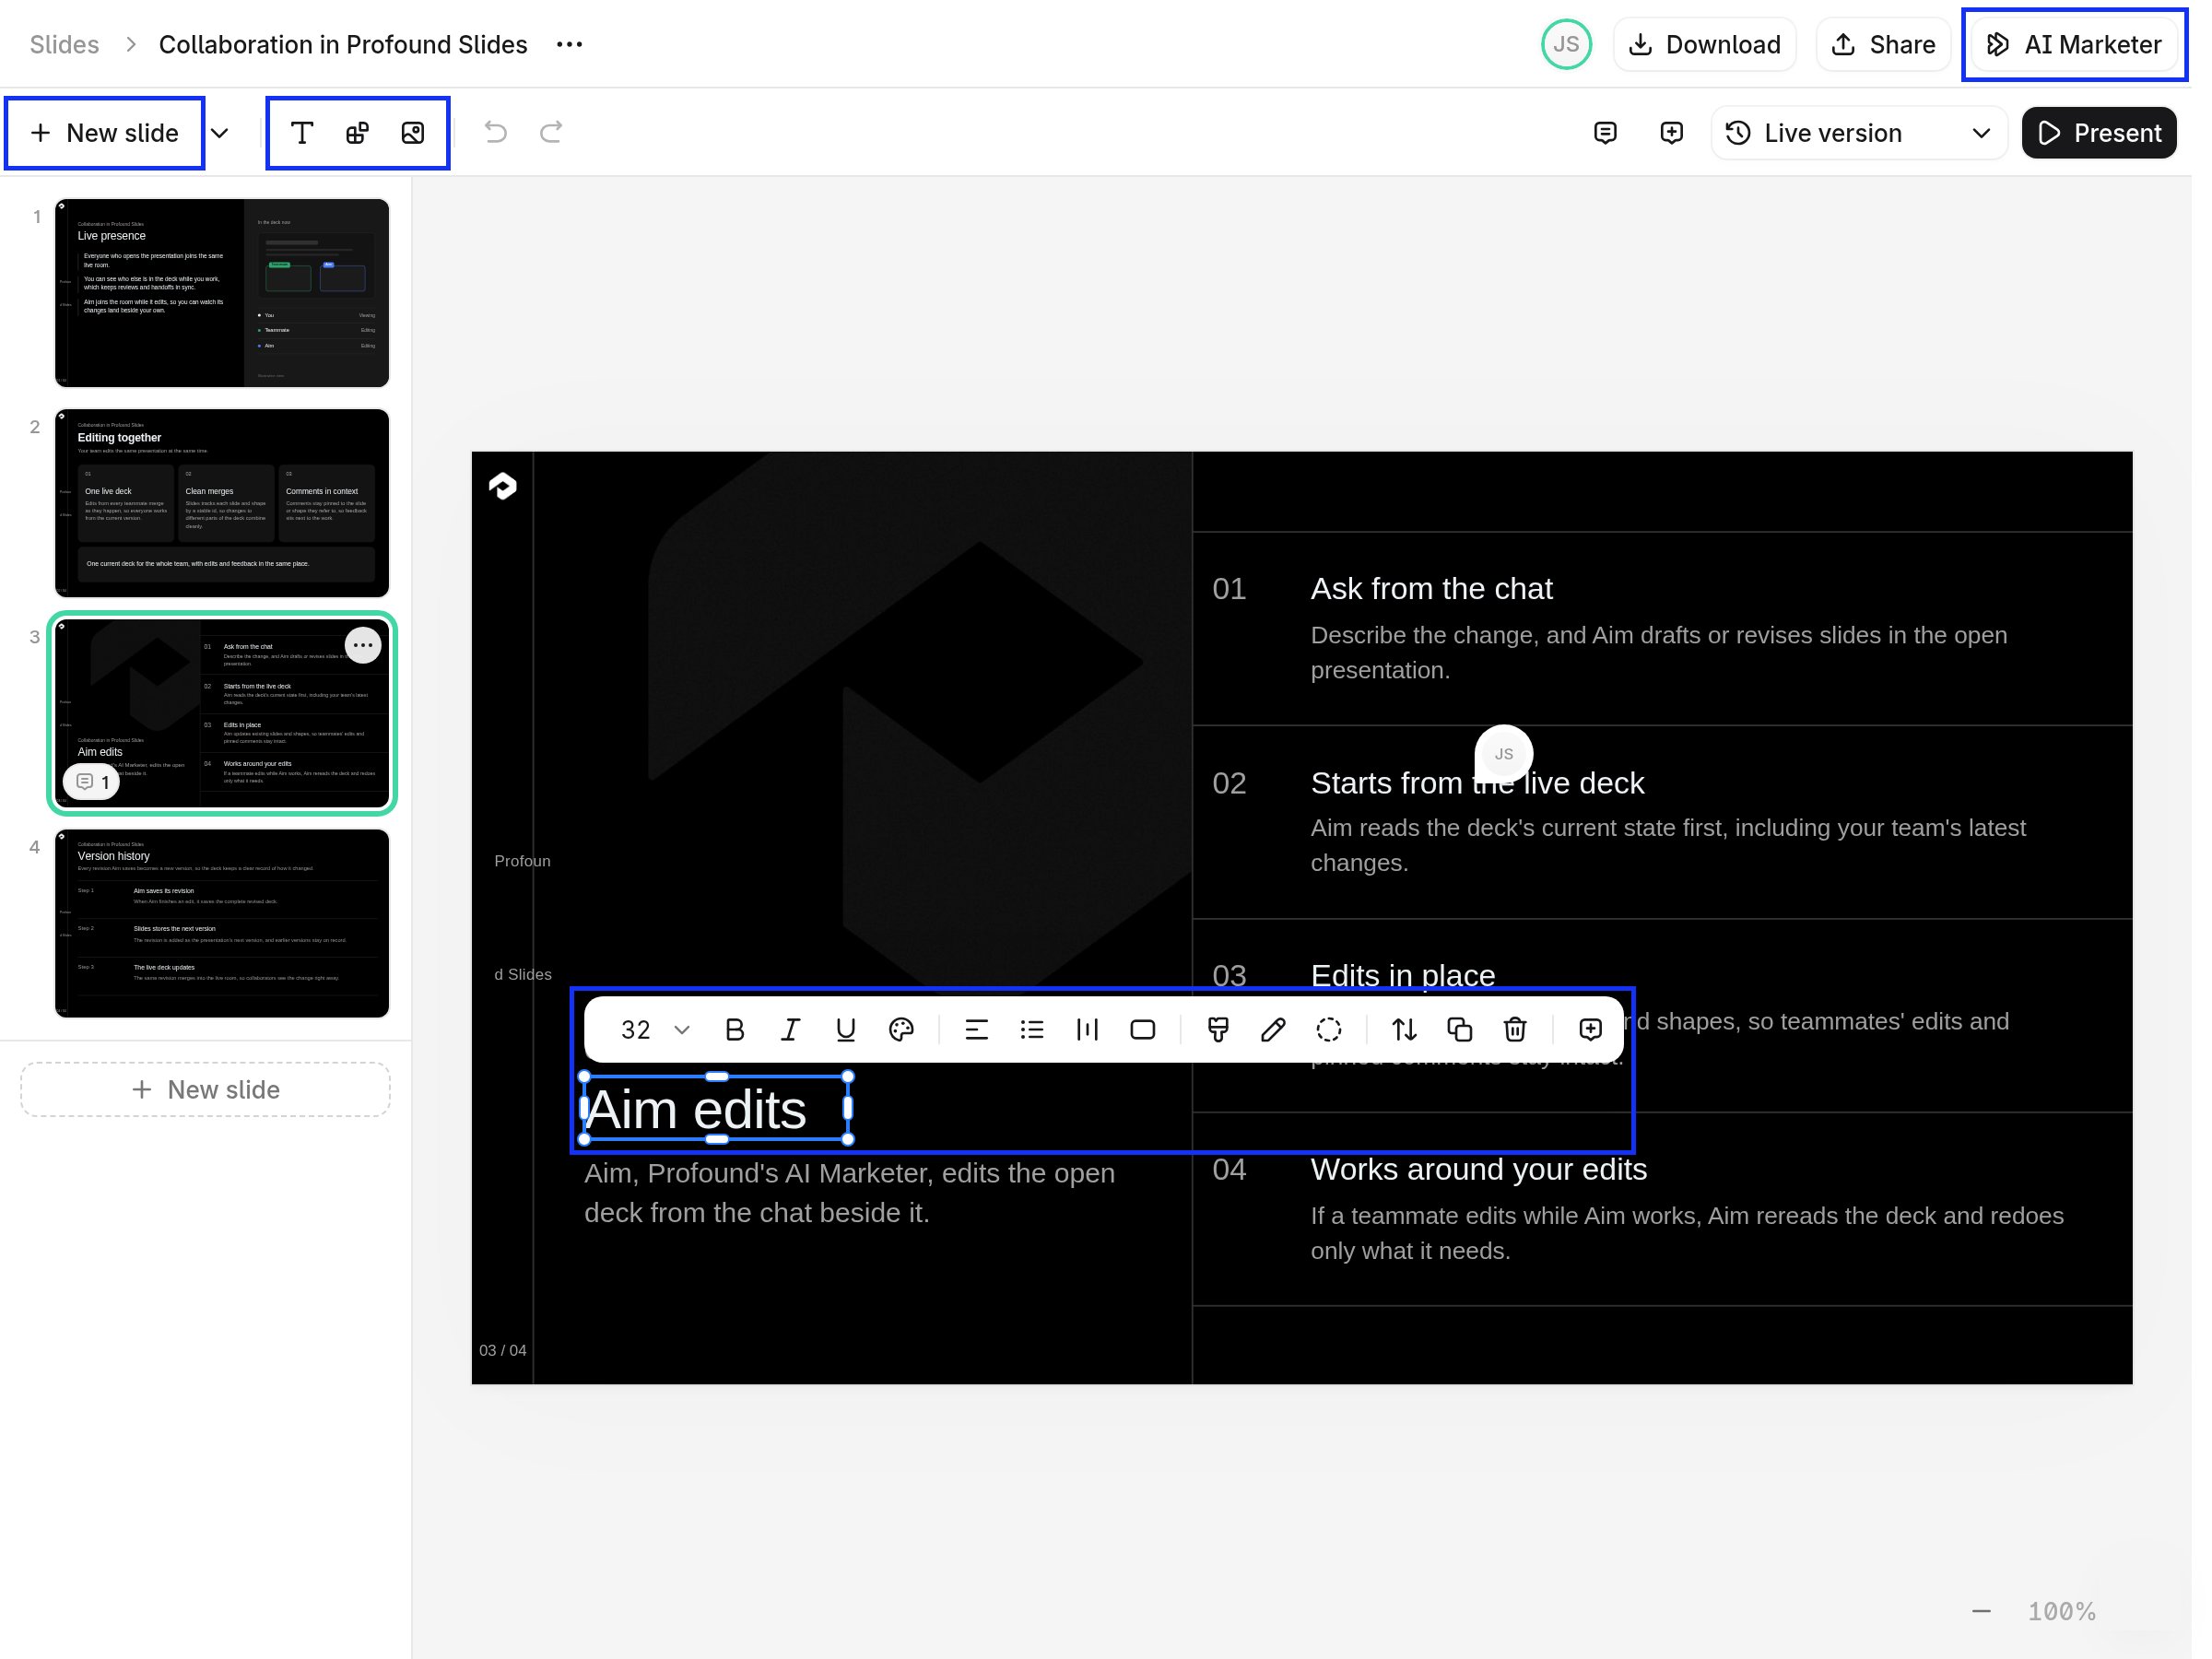
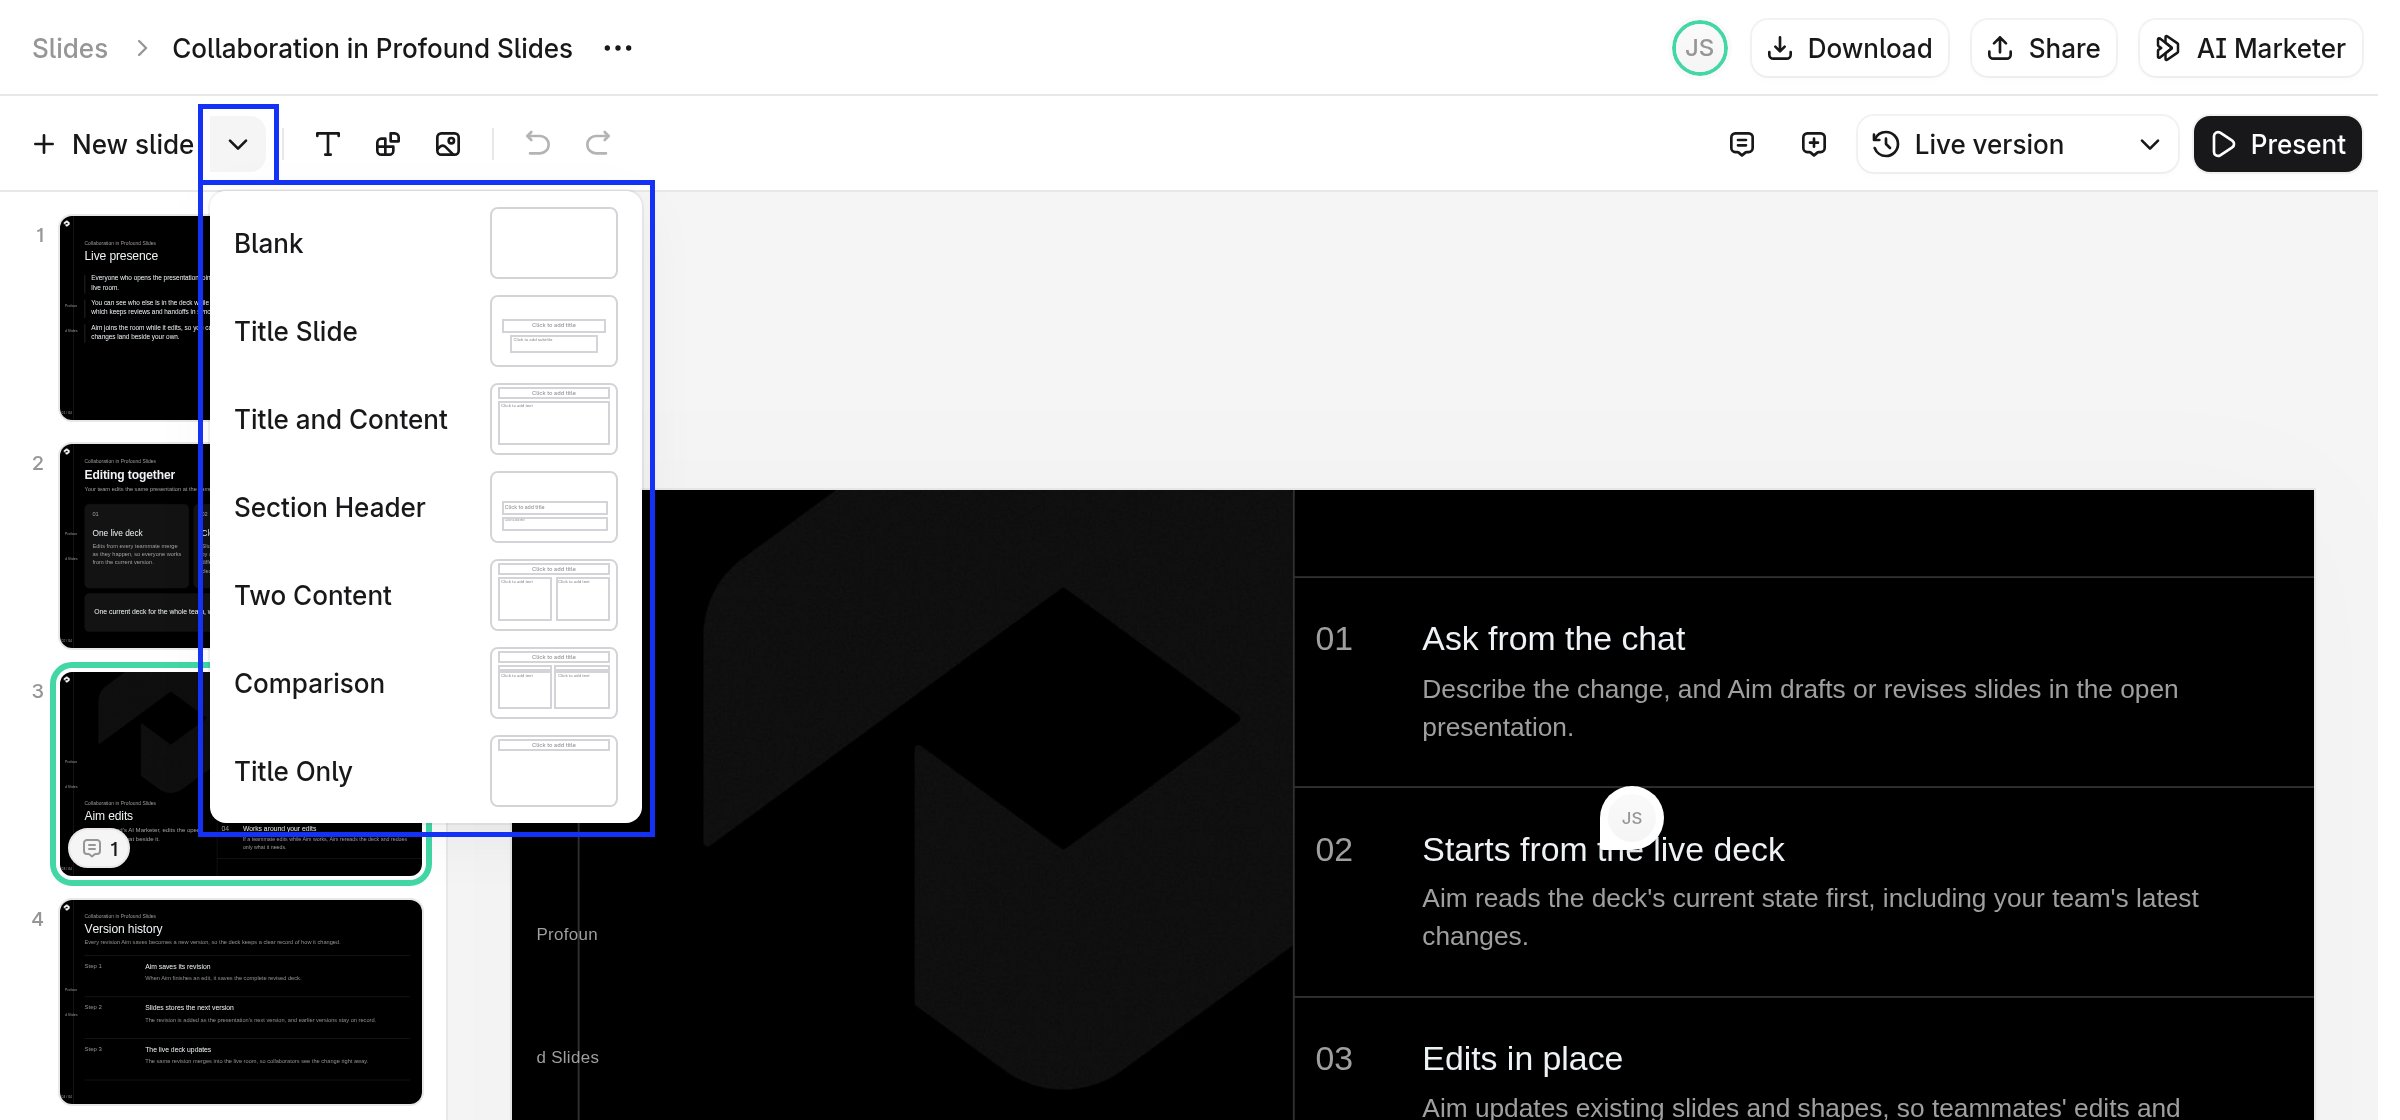
Once your deck draft is ready, you can edit it how you would in any other presentation editor: select an element to move, resize, or restyle it, and select text to change it directly in the slide. The Slides editor with a heading selected on a slide and its formatting toolbar above it. New slide, the Text box, Shape, and Image buttons, and AI Marketer are highlighted Use the toolbar to add a slide, a text box, a shape, or an image. The layout menu next to New slide open, listing Blank, Title Slide, Title and Content, Section Header, Two Content, Comparison, and Title Only Right-click on a slide to access its … action menu with options to change the layout or background of the current slide or every slide. The right-click menu on a slide with More actions open, showing Change slide background and Change all slide backgrounds To refine the deck with Aim, select AI Marketer in the top right if the chat isn’t open, then describe the change. Aim edits the slides you ask about and leaves the rest alone. A deck you created in chat saves on its own a few seconds after your first edit.
Step 3: Share and collaborate

Share the deck with your teammates

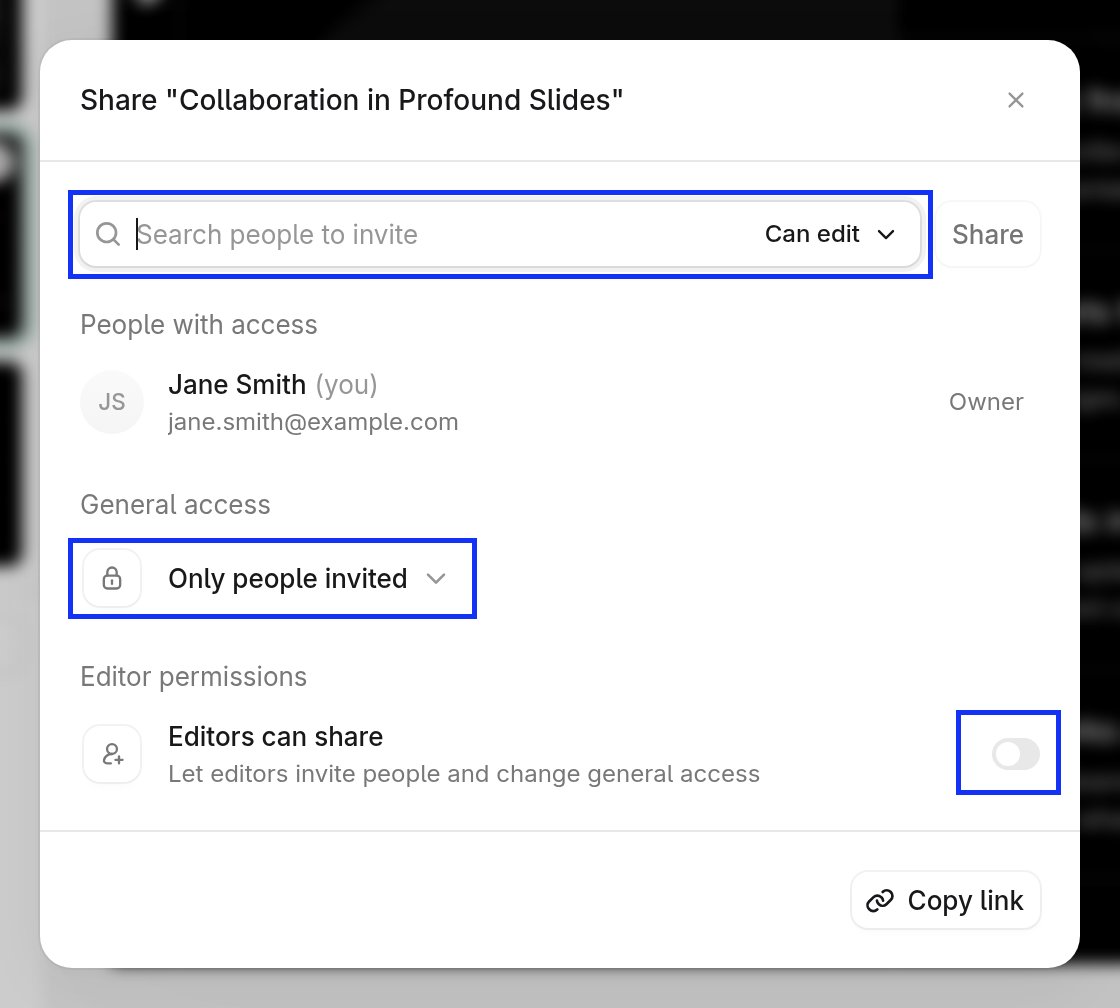
Select Share in the top right of the screen. Invite people by name with Can view, Can comment, or Can edit permissions. Under General access, keep the deck to invited people only or open it to everyone in your organization. As the owner, you decide whether editors can share the deck further. The Share dialog, with the invite field and its Can edit picker, the General access option set to Only people invited, and the Editors can share switch highlighted Everyone with edit access can work on the deck at the same time, including with their own Aim chat. See Live collaboration in Slides for what happens when edits overlap.
Can edit sharing requires both the members’ organization roles to allow managing presentations.

Collaborate in comments

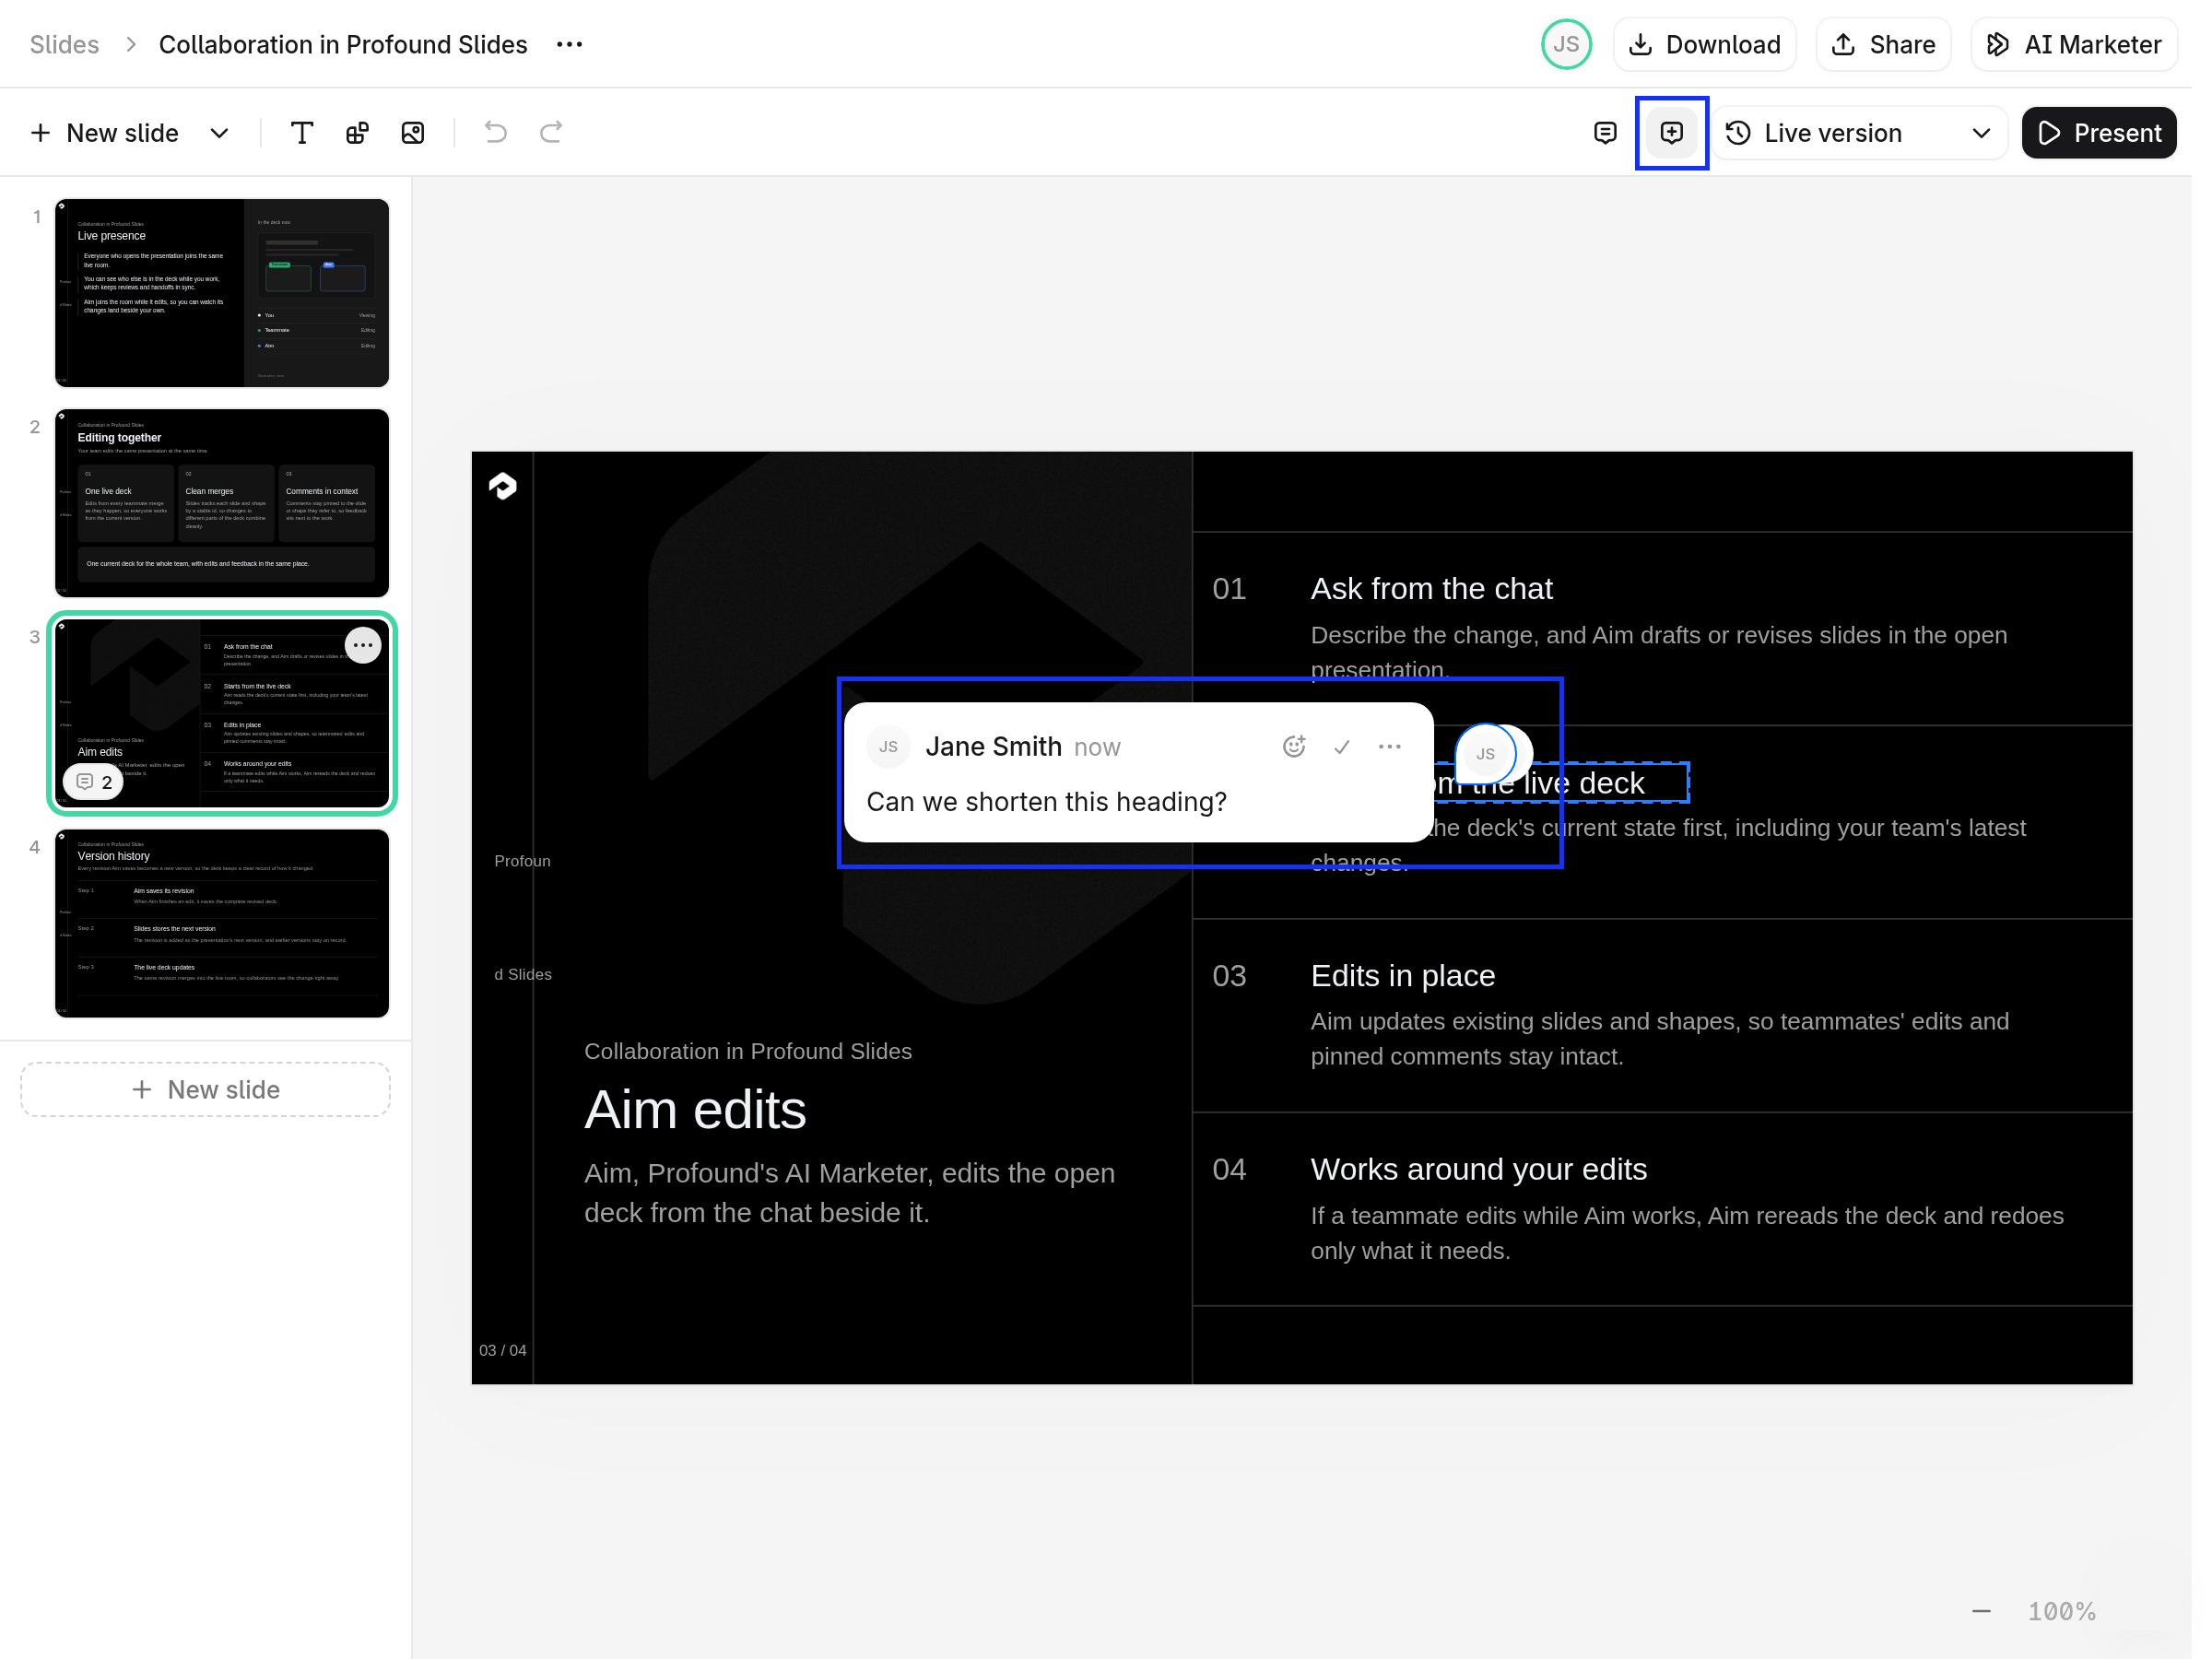
Select Add comment in the toolbar, then click an element on the slide to pin a thread to it. The Add comment button highlighted in the toolbar and a comment thread pinned to a slide heading, with buttons to react, resolve, and open more actions Reply, react, and resolve threads in place. Resolved threads stay available under Resolved comments. If someone deletes the element a thread is pinned to, the thread resolves on its own and reopens if the element comes back. Type @ in a comment to mention a teammate.
Step 4: Review versions

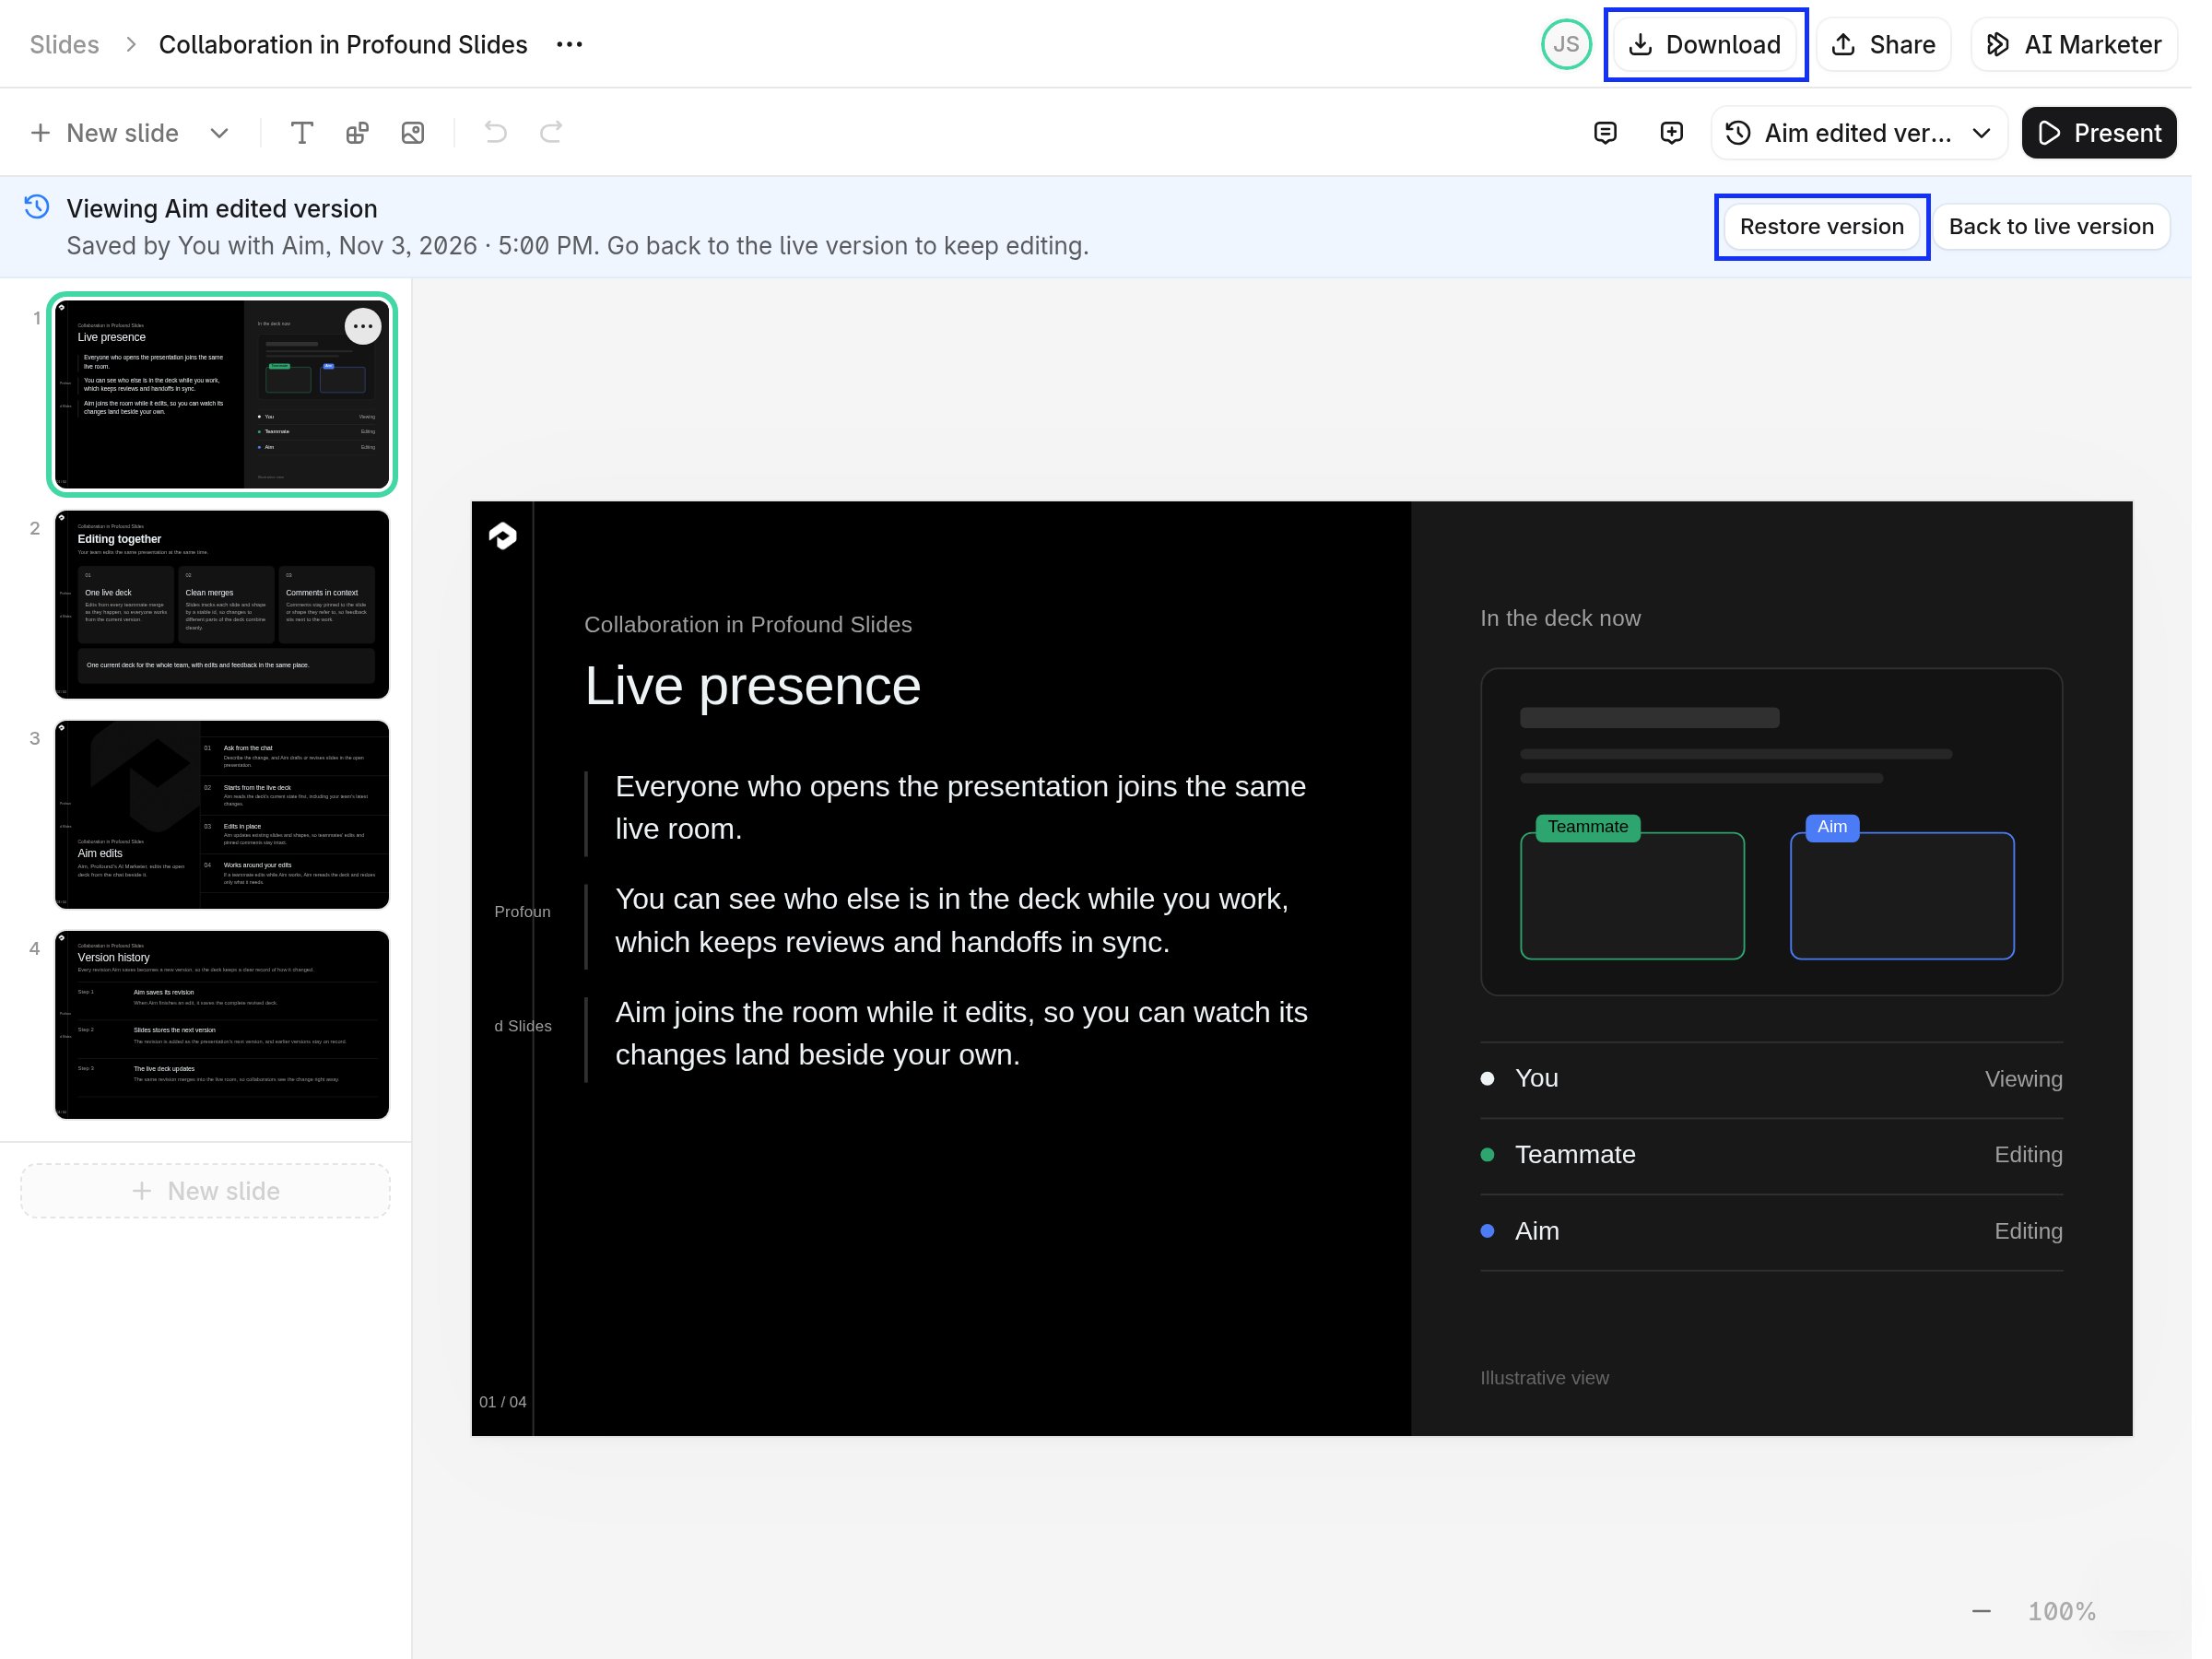
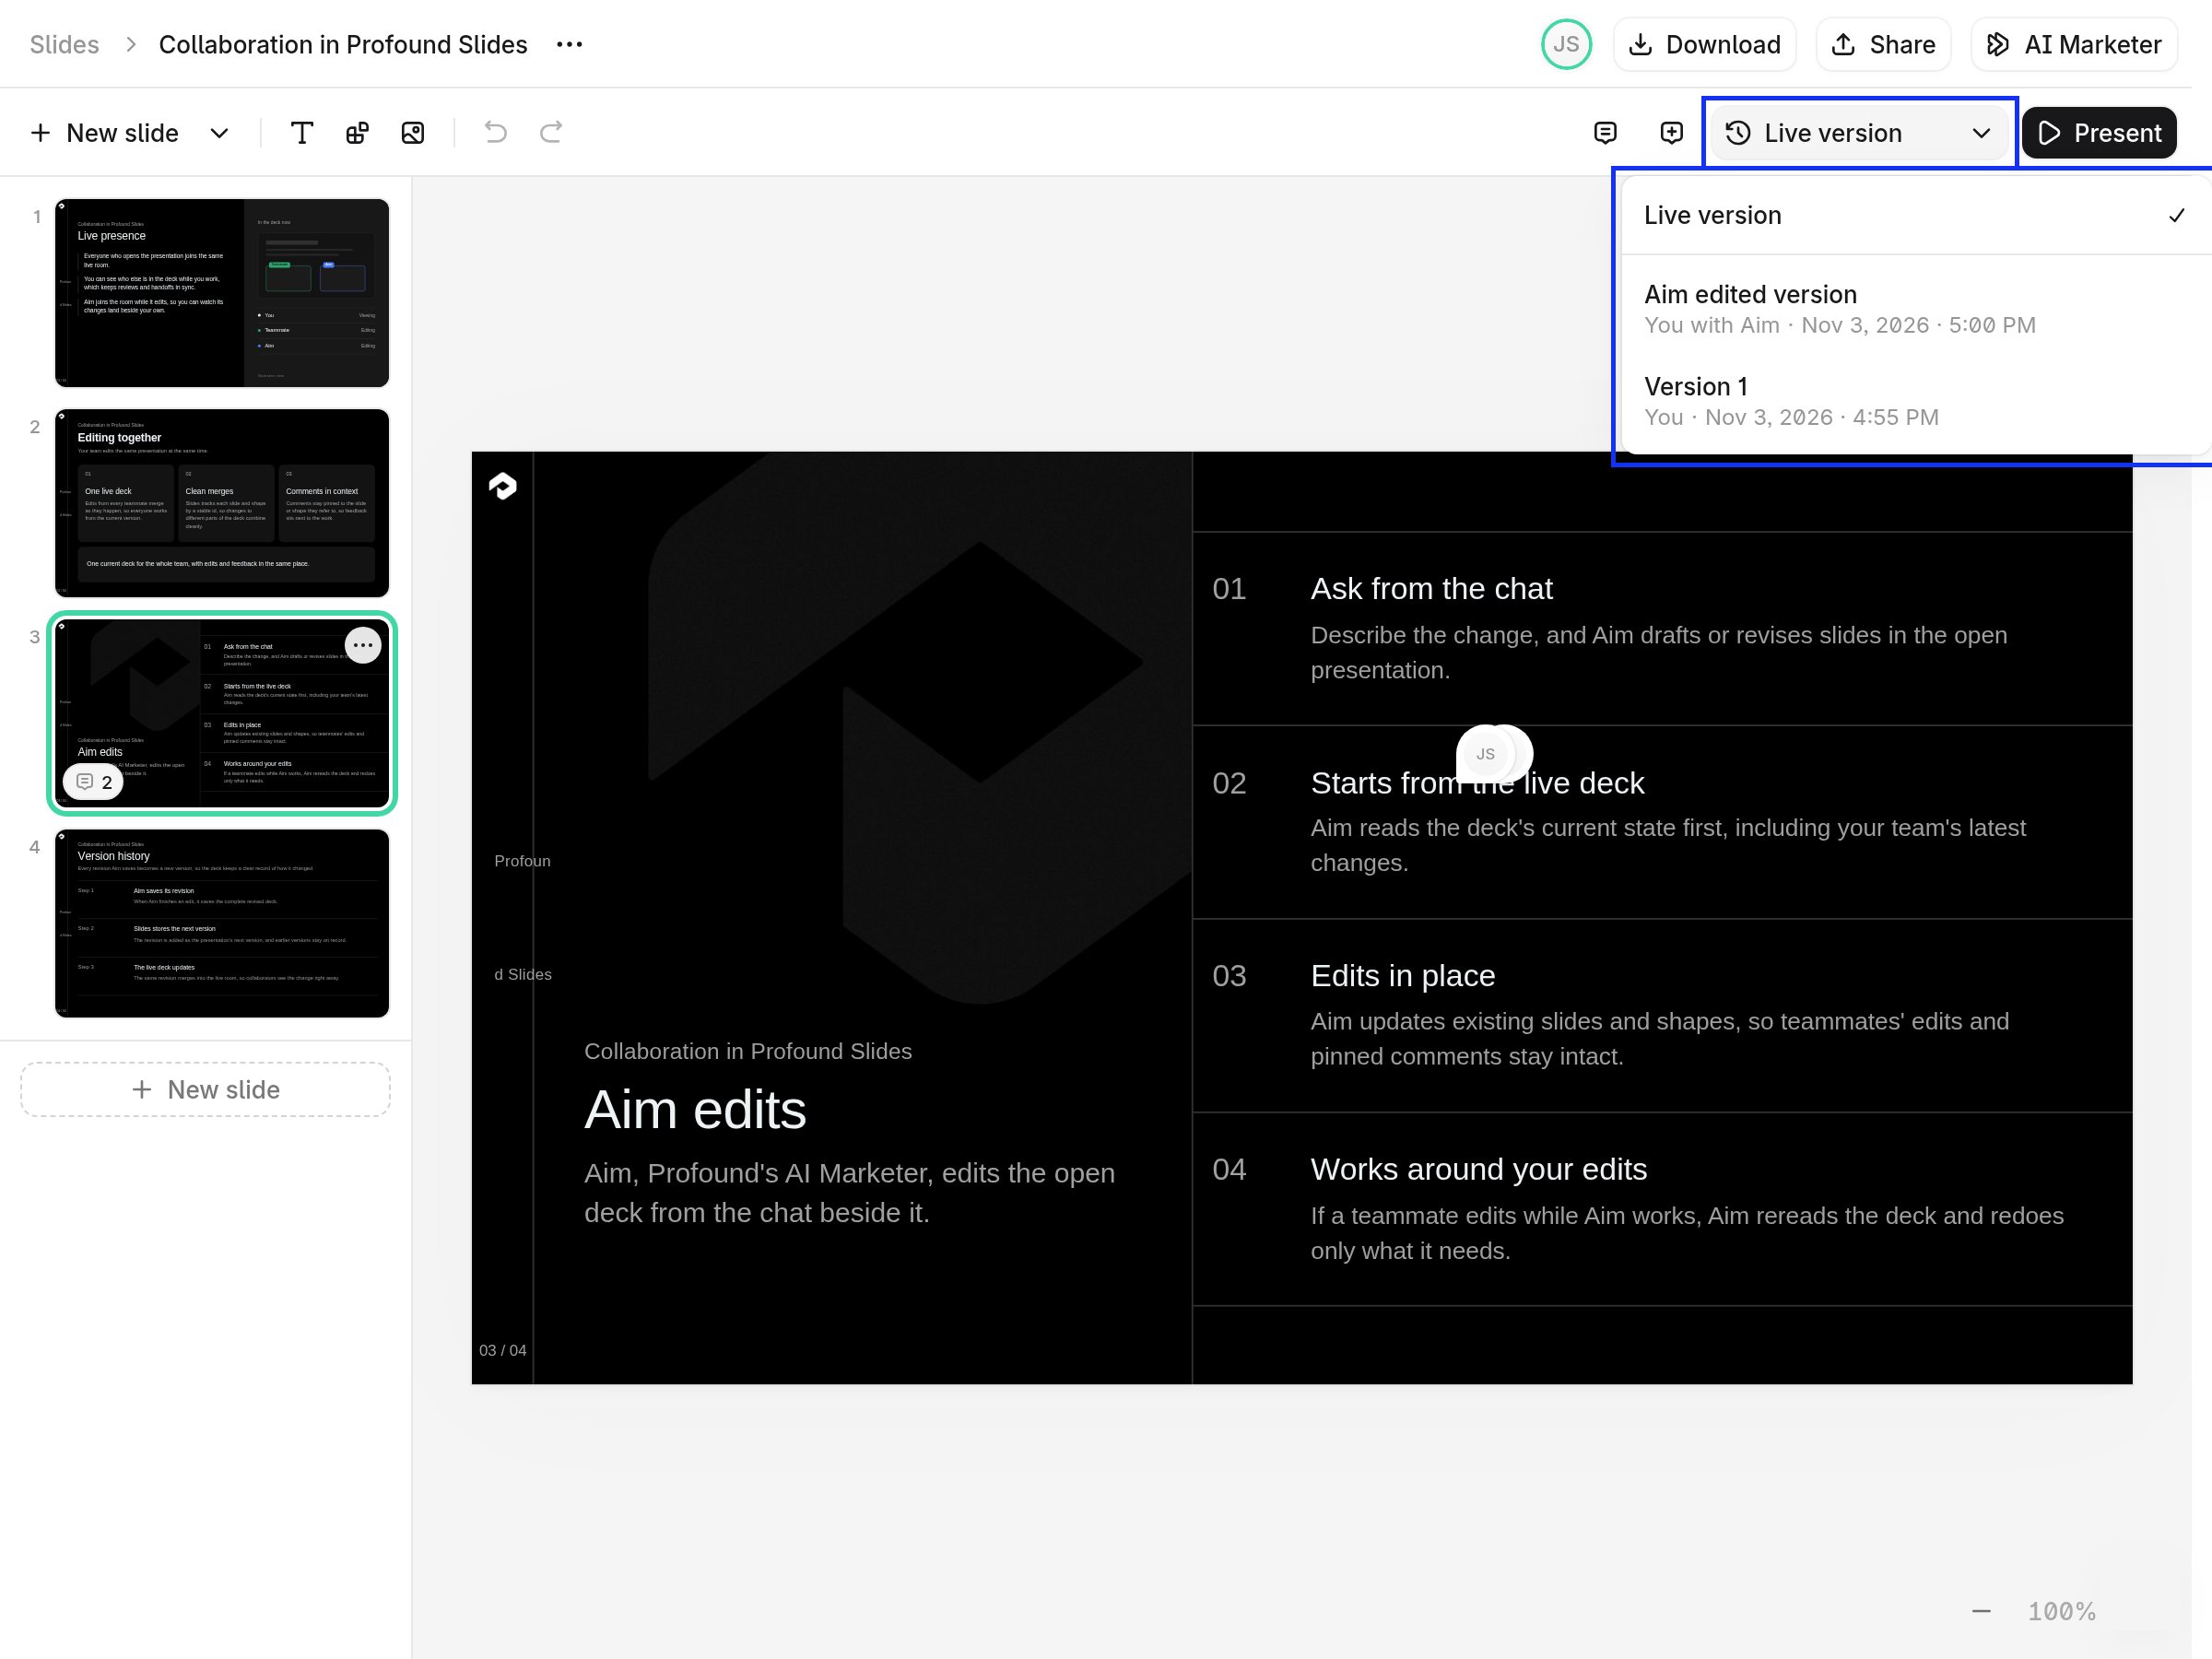
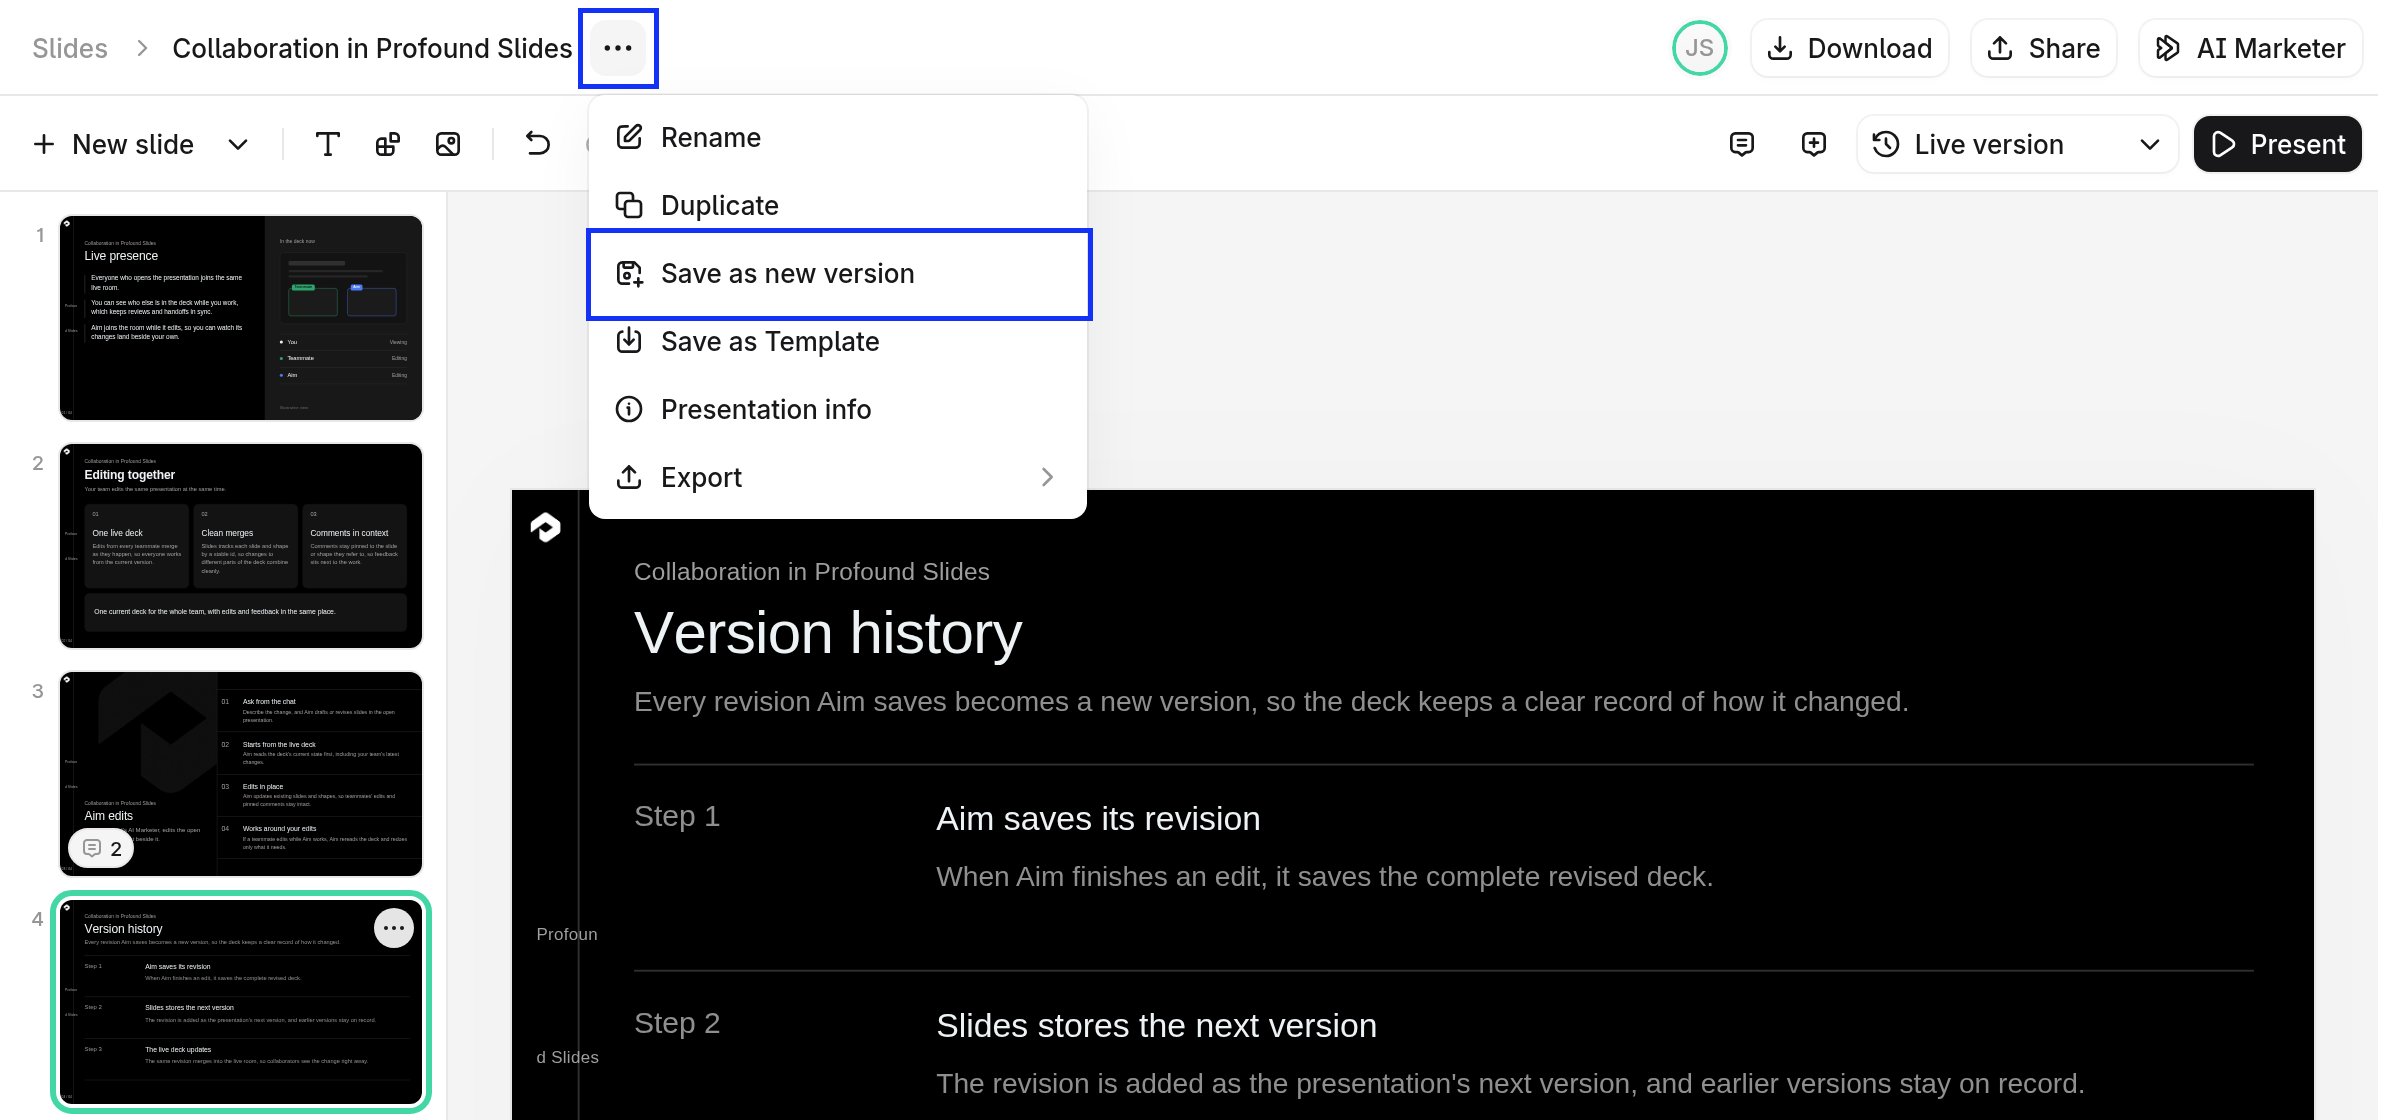
The Live version menu in the toolbar lists every saved version with who saved it and when. The Live version menu open, listing Live version, Aim edited version, and Version 1, each with who saved it and when To name a version yourself, open the presentation options menu next to the deck name and select Save as new version. Everyone with access to the deck can open its versions. The presentation options menu next to the deck name open, with Save as new version highlighted Open a version to view it read-only. From there, select Restore version to bring it back into the live editor, or Download to export that version. A restore first saves the current live deck as an Autosave version, so nothing is lost. Restoring isn’t available while Aim is editing the deck. A saved version open read-only, with a Viewing Aim edited version banner. Restore version and Download are highlighted
Step 5: Present or export

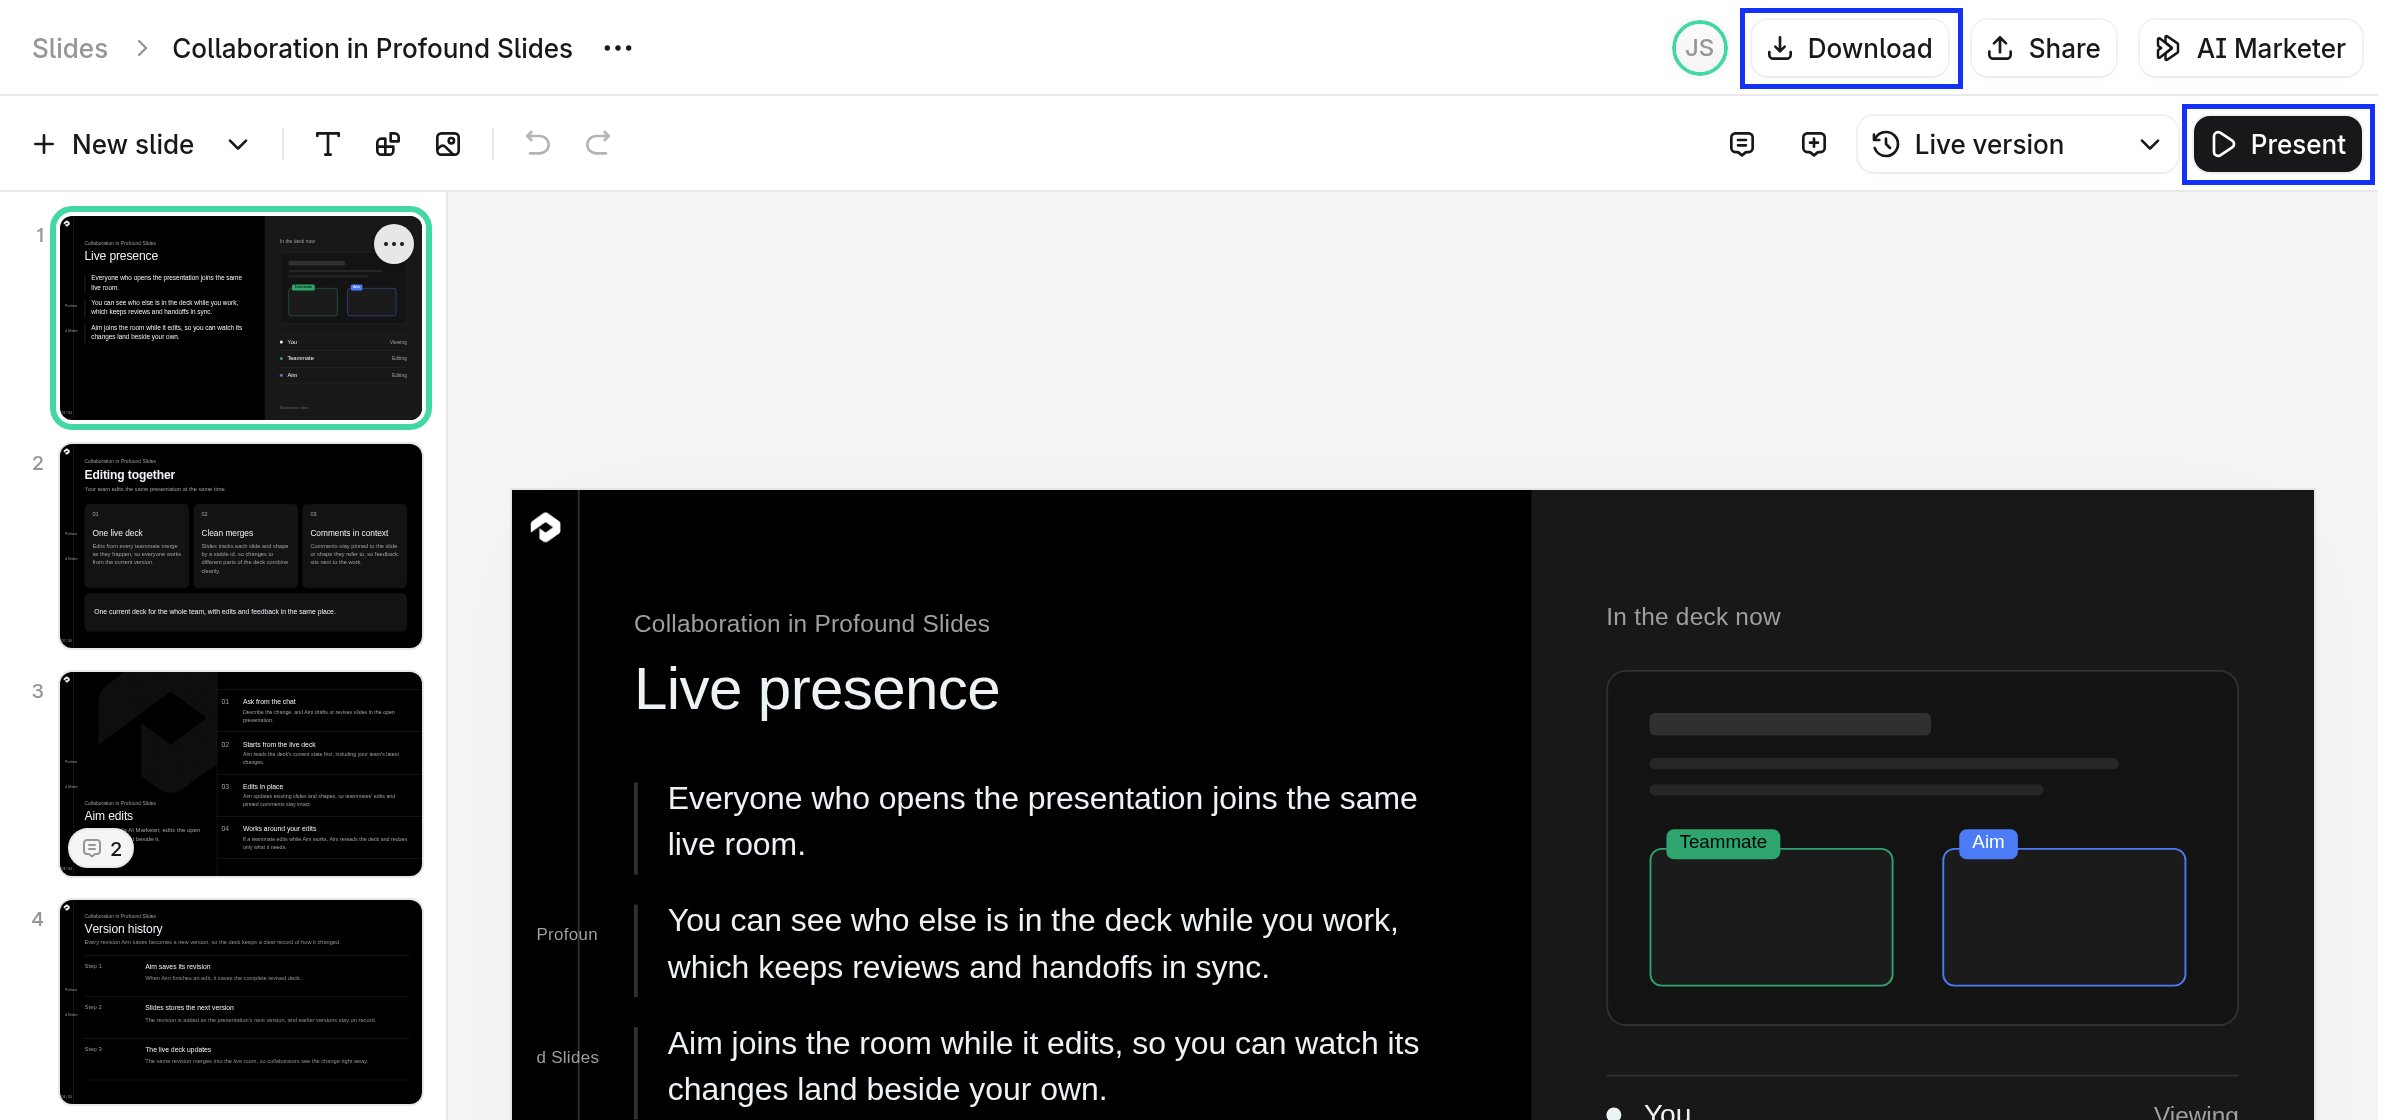
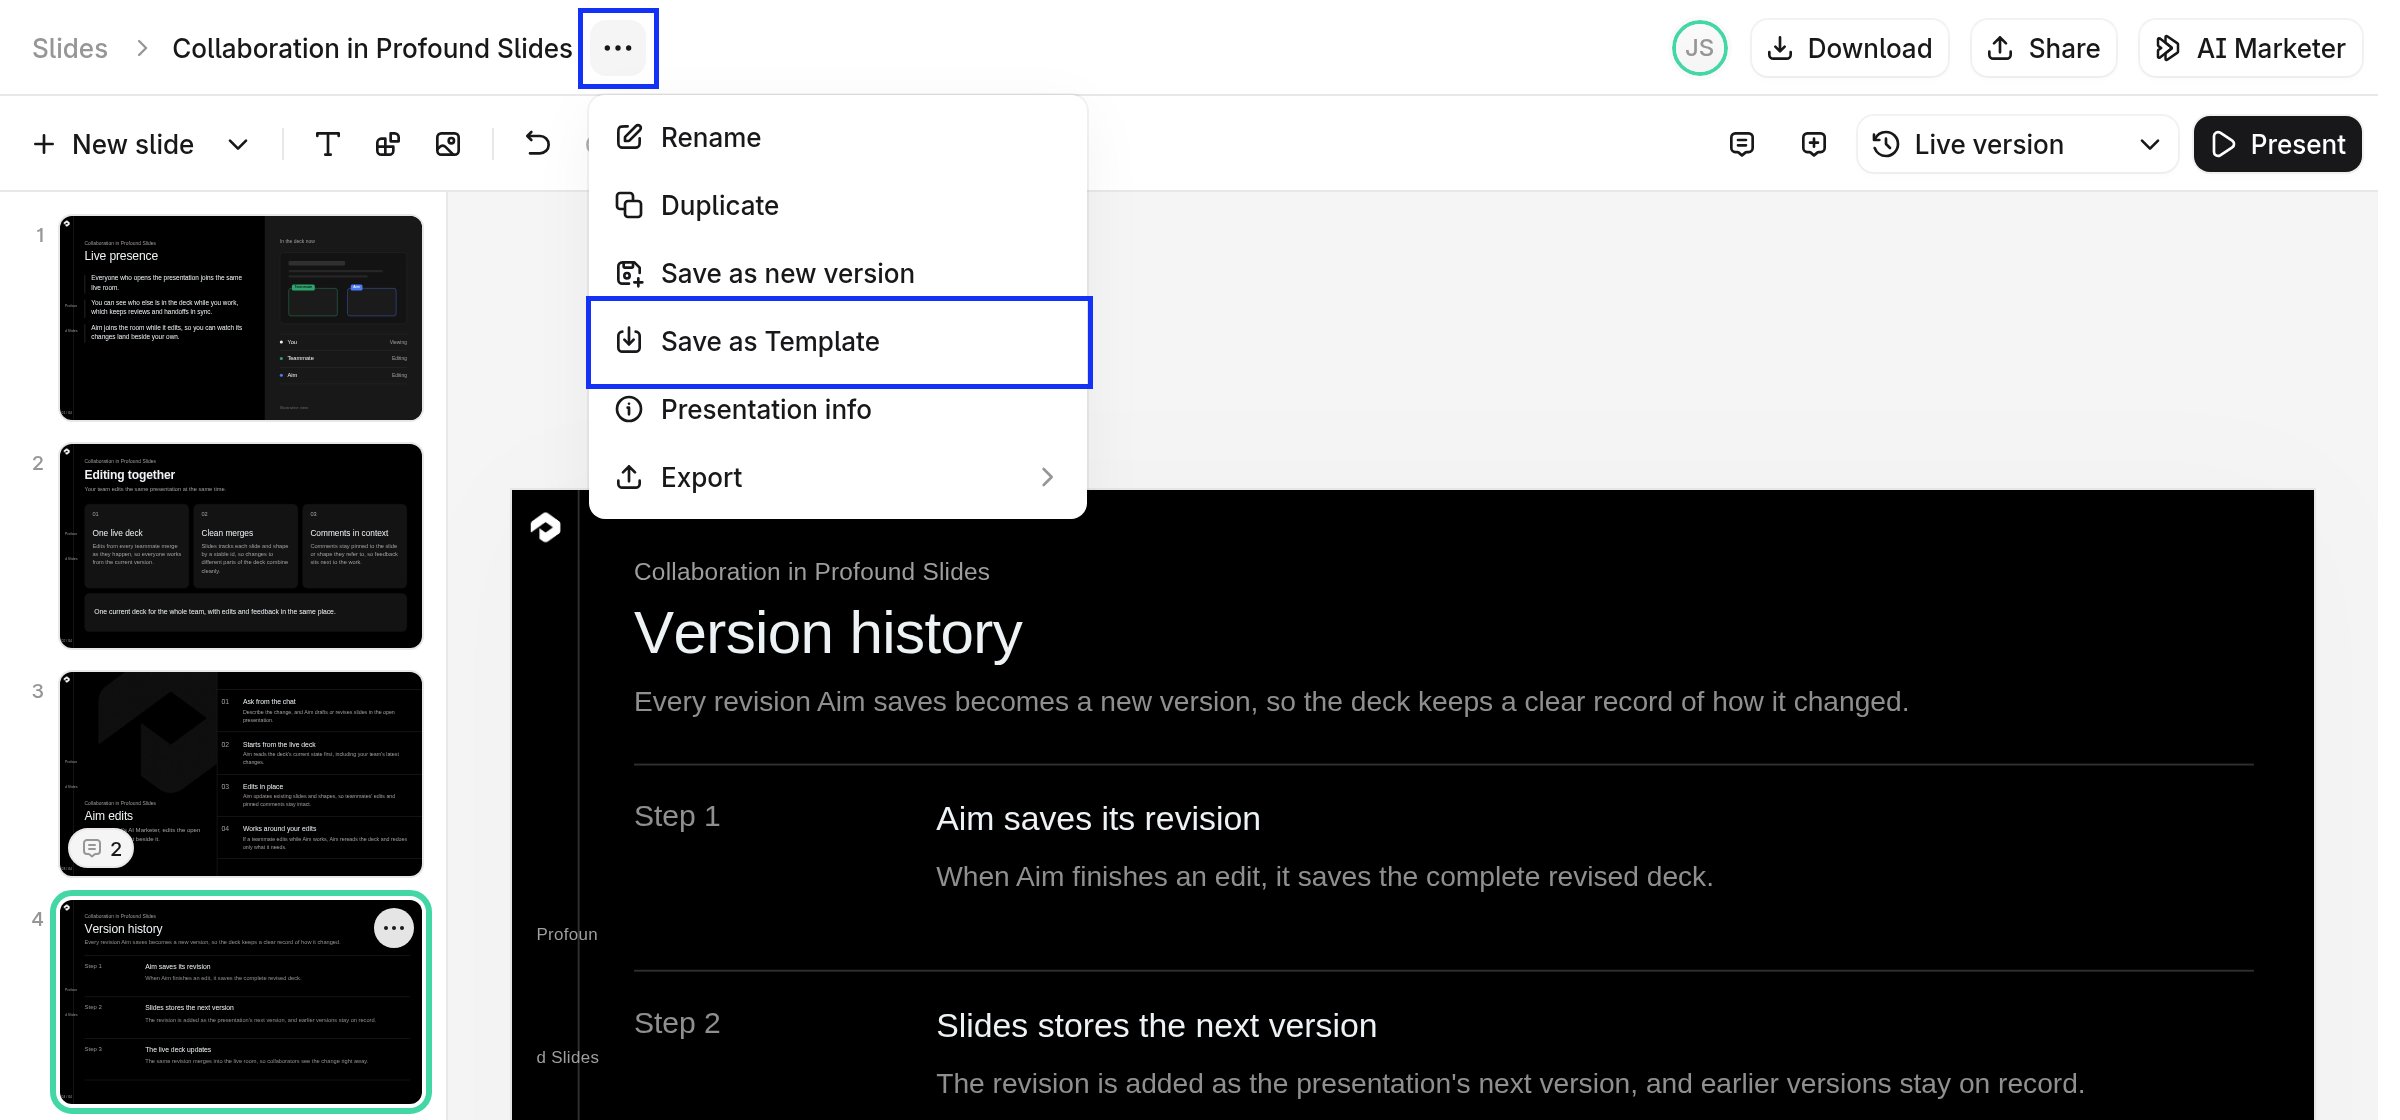
Select Present (the play button at the right of the toolbar) to present full screen, with slide controls and a counter. Select Download in the top right to get a .pptx. The Slides editor with Download in the top right and Present at the right of the toolbar highlighted On the Slides page, the slide’s card … action menu’s Export option offers PowerPoint, PDF, and HTML. To reuse the design, open the presentation options menu and select Save as Template. The deck appears on the Templates tab for everyone in your organization. The presentation options menu next to the deck name open, with Save as Template highlighted